What is resin jewelry?
Resin jewelry is wearable art made with epoxy resin. Epoxy resin is a crystal clear material made up of 2 liquid parts that transform into a glossy solid when they're mixed together. Epoxy resin's ease of use, shine and beauty lends itself perfectly for making resin jewelry such as pendants, earrings, necklaces and bracelets.
Epoxy resin can be used to make jewelry in so many different ways. Its versatility is why resin is so popular amongst artists, crafters and DIY jewelry makers:
- resin can be used clear or tinted with colorants.
- decorative items such as dried flowers, glitter or gold flake can be suspended within the resin.
- wood, beads or precious gemstones can be layered with resin.
- resin can also be used as a glossy, protective topcoat for jewelry pieces made of polymer clay, paper, fabric or butterfly wings.
Epoxy resin jewelry is fun and easy to make and you can handcraft designs to suit your individual taste and style. Our DIY resin jewelry tutorial provides endless possibilities to create statement pieces for yourself, to gift to friends and family, or to sell in your very own resin business! 
How do you make resin jewelry?
You can make resin jewelry by pouring resin into a mold (made of plastic or silicone) or into a metal pendant frame called a bezel. The resin will cure permanently to the shape of the mold or bezel and you can embellish it with colorant or inclusions to give it a one-of-a-kind look. From rings to earrings to pendants to charms, you'll find a huge range of resin jewelry molds and bezels for sale in every shape and size.
Can you make DIY silicone molds for resin jewelry?
Yes. Creating your own resin jewelry molds is an easy way to custom make your own designs. You can replicate and breathe new life into an heirloom or antique piece of jewelry, or transform an object you own into a unique piece of wearable art. As the molds can be used many times over, you can create multiple pieces to give as gifts or to sell as part of your own jewelry resin business.
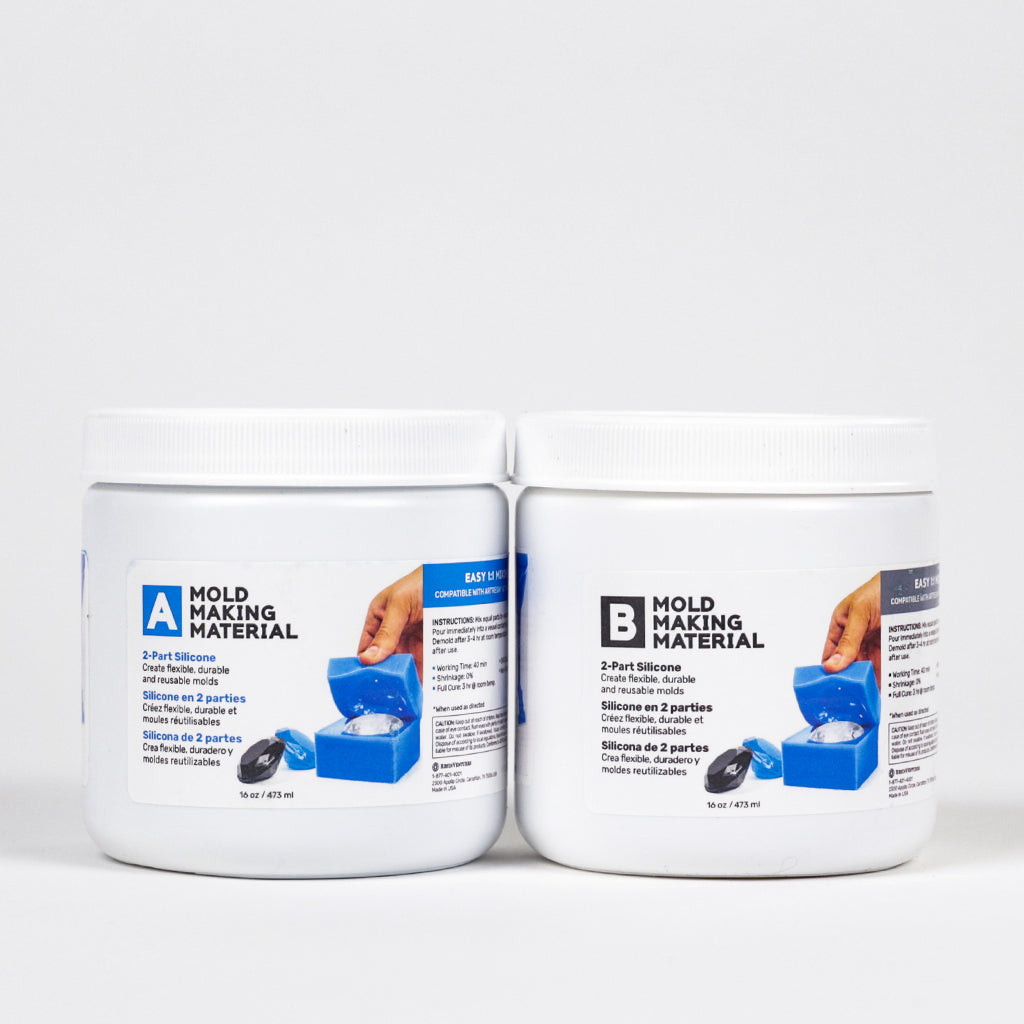
Mold Making Material is an easy to use, two-part platinum silicone kit designed for making custom resin molds. The product comes in two parts that, when mixed together, cure from a liquid to a flexible, high strength silicone, perfect for DIY resin molds. Whether you want to copy a flat item or a 3D object, there are no limits to the shape of the object you wish to replicate. The molds are high quality and can be used over and over again to create hundreds of resin jewelry castings.
How do you make resin jewelry using custom silicone molds?
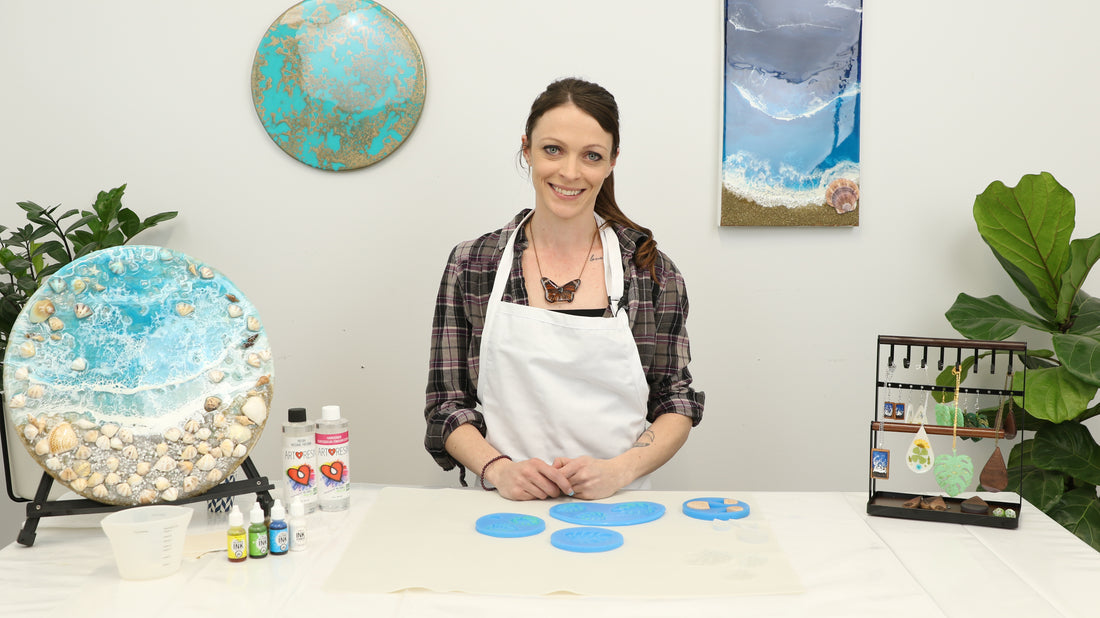
In this tutorial, artist Michelle Dechert demonstrates how to use Mold Making Material to create custom resin jewelry molds in the shape of a Monstera leaf and a teardrop.
She then uses these molds to create a leaf inspired pendant and earring set with alcohol ink and resin. Next, Michelle walks us through how to make resin earrings and a necklace pendant in a teardrop shape that incorporates wood and gold leaf. Along the way, Michelle teaches us how to correctly mix and tint the resin to create beautiful art that you can wear yourself, sell or give as a gift.
Let's get started!
What do I need to start making resin jewelry?
- The object you would like to cast (Michelle used flat acrylic cut outs in the shape of a Monstera leaf and a teardrop.)
- A container for your jewelry mold slightly bigger than the object. Michelle used a silicone coaster mold.
- Mold Making Material
- ArtResin epoxy resin
- A few pairs of disposable nitrile gloves
- A plastic or silicone measuring cup
- Craft or popsicle sticks
- Alcohol Ink: Michelle used green, yellow, and gold
- White Ink Sinker
- White ResinTint colorant
- A sheet of gold leaf sheet or gold leaf flakes
- A 4-sided nail file or sandpaper from 100-2000 grit
- A electric drill and a tiny drill bit
- Jewelry hardware: earring hooks or posts, necklace chain and closures.
- Pliers: needle nose and cutting
- A small piece of wood to fit inside the teardrop mold
- Food safe oil and a soft cloth
How to make DIY silicone molds for resin jewelry?
Step 1: Prepare the object you wish to cast


Step 2: Measure & Mix The Mold Making Material


Step 3: Pour The Mold Making Material Over Your Object


Since the items are glued down, we don't have to worry about them floating out of place. Let the silicone cure for 3-4 hours at room temperature until it’s no longer sticky to the touch.

Step 4: Remove The Objects From The Cured Mold
Carefully remove the cured silicone from the coaster mold and flip it over to gently wiggle the acrylic shape out. A utility knife is useful in case you need to cut a larger opening to remove the acrylic shape or for cleaning up loose bits of silicone from the edges. 

Step 5: Prepare The ArtResin
Wearing gloves, prepare 2 fl oz of ArtResin by measuring 1 fl oz of resin and 1 fl oz of hardener into a plastic or silicone measuring cup. It doesn't matter if you start with the resin or the hardener first, as long as you measure perfectly equal amounts of each.

With a craft stick, mix the resin and hardener together for 3 minutes, scraping the sides and bottom as you stir so that the entire mixture is thoroughly combined.
Step 6: Pour The ArtResin Into The Leaf Mold
Slowly pour the ArtResin into the mold, being careful not to overfill.
💡TIP: A silicone measuring cup is useful for pouring resin into small spaces since you can squeeze the cup to slow down the flow. Once you've finished pouring, allow the resin to cure right in the cup. The next day, simply peel the dried resin from the silicone and re-use the cup again and again.

Fill the mold by pouring a small amount into the center. Use a craft stick or toothpick to spread it out into the crevices.

NOTE: Don't fill the mold up right to the top if you're planning to add alcohol ink - you don't want the mold to overflow. You can always top it up with a little more resin after the inks have been added. Allow the resin to self-level and settle into all the crevices.
Step 7: Add alcohol ink to the leaf mold
Start with adding few drops of green alcohol ink scattered over the entire surface of the resin. Leave some empty spots for the yellow ink.
Follow this with a few drops of yellow alcohol ink in the empty spots.
Drop white alcohol ink sinker over the green and yellow alcohol ink. Follow a ratio of 1 drop Ink Sinker to every 2 drops of colored ink. Repeat as desired, adding a few more drops of green or yellow ink, followed by Ink Sinker, to fill any empty spots.
Add a few drops of gold for a metallic accent, if desired.
Add a drop of white to lighten up any areas that seem too dark. 
Top up the molds with a small amount of resin, if necessary. Gently drizzle the resin using a craft stick so it doesn't disturb or dilute the alcohol ink.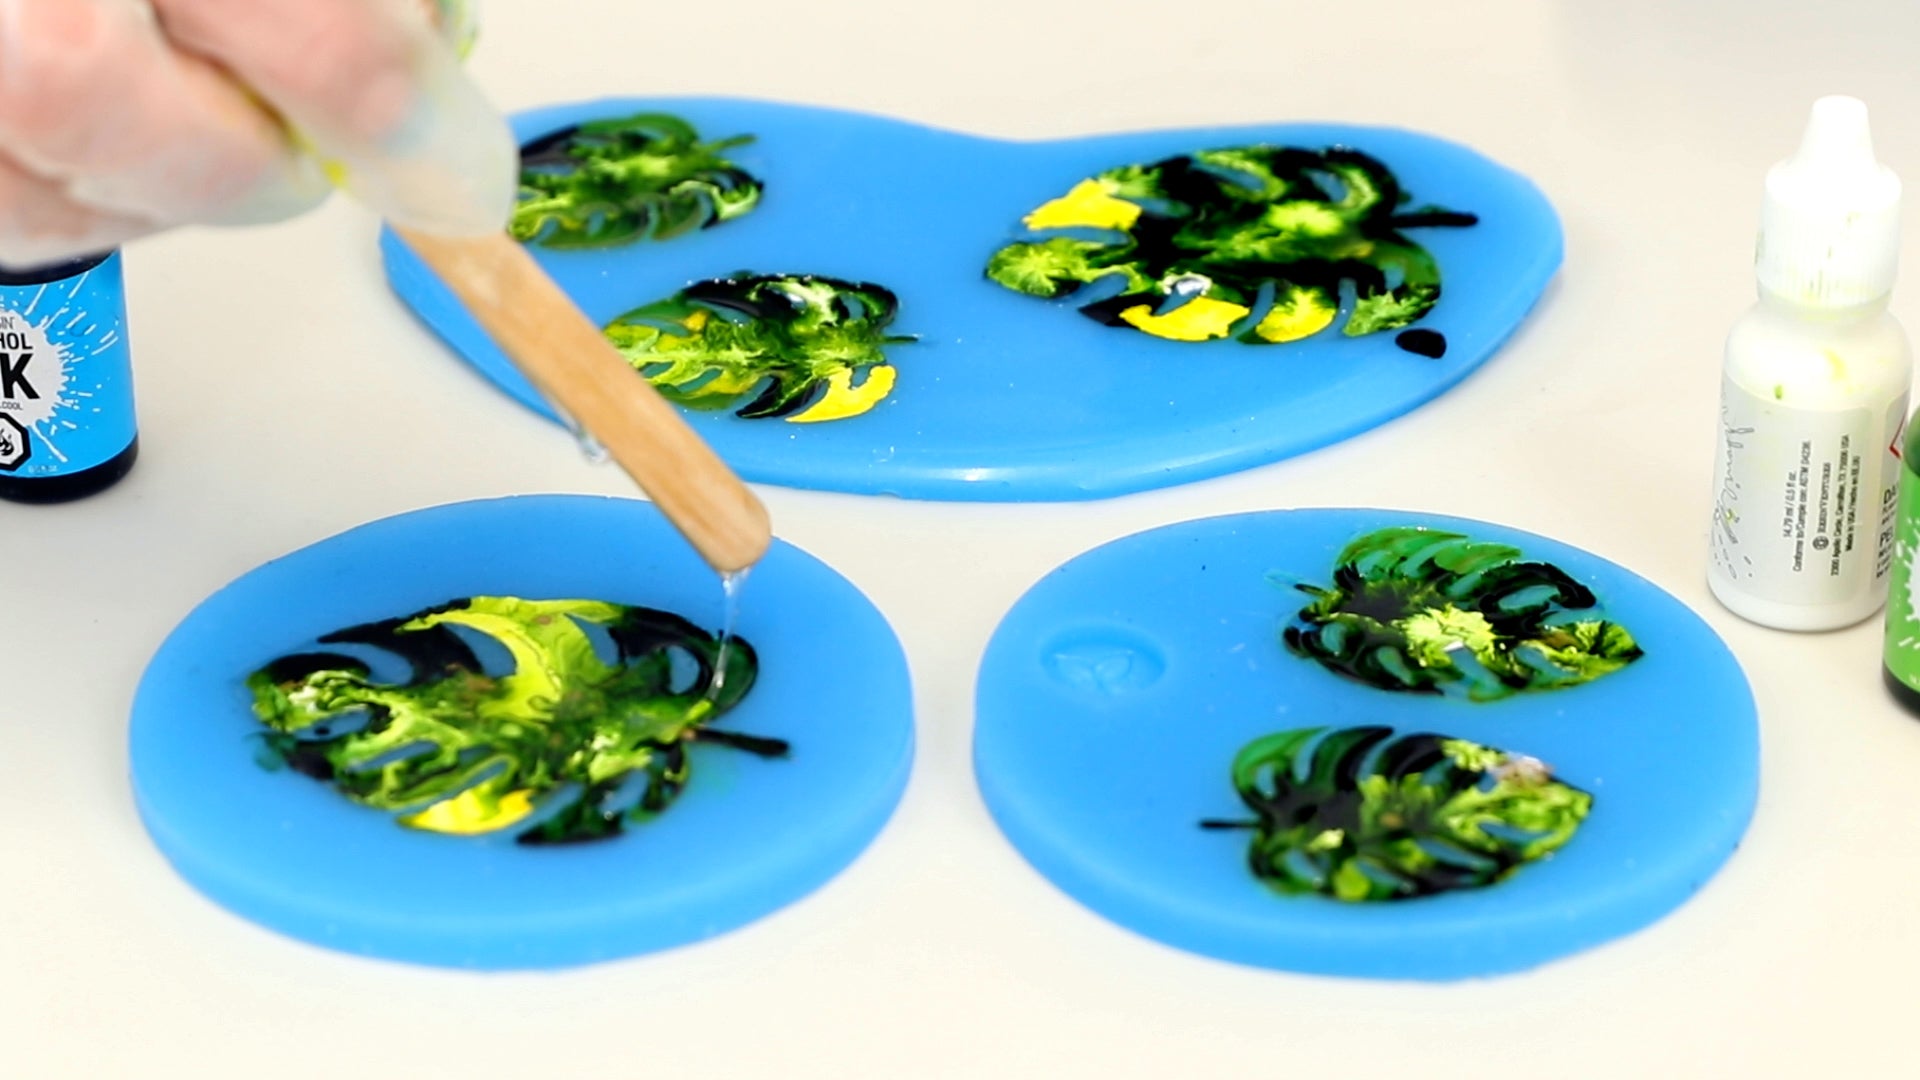
Step 8: Prepare the teardrop mold
Place small pieces of wood to the mold as desired. For this project, Michelle traced the acrylic shape onto a piece of scrap wood and used a skilsaw to cut small pieces that perfectly fit into mold. You can also use small pieces of scrap wood for a more organic look.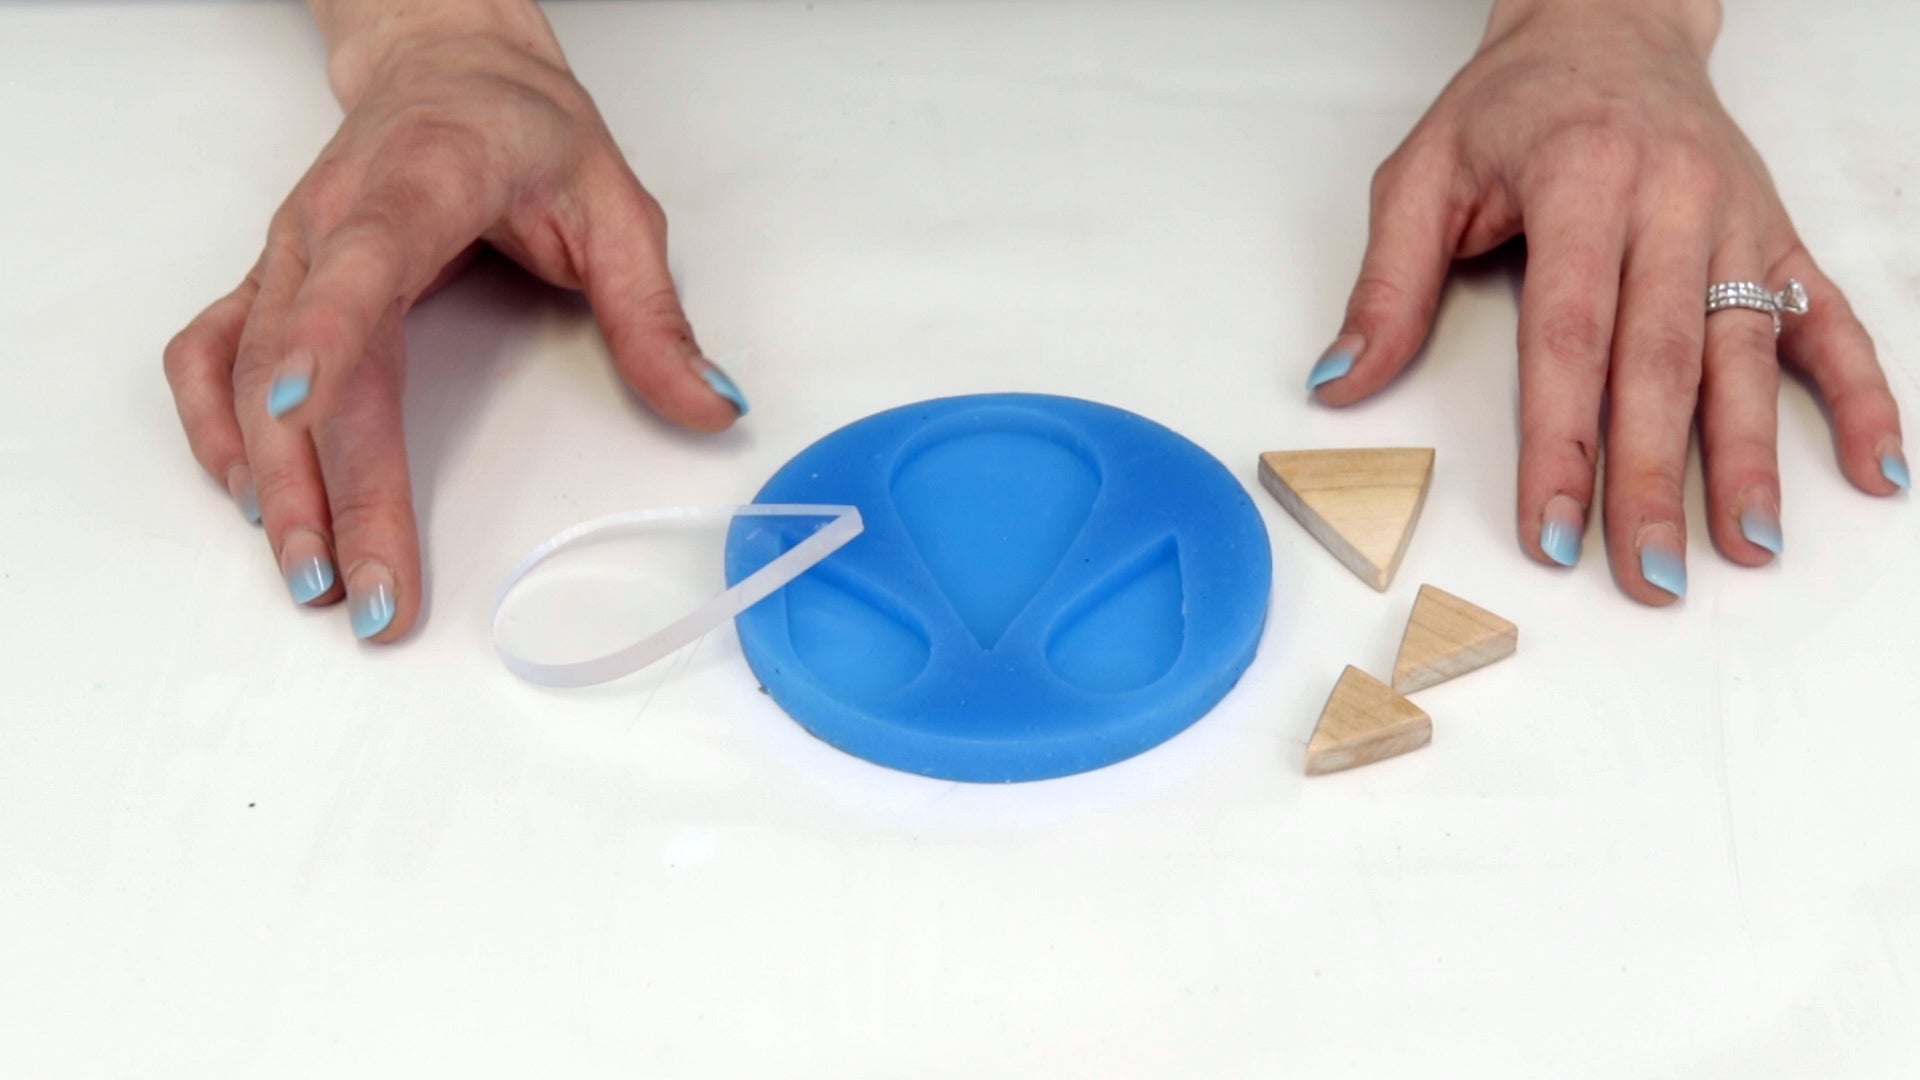
Step 9: Add tint and gold leaf to the ArtResin
Add a few drops of white colorant to slightly tint the resin. Or, if you wish, you can leave it clear.
Drop a sheet of gold leaf into the resin, breaking it into flakes with the mixing stick.
Step 10: Pour the ArtResin into the teardrop mold
Squeezing the silicone cup to control the flow, slowly pour a little resin into the mold. Use the craft stick to help guide the resin into the corners.

NOTE: Don't worry if the level of the resin is not flush with the wood. The piece will be sanded smooth once the resin has cured.
Weigh down the wood with small stones to prevent it from floating out of place as the resin cures.
Step 11: Cover and wait
Place a dustcover over top of the molds and allow them to cure for 24 hours. The clear lid from a large deli tray works very well.
Step 12: Remove the cured resin from the mold
Carefully remove the resin objects out of the mold. The resin will be flexible at first and will harden up once they have fully cured.

Step 13: Sand down uneven edges
Clean up rough edges to a nice, smooth finish, once the resin has fully hardened. You can use a multisided nail buffing file from the drug store or dollar store, starting with the coarsest side of the nail file and working your way to the finest. Or start with 100 grit sandpaper, making your way up to 2000 grit.
Use the nail file or sandpaper to sand down the wood so that the surface is perfectly smooth and flush with the resin.

Step 14: Add the jewelry hardware
Add the hardware of your choice, once the resin edges have been smoothed out and cleaned up. You can purchase jewelry hardware kits on Amazon or in craft stores.

Start by drilling a small hole for the hardware near the top of the resin piece, ensuring you don't drill too close to the edge.
💡TIP: Drill the piece on a piece of scrap wood to prevent your table top from getting damaged by the drill. 
Using pliers to pull the hoop open, feed it through the hole and close it back up again. Attach a second hoop to the first, adding an earring hook (or post) before closing it back up again.


To finish the necklace, drill a hole near the top of the pendant, being careful not to drill too close to the edges. Using pliers, pry open a hoop and insert it into the drill hole. Use the pliers to close the hoop once again. Repeat this step, adding a second hoop onto the first.


Choose the length of chain you would like for the necklace, and feed the chain through the second hoop. Attach the necklace closures.
Step 15: Season the wood with oil
Apply a small amount of food safe oil to a soft cloth, rubbing it on to the wood pendant to season the wood. Not only will this step finish the wood to its beautiful, glowing state, but it will help disguise any epoxy resin remnants that you couldn't quite sand off.

Your pieces are now complete and ready to wear!

Which technique are you most excited to try out?
We hope you found this tutorial helpful! Please leave any any questions or comments below regarding resin jewelry or making your own custom silicone molds.
_________________________________________________________________________
To see more of Michelle's work:
visit her website: www.m-k-art-graphics.com
follow her on Instagram: @m.kartgraphics
Do you want to learn more about using resin on accessories? See below our how-to tutorials:
- Introduction to Resin Art
- How to Resin Pencil Crayon
- How to Make Resin Geode Art
- How to Resin Paint Marker
- How to Resin a Bracelet
- How to Use Resin Over Cricut Decals
- How to Make Resin Keychains
- How to Make a Resin Geode Phone Grip
- How To Resin Marker
ArtResin: The Original Epoxy For Resin Art.
