
The Aurora Borealis, or Northern Lights, is a natural phenomenon known for its vibrant colors that seem to dance across the night sky - an effect that has captivated onlookers and artists for generations.
Vonka Chez is a mixed media artist based in Pennsylvania who creates colorful, abstract resin art. In this tutorial, she demonstrates how to recreate the Aurora’s glowing effect using ArtResin and her signature Magic Pigments, guiding you through each step from panel prep to precisely timed pours.
ArtResin has a 40-minute working window before it begins to thicken, however to create her Northern Lights effect, Vonka intentionally lets the tinted resin thicken beyond this point. She carefully times each step, using the thick consistency to her advantage so that the resin stays exactly where she wants it.
For the best results, Vonka recommends reading the important notes about thickened resin and following each step exactly, as the timing and materials are key to success.
Let’s get started!
Materials You'll Need
• Circular wood panel – Vonka used an 18" round panel
• Painter's tape – to protect the back of the panel
• Black acrylic paint – Vonka used Black Acrylic Flow Paint
• Vonka's Magic Pigments – in Star Dust, Milky Way, Moonlight, His Mood, Northern Lights, Aurora, and Twinkle Blue
• ArtResin
• Disposable gloves – for safe handling
• Mixing container
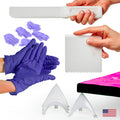
• Stir stick, spreader, and stands - available in our Accessory Kit
• Small mixing cups and stir sticks – one for each color
• Level – to ensure an even pour
• Maker’s Studio Torch – to remove bubbles
• Fan brushes – for applying glue to shape trees
• Sandpaper - Vonka used 220 grit
• Pebeo Mirror Effect Gold Foil
• Pebeo Mixtion Relief Paste
• Toothpicks – for detail work
• Gold leaf marker – Vonka used DecoColor’s gold leaf marker
• Self-adhesive cork backing – for the coaster backs
• Hairpin legs – to transform the panel into a finished table
Step 1: Prepare the Wood Panel
Vonka begins with an 18" wood panel, which will become her tabletop. Before applying paint or resin, she carefully tapes off the back using painter's tape to protect it from drips during the resin pour.


Next, Vonka primes the top surface with black acrylic paint. This coat will not only help create the night-sky background of her Northern Lights scene, but also prevents air bubbles from escaping from the wood into the resin.

Step 2: Pour the Resin Base Coat
To start, Vonka props the panel on plastic stands and ensures it’s perfectly level.

Wearing gloves, she mixes equal amounts of resin and hardener by volume, stirring for about 3 minutes, while scraping the sides and bottom of the container to ensure a thorough mix.
💡TIP: For her 18" panel and 3 coasters, Vonka uses approx. 8 fl oz each of resin and hardener per layer.

She tints the resin with black acrylic paint, and mixes well so that the paint is thoroughly combined.


Next, Vonka adds 2 small scoops of Star Dust pigment. This interference pigment color shifts between blue, purple, pink, and orange. It adds a soft shimmer and a galaxy-like twinkle.

Vonka pours the tinted resin into the coaster molds and over the wood panel.


She gently guides it across the surface of the panel with a spreader, smoothing the sides with gloved hands.


After waiting 10-15 minutes, Vonka uses a flame torch to remove surface bubbles.

Step 3: Create Gold Trees with Foil
24 hours later, once the resin has cured, Vonka removes the coasters from the molds. Next, she will create her tree design using Pebeo's Mixtion Relief Paste, Gold Mirror Foil, and a fan brush.


Vonka squeezes a small amount of the relief paste onto a plastic palette. Using a damp fan brush, she picks up a small amount onto the edge of the brush. She lightly dabs the edge of the brush on the surface to create the tree trunks.
💡 TIP: If you make a mistake, use warm water to remove the glue and start again.

Vonka creates the branches by turning the brush 90° and dabbing it on the coaster, rotating it back and forth as she makes her way from the top of the trunk to the bottom.
💡 TIP: This branch technique is simple, but if you want further guidance, Vonka suggests looking up tutorials on YouTube demonstrating how to create trees with a fan brush.

Repeat the steps on the table top. Vonka suggests doing two applications on the tabletop, repeating the layers to make the tree trunks and branches appear thicker.
Allow the glue to set for about 2 hours.

After about 2 hours and once the paste turns clear, she lays gold foil onto the trees. Ensure the silver side is placed facedown against the adhesive and the gold side on top. Vonka gently presses the foil down to ensure it adheres.


Gently remove the foil to reveal the gold trees! Missed spots can be touched up with more foil.


Step 4: Pour A Clear Resin Layer
Now Vonka is ready to pour another layer of clear resin. She lightly sands the cured resin (avoiding the gold trees), wipes away the sanding dust and residue with a baby wipe, and pours a fresh layer of clear ArtResin.
After torching out the bubbles, she allows it to cure another 24 hours.


Step 5: Create the Northern Lights Galaxy Effect
Vonka prepares a fresh batch of ArtResin - enough to coat the panel and coasters and for tinting to create her Northern Lights effect. Once mixed, she sets the resin aside for exactly 15 minutes.
⚠️ AN IMPORTANT NOTE ABOUT THE THICKENED RESIN:
• Use a timer and follow Vonka's steps: Pouring too early can cause the colorants to slide, blend, or run off the edges, resulting in a thin, muddy layer. Because timing is critical, Vonka recommends setting a timer as soon as the resin is mixed.
• Vonka intentionally allows the resin to thicken beyond ArtResin's 40 min working window: She pours at specific intervals to guide the tinted resin exactly where she wants it.
• It's critical to portion the resin into smaller containers: Leaving large volumes in the mixing cup can lead to a flash cure, where the resin overheats and hardens instantly. Small amounts of clear or lightly pigmented resin remain workable much longer, especially when only a minimal amount of pigment is added.
• Avoid heavy colorants like acrylics or pastes for this technique: These can speed up curing. Vonka recommends using lightweight powdered pigments, such as her Magic Pigments, which require only a tiny amount and won’t interfere with the curing process.


While the resin sits, Vonka sands down the last cured resin layer, wiping away the sanding dust with a wet wipe.

15 minutes after mixing: Vonka pours a clear coat over the panel, spreading it evenly across the surface.


20 minutes after mixing: she portions resin into separate cups, one for each color she intends to use, and setting aside enough for another base coat on the coasters.

21 minutes after mixing the resin: Vonka torches the surface to remove any air bubbles.

35 minutes after mixing: Vonka mixes her pigment powders into each resin cup.
💡 TIP: To avoid airborne particles settling onto your work, Vonka advises mixing the powders away from the panel.


1 hour after mixing: Vonka pours a clear base layer of resin over the coasters.

1 hour and 8 minutes after mixing: Vonka starts adding fine lines of Milky Way, Moonlight, Star Dust, Northern Lights, and Aurora. The resin will be very thick - this helps keep the colors from blending too much so they stay crisp and easy to control.


She torches very lightly.

Next, Vonka places a piece of paper over the lines on one edge, then slides it slowly across the panel to gently blend the colors.


Vonka uses a popsicle stick to apply more Moonlight and Northern Lights, as well as carving in a lines detail.


With a heat gun, she gently helps the tinted resin flow and blend, naturally creating cells.

As a final touch, she uses a toothpick to add a little Aurora. She uses a popsicle stick to apply another line, top and bottom, of Star Dust, blended with a silicone brush.


She applies more Aurora with her popsicle stick in the areas that need a little touching up.


Finally, Vonka adds a little bit of her Twinkle Blue tinted resin, slightly blending it with the silicone brush.

Vonka follows this with a light torching.

When the resin is very thick—almost no longer pourable—she adds His Mood, a glitter pigment. The thick consistency ensures it stays exactly where she places it without blending into the other colors.


1 hour and 25 minutes after mixing: Vonka repeats the process on her coasters. The resin is very thick at this point, which is exactly what Vonka wants: the thick resin slides easily with the silicone brush while keeping her Northern Lights lines crisp and in place.
Vonka adds lines of color, adding more as needed, blending with the silicone brush, and finishing with the glittery His Mood pigment.


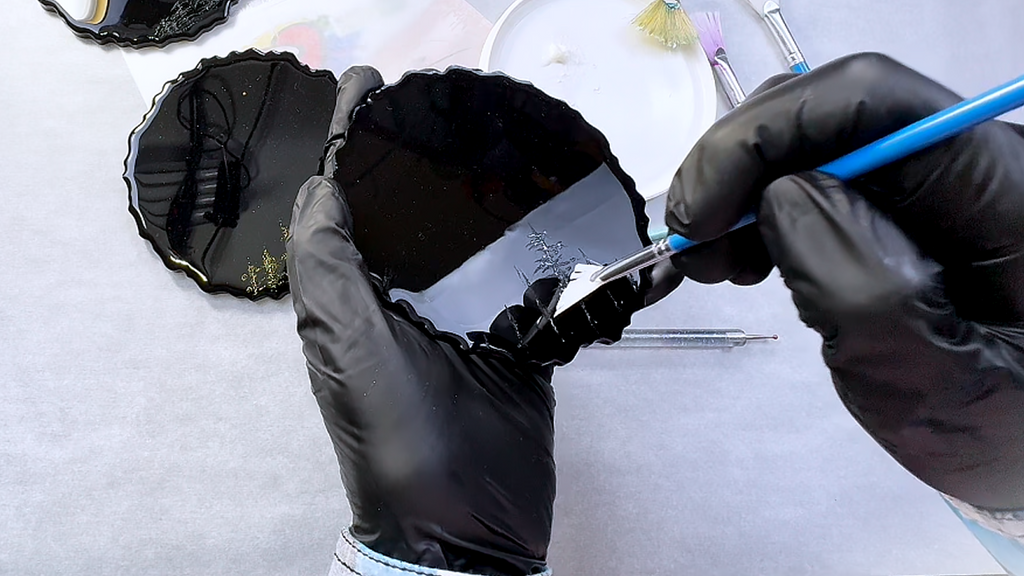
2 hours after mixing: Vonka uses a toothpick to carve lines in the tinted resin lines. The resin is very thick and you can literally create any design you want.
She adds more tinted resin to fill in any spots that need it. Once she's happy with the look, it's time to let the resin cure.


Step 6: Tree Designs
Vonka adds a 3D effect by adding more layers to the gold trees on her panel. She dispenses ink from a DecoColor gold leaf marker onto a plastic cup, applying it with a toothpick over the tree shapes.
The result is stunning depth with layers of gold encased in resin.


For the coasters, Vonka applies more relief paste, using a fine round-tipped clay tool. Once it becomes tacky, after approximately 2 hours, she adds the gold foil to impart a shiny, gold finish!


Step 7: Clear Resin Topcoat
Once cured, Vonka sands the piece one last time, carefully avoiding the glitter and trees, and adds a final clear coat of ArtResin.


The next day, after the resin had dried, Vonka realised that the gold trees were a little too thick and raised. Vonka applies another coat of resin to fully cover them

Step 8: Applying Cork Backing & Table Legs
To complete the pieces, Vonka applies self-adhesive cork backing to the coasters and attaches hairpin legs to the panel to transform it into a one-of-a-kind aurora-inspired table.


✨ The Final Results
The finished table and coasters are rich in shimmer, color, and dimension—bringing the magic of the Northern Lights into your home.


A Note From Vonka:
"I've been working with ArtResin for over 6 years and I absolutely love it. Thanks to its unique qualities, I've developed many cool techniques and this is one of them that I'm sharing with you today. The magic happens at around 40-60 minutes and up to 2 hours after mixing the two parts of resin, but to get the same results, it's important to follow every step I show in my tutorial. Using different pigments, larger resin volumes or a different brand may affect the outcome. With ArtResin, the sky is the limit when it comes to creating abstract art."
Questions?
We hope you enjoyed this tutorial!
If you have questions, feel free to leave a comment or reach out to Vonka through her social media channels linked below.
To see more of Vonka's work:
Visit her website: www.vonkachez.com
Follow her on Instagram: @vonka_chez
ArtResin: The Original Epoxy For Resin Art
