Do you wish that the canvas prints you ordered online would have a little more pizazz? Are you tired of looking at the same print on your walls?
Add vibrancy to your art with ArtResin! Pouring a perfect coat of ArtResin adds a professional look and shine to any print that you order or pick up from the store. It's simple and quick.
Within 30 minutes, you'll be measuring, mixing and pouring like a pro.
Though the idea of applying epoxy resin may seem a bit daunting, ArtResin was designed by artists who understand what artists want:
- a product designed specifically for artwork
- a safe and easy application
- and most importantly, pro results.
This video will show how simple ArtResin is when you follow a few key steps: measure, mix, pour, spread, cover and you’ll wonder why you haven’t been using it all along!
Let's get started ...
What You'll Need:
The ArtResin 32oz Combo Pack
This kit includes:
• 32 oz ArtResin (covers approx. 8 sq ft)
• 5 reusable spreaders
• 1 reusable mixing stick
• 5 pairs of disposable gloves
• Maker's Studio Torch (butane not included)
• 4 resin stands
In addition, you will need:
• cardboard
• level
• plastic measuring cup (or 2-3 clear plastic drinking glasses)
• toothpicks
• paper towel
• dust cover large enough to fit your piece (a cardboard box or a plastic tote)
1. Assemble Your Materials:
Gather together your tools and your ArtResin epoxy before you start resining. Line your work surface with plastic for easy clean up and to protect your table top: a vinyl shower curtain makes an easy, inexpensive liner that can be re-used again and again.

2. Prepare Your Artwork:
Make sure your artwork is dry and dust free. A cloth, soft brush or canister of compressed air can help eliminate dust.

Decide if you want to resin the entire painting (i.e including sides) or if you only want to resin the top. Applying resin to the top of your artwork while leaving the sides unresined is referred to as doming.
💡 TIP: Learn more about doming in our blog What Is Doming Resin?

If you want to resin the sides, we always advise taping off the bottom of your piece. Drips will naturally start to accumulate along the bottom of your piece but tape will catch those drips. Once the resin is dry to the touch, you can pull the tape off and the drips right along with it.
Stretched canvases should be reinforced. The weight of epoxy resin can cause stretched canvas to sag and, consequently, the resin to pool in the center. To prevent this, cut a piece of cardboard to size and insert it in the back to provide strength and stability.

Prop your piece up on plastic stands. Propping up your piece allows drips to pool on the plastic lined work surface.

Ensure your work is perfectly horizontal by checking it with a traditional level or with ArtResin's mobile phone level: www.artresin.com/level

3. Prepare Your ArtResin
Measure equal parts by volume. ArtResin is a 1:1 epoxy resin, meaning that you need equal parts of resin and hardener measured by volume. To determine how much ArtResin you will need for your piece, enter the length and the width into the Resin Calculator on our website.

Wearing gloves, measure equal amounts of resin and hardener. It doesn't matter which one you start with, as long as you measure equal amounts of both. It's important to measure accurately: if your resin and hardener are not perfectly equal, your resin may not cure properly.

Mix thoroughly for at least 3 minutes. As you stir, scrape the sides and bottom of the cup to ensure you incorporate every last bit of resin and hardener. Mixing thoroughly and scraping the sides will ensure every last bit of resin and hardener are combined. Now you're ready to pour!

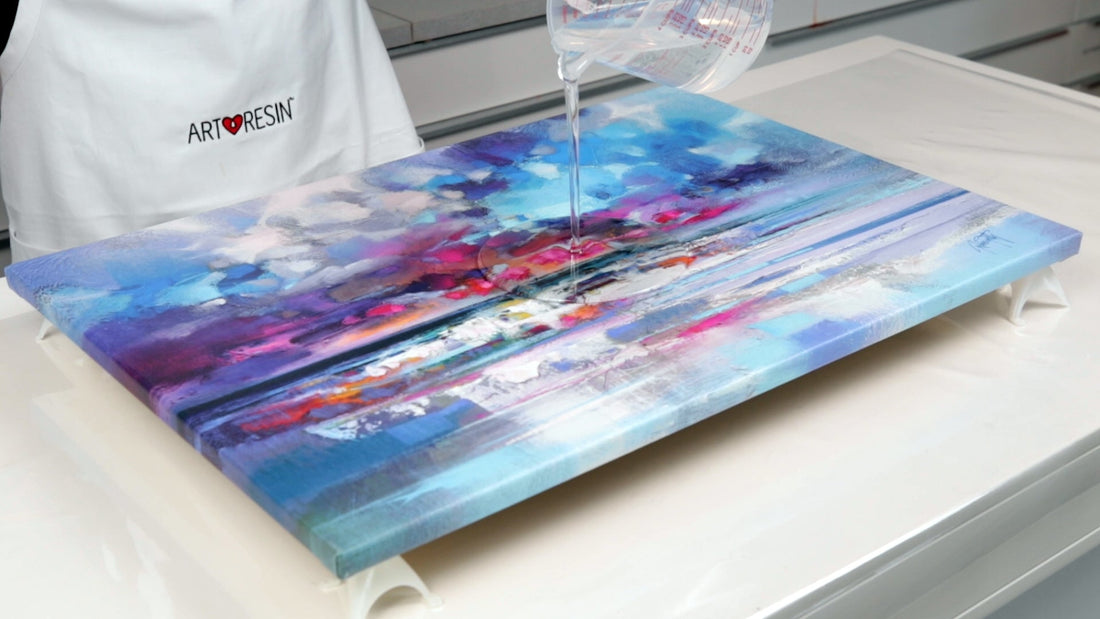
4. Pour The Resin

Use the spreader to gently pull a little resin over the edges and down the sides of your piece or let the resin dome on top.

Using gloved hands, smooth the resin out, evenly coating each side.

5. Torch, Cover And Wait:
Using an Maker's Studio Torch, hold the flame a couple of inches above the resin surface just long enough to pop the bubbles. One or two passes with the torch is all you need to get rid of bubbles.
Keep the torch in a constant side to side motion, as if you're ironing clothes. Don't hold the flame too close - it should just lightly kiss the resin surface.

Use a toothpick to pop any missed bubbles or to fish out any bits of dust. Look at your resin under a light source and at eye level to easily spot any imperfections.

Cover and wait 24 hours. Using a clean plastic tote or cardboard box, cover your piece and let it sit for 24 hrs until it’s dry to the touch.

6. Reveal!
Remove the cover to reveal your new and improved artwork!
We hope you found this tutorial informative and helpful. More importantly, we hope it made the process of applying epoxy resin a little less intimidating. Like anything, practice makes perfect but these suggestions will give you a good head start:
- have everything you need ready to go: tools laid out & artwork prepped
- ensure your ArtResin and resin room is 75-85°F or 24-30°C
- measure accurately, mix thoroughly, scrape your container as you stir
- use a torch and dust cover
Before you know it, you'll be applying ArtResin over ALL of your favourite art pieces!
Questions? Comments? Tips?
Please leave them below!
See our tutorials below for more resin art and craft ideas!
- How To Make Resin Keychains
- Introduction to Resin Art
- Top 20 Resin Craft Ideas
- How To Create Resin Petri Dish Art
- How To Create A Resin & Glass Mosaic Seahorse
- How To Make Resin Bloom Coasters
- How To Make Resin Jewelry
- How To Make Resin Geode Art
- Acrylic Pour Art Coasters: A Step By Step Tutorial
- How To Make Glitter Resin Art
ArtResin: Made For Artists, By Artists.
