
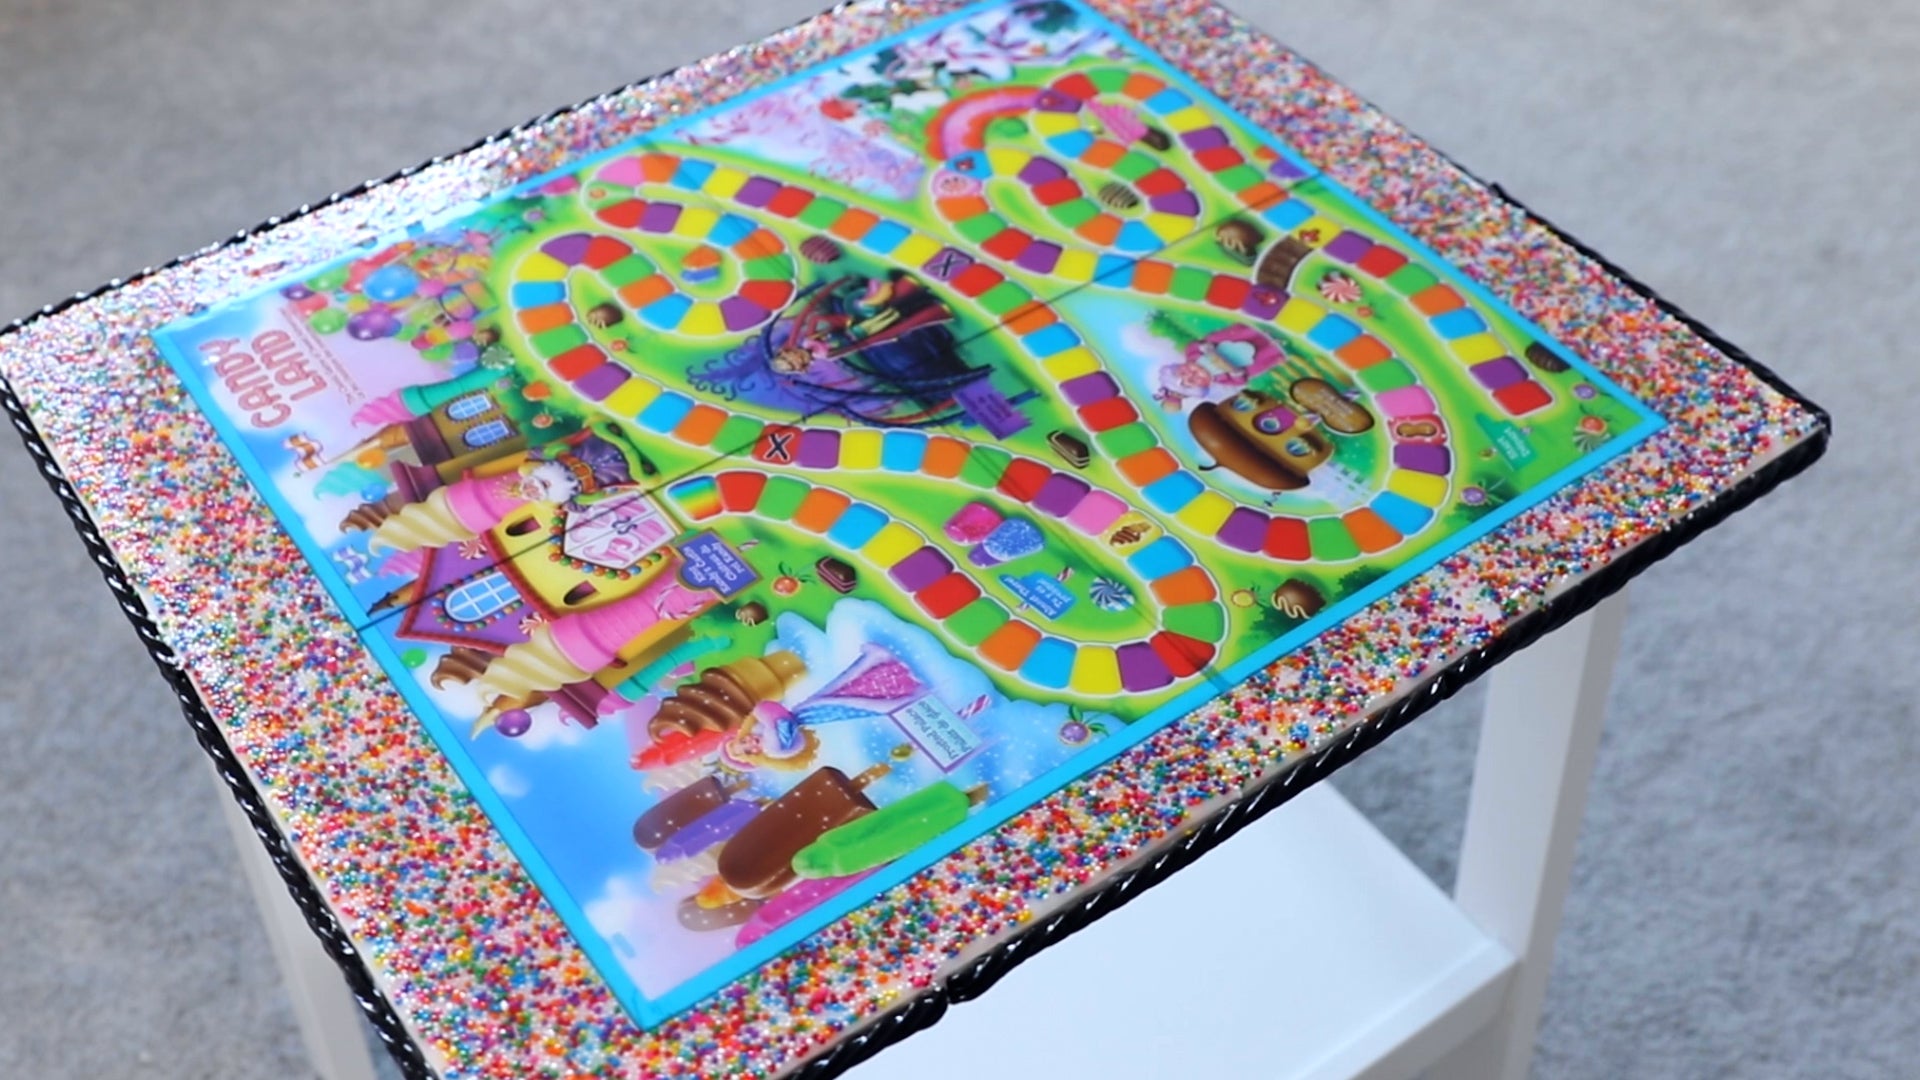
It's easy to turn a boring table into something fun and functional: simply mount your favorite game board to the tabletop and seal it with epoxy resin. This method works equally well on either a small side table or a TV tray: pick up an inexpensive item from IKEA or a thrift shop or, even better, repurpose something you already own.
YouTube creator Dan Rodo shows how easy it is to transform a plain, white table into a one-of-a-kind gift for his niece: a Candy Land board game table complete with real candy decorations!
Let's get started!
Supplies
-
Candy Land game board (or game of your choice):
You can, as an added precaution, seal the game board first using a brush on or spray sealant to prevent the resin from soaking into the paper. Test the sealant on an inconspicuous area first and allow to dry thoroughly prior to resining. - A side table or TV tray with a top big enough to fit the game board.
- Candy decorations: we used sprinkles and black licorice twists.
- Spray adhesive.
- A piece of cardboard: to help control where the spray adhesive lands.
- Painter's tape.
- Plastic drop sheet: to protect the work surface and floor from resin drips.
- A bubble level.
- ArtResin epoxy resin.
- Plastic mixing container with clearly marked measuring lines.
- Disposable gloves, stir stick, spreader and pyramid stands.
- A handheld butane torch: we like the Maker's Studio Torch.
- Toothpicks: to pick out bits of dust from the resin.
- A dustcover: a clean cardboard box or plastic tote
Discover our resin art tools & accessories!

Step 1: Prep The Tabletop
With plastic drop sheets in place to protect the floor and work surface, use painter's tape to mask off the underside of the tabletop. The tape will collect any resin drips and can be removed after 24 hours. This step will save you from having to sand the cured drips off.

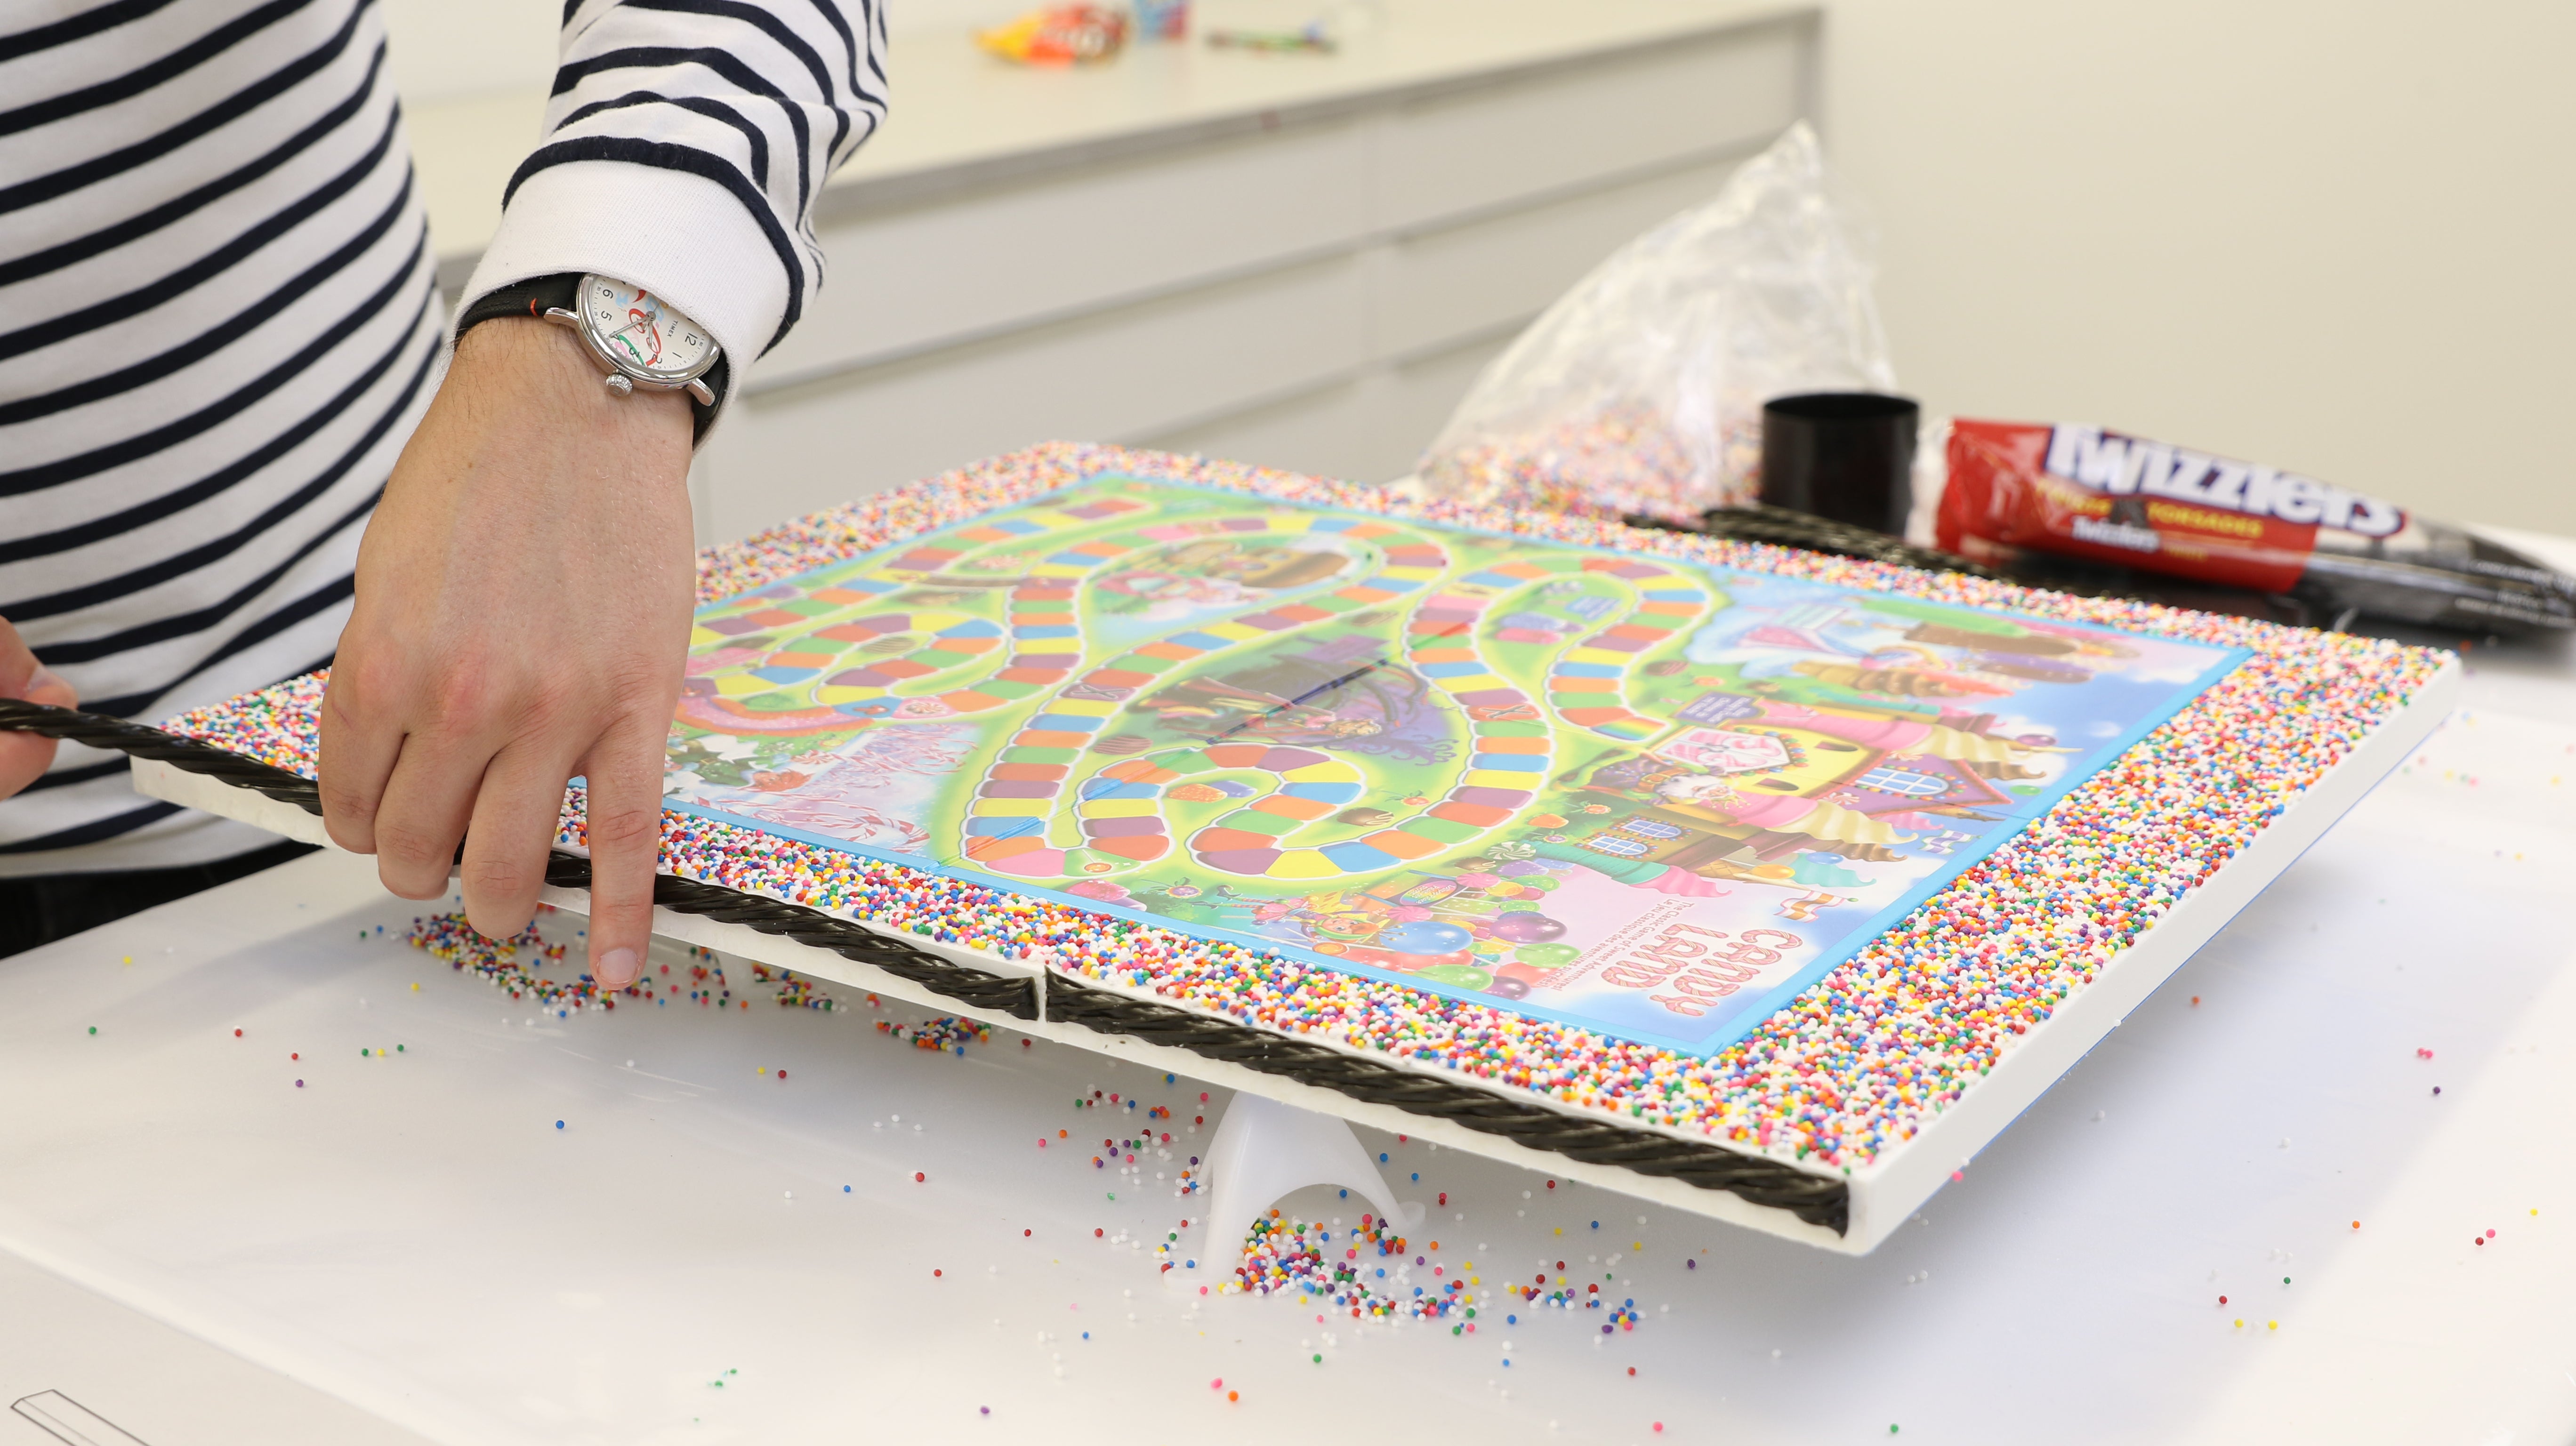
If you're building your own table, prop the tabletop up and off of your work surface using painter's pyramids or small plastic shot glasses. 
Step 2: Ensure The Tabletop Is Level
Using a bubble level, ensure the tabletop is perfectly level before working with epoxy resin. This step is important: epoxy resin self-levels and if the table top slants to one side, the resin will pool or run off.

Step 3: Mount The Game Board
Following the label directions, spray a thin layer of adhesive over the entire table top: the adhesive will hold down both the game board and the sprinkles. This is a better method than dropping sprinkles into the liquid resin; as the resin self levels, the sprinkles will move and could end up in places you don't want.

Lay the game board down in position on the tabletop, starting with the side closest to you. 

Step 4: Apply The Candy To The Tabletop
Once the game board is in place, grab a handful of sprinkles and drop them slowly around the board. 


Don't worry if some of the boards fall off at this point - you're simply looking to lay down a base coat of sprinkles. If you wish, you can apply more sprinkles after you pour the resin. 

Let it sit for about 10 minutes (or according to label directions) to allow the adhesive to cure.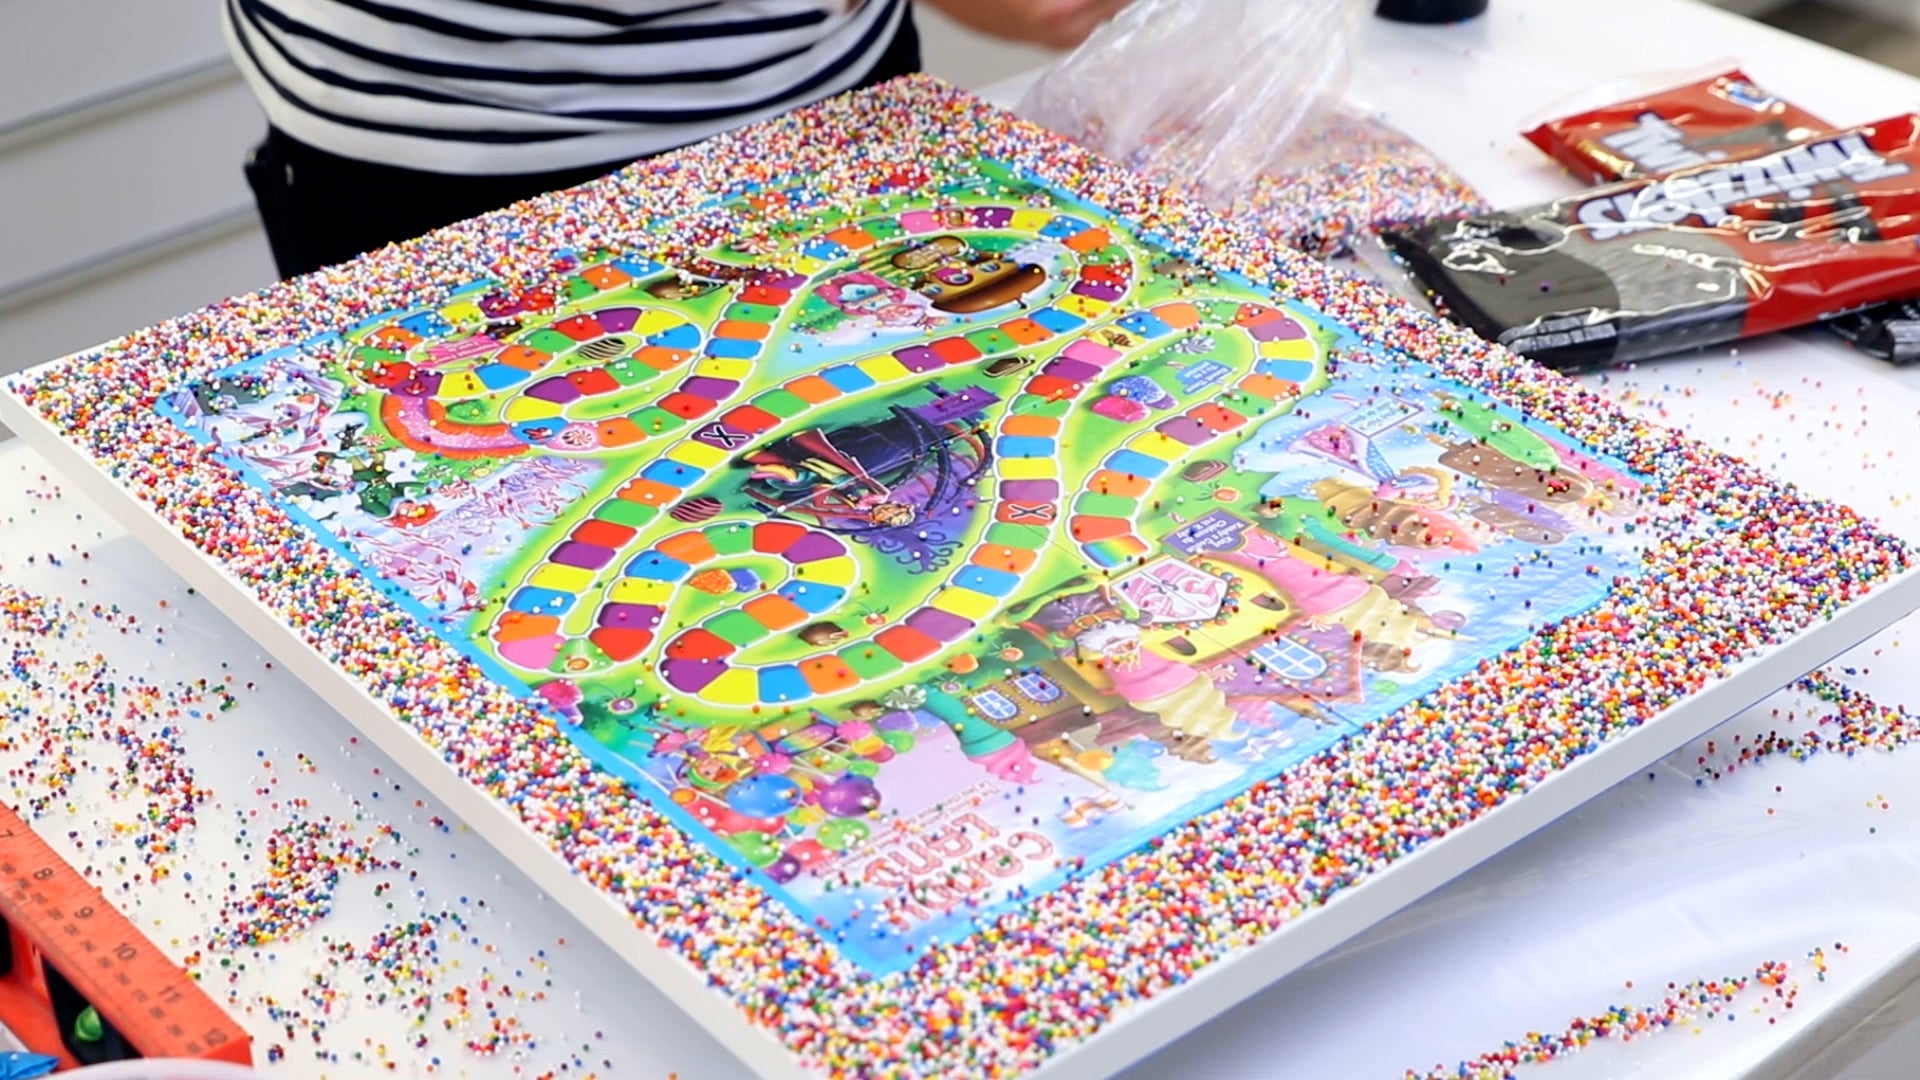
After 10 minutes, tip the table top to release any sprinkles that did not set.
Spray a coat of adhesive along the edges of the table top, shielding the tabletop with a piece of cardboard. Allow the adhesive to sit for a couple of minutes to become tacky. 
Line the flat edge of a piece of licorice against the table edge and hold it in place until it adheres. Work your way around the perimeter in this fashion until all the edges are covered.
Step 5: Prepare The ArtResin
Wearing gloves, measure equal amounts of resin and hardener by volume. Our tabletop was 18 x 22" which required 7 fl oz (200 ml) each of resin and hardener, for a total of 14 fl oz (400 ml).
💡TIP: If you're not sure how much resin you need, check ArtResin's online Resin Calculator. Simply enter the length and width of the table top and the calculator will tell you exactly how much resin you need.

Using a mixing stick, stir the ArtResin for at least 3 minutes. Some bubbles are fine, but avoid mixing too too fast or you'll create excessive air bubbles. Scrape the sides and bottom of the container as you go to ensure the mixture is thoroughly combined.

Step 6: Pour The ArtResin
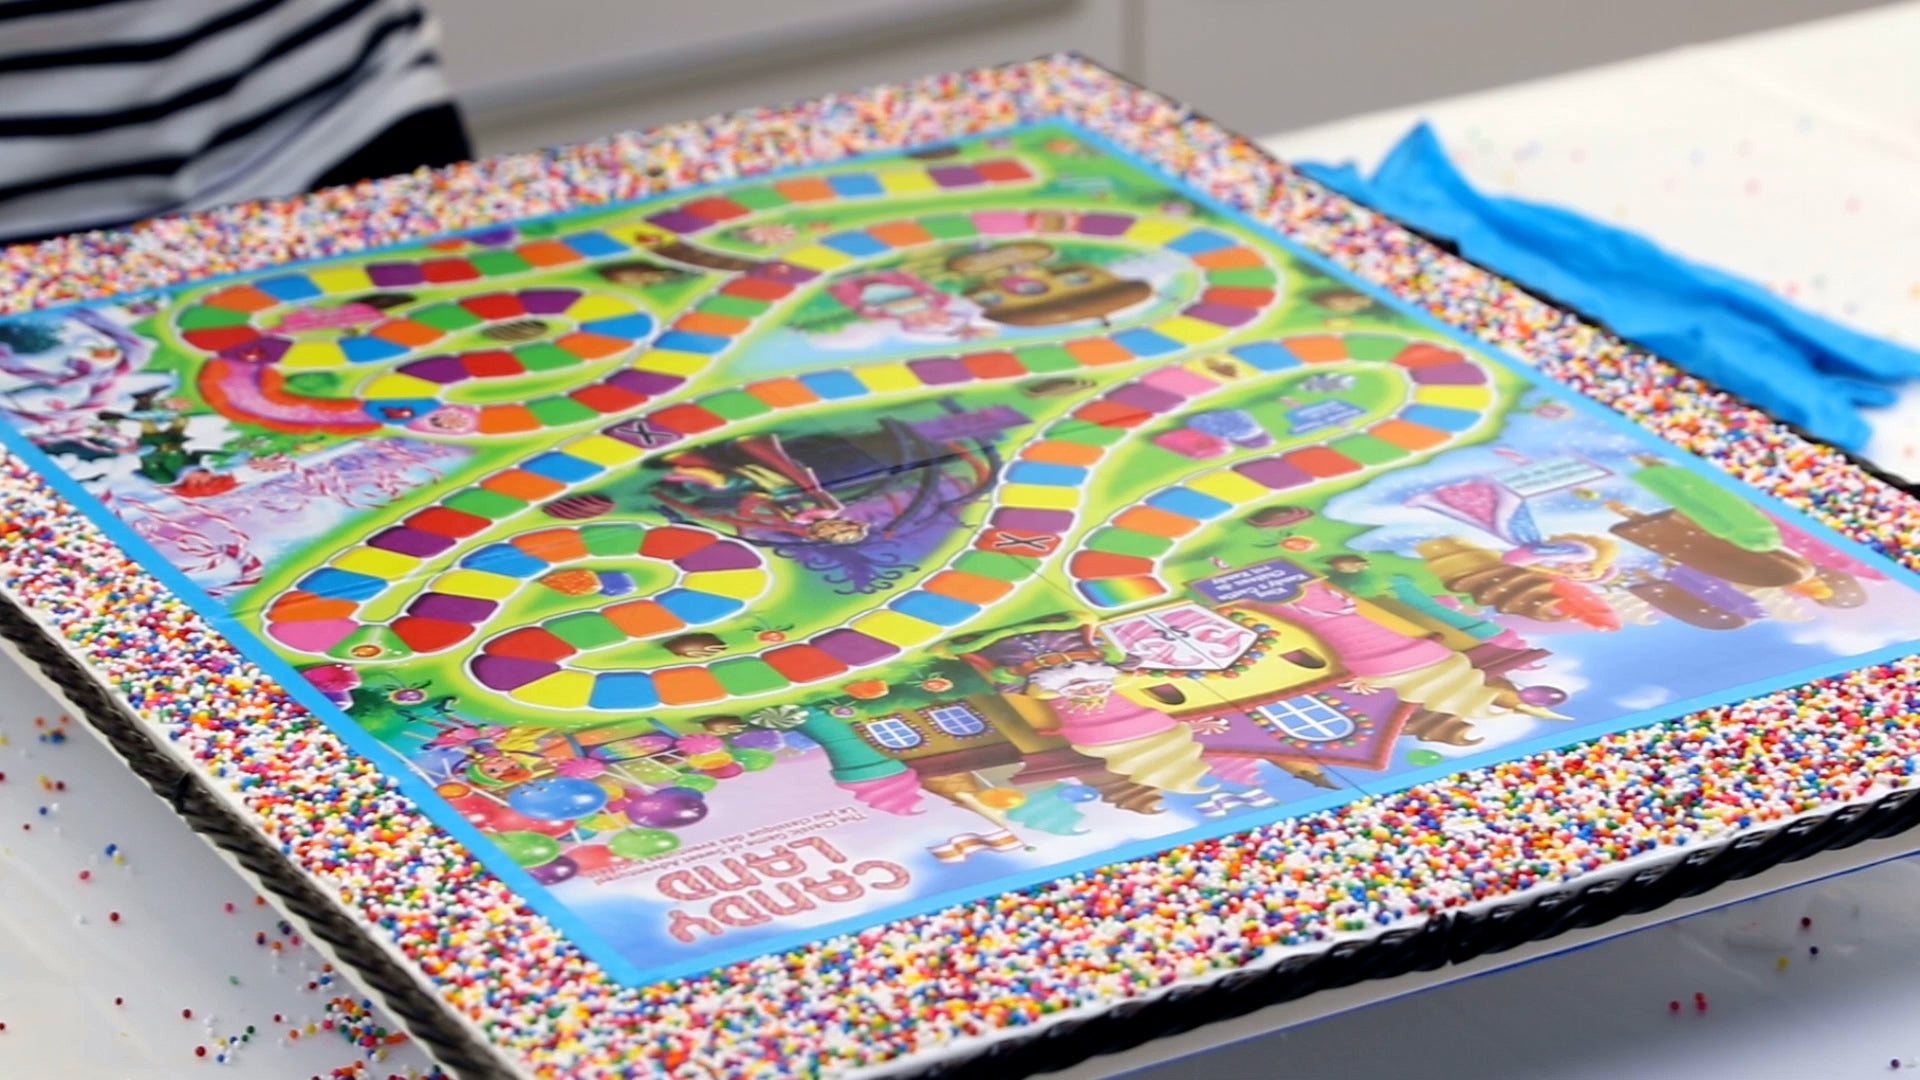
As soon as the mixture is thoroughly mixed, pour the resin into the center of the game board. It will start to self level but you can use the spreader to help guide the resin to the edges.
💡 TIP: You have 45 minutes to work with the resin before it gets too thick to spread, but we don't advise leaving mixed resin sitting in the mixing cup. 

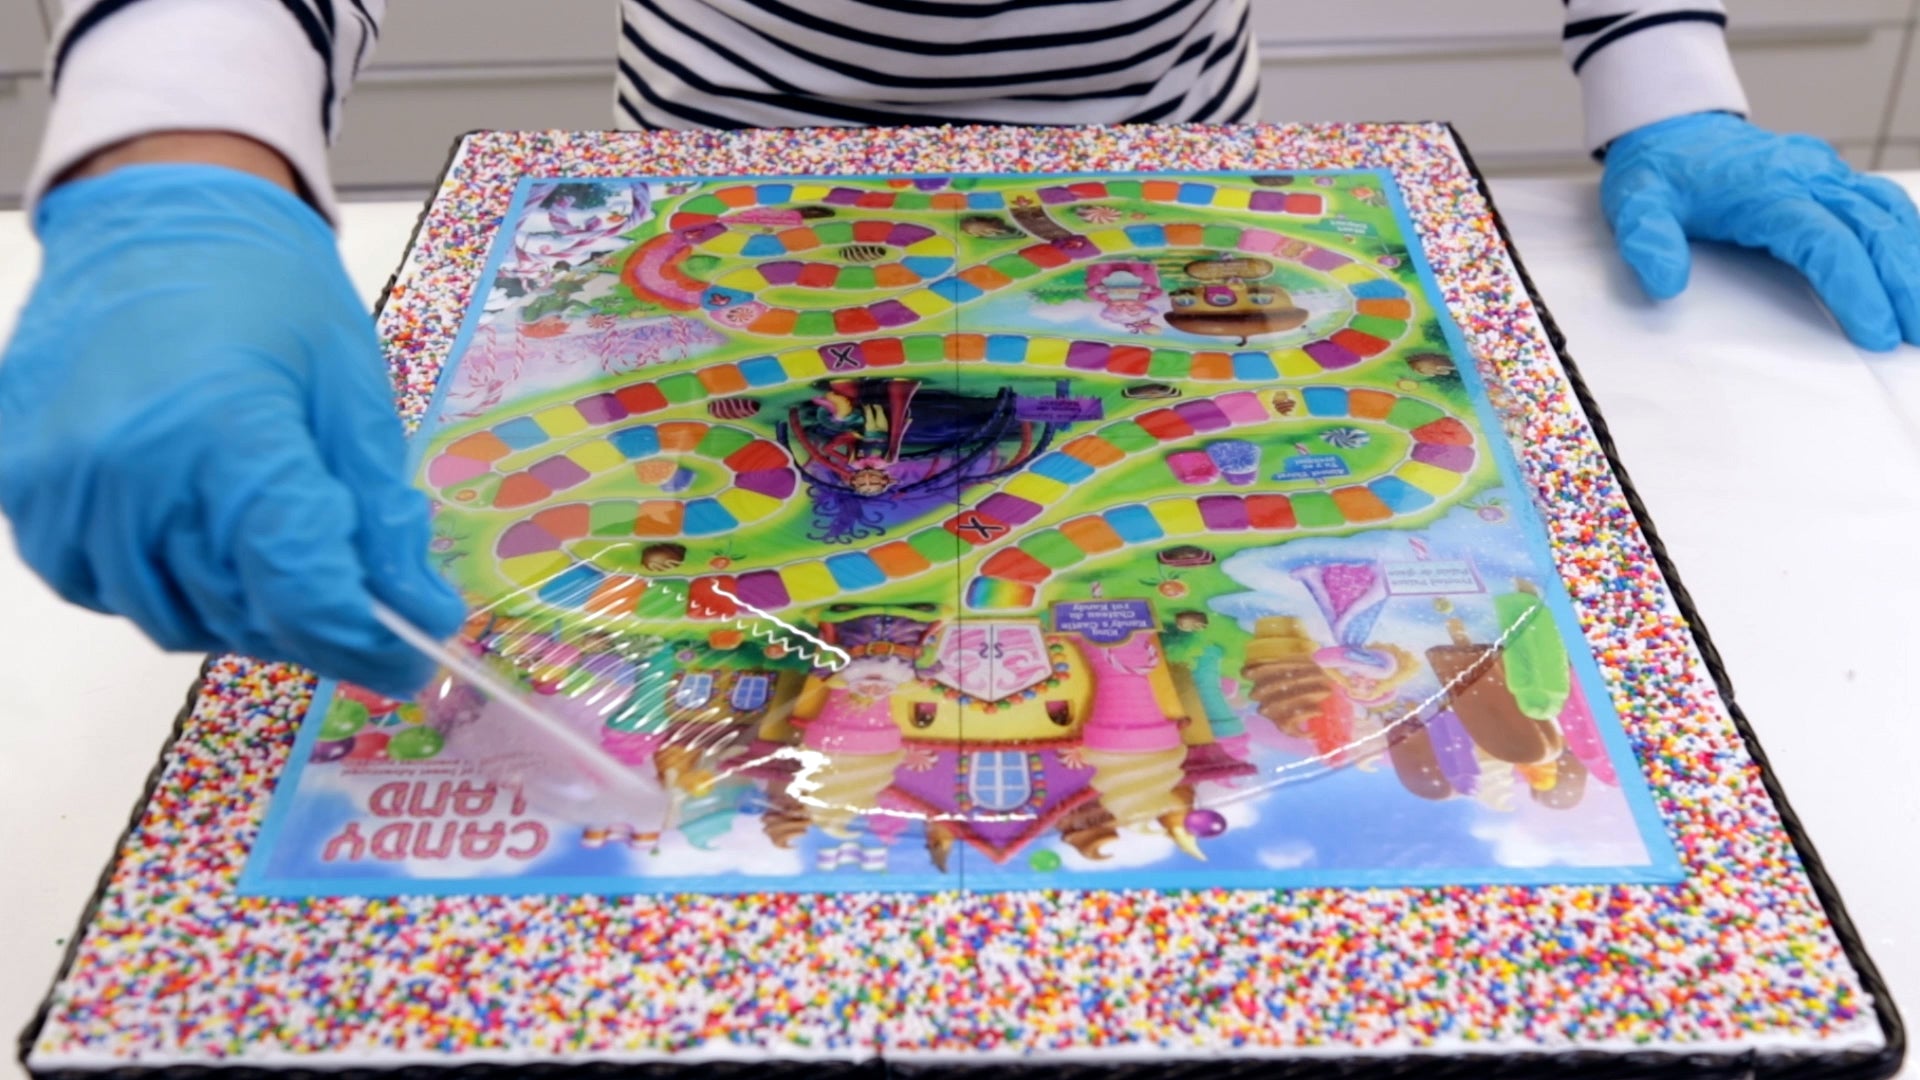
Step 7: Torch Out The Bubbles
Hold the flame of the butane torch over the resined surface, keeping it constantly moving back and forth until the bubbles have disappeared. A quick pass will suffice: don’t hold the torch too close or in one spot for too long, especially over the sprinkles.
💡TIP: Once you've torched, look at the piece at eye-level and under a light source to easily spot any bits of dust or hair that may have landed in the wet resin. Remove these with a toothpick.

If some of the sprinkles have migrated over top of the licorice, use a small brush or a toothpick to move them.

Step 8: Cover And Wait
Cover the table top with a clean cardboard box or plastic tote, or you can fashion a dustcover using a large piece of cardboard, a plastic drop sheet or large stretched canvas propped up on plastic containers. Allow the resin to cure for 24 hours.
At the 24 hour mark, peel off the painter's tape and the cured drips right along with it. 


Step 9: Assemble The Table
If you've bought a new, flat pack table, now is the time to assemble. Work on a soft surface, like a carpeted floor, or ensure you have a soft blanket or towel to rest the resined table top on. 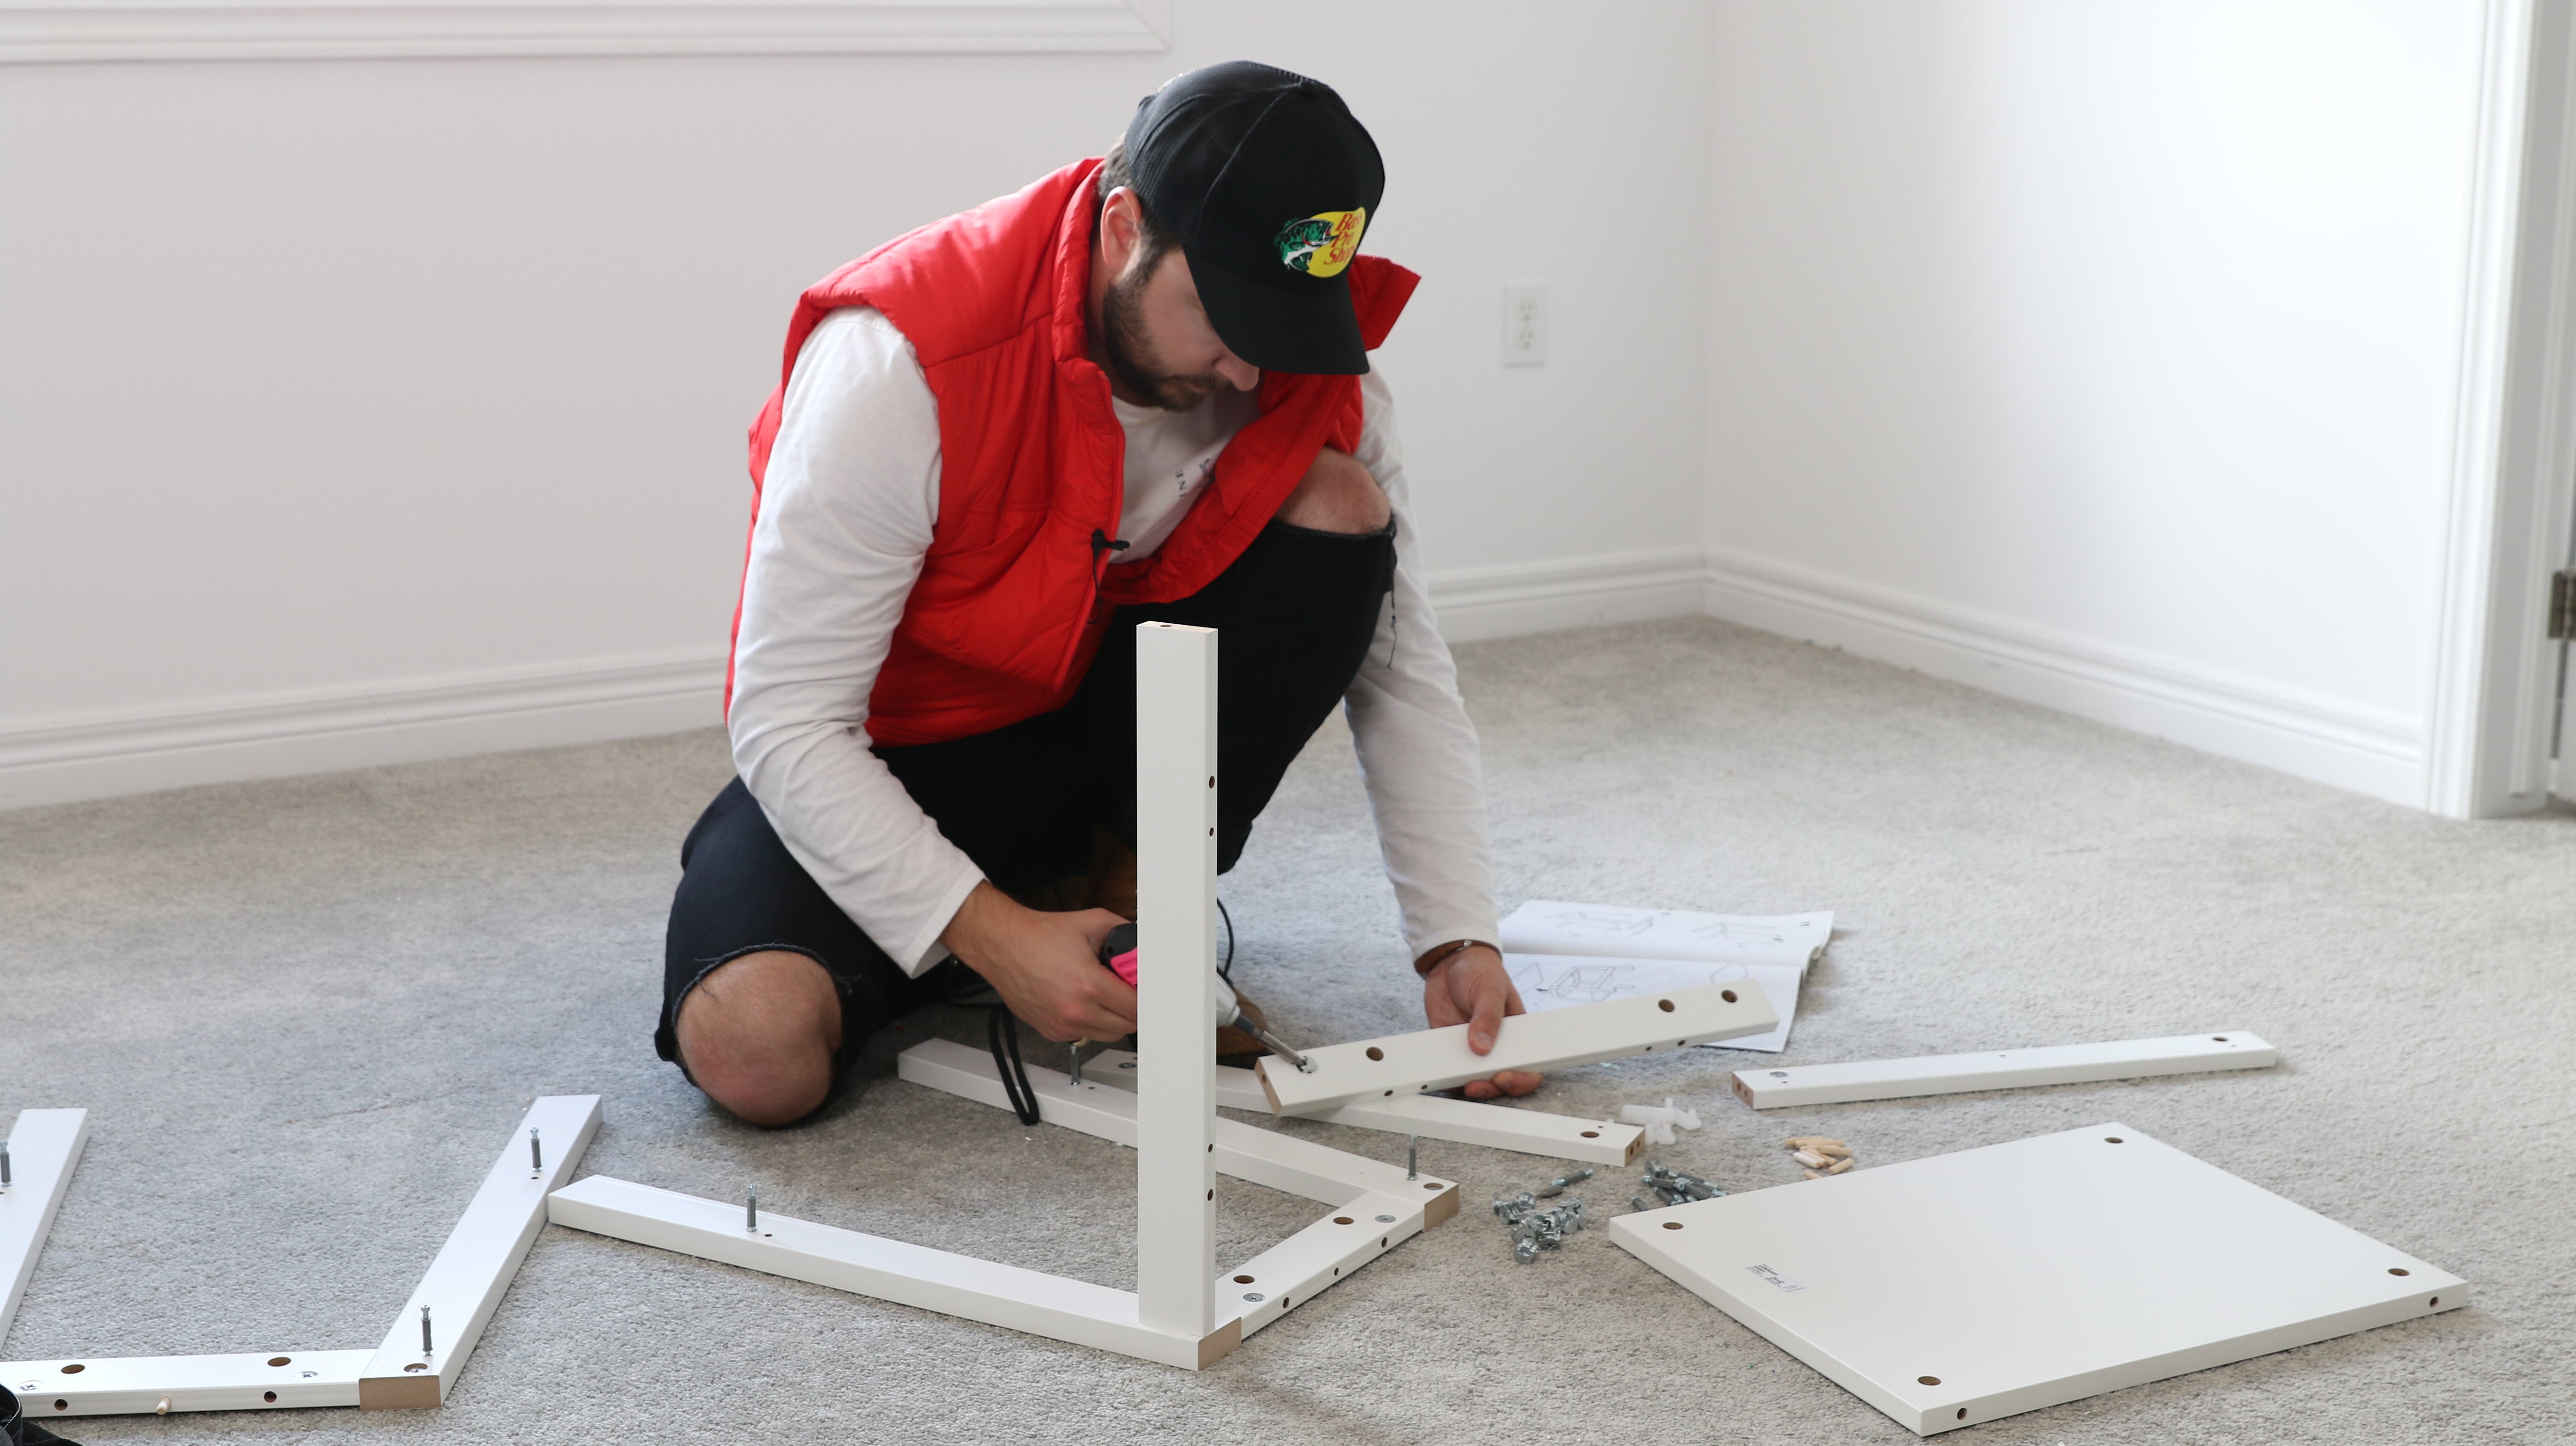

And voila! The table is ready to use! The board game is protected by the resin, but if you do find that the resin becomes scratched, simply sand down the surface and pour on a fresh coat of resin. Instructions on how to do that are in our blog Can I Apply A Second Coat Of ArtResin?

We hope this gives you lots of ideas on different board game tables you can create!
Some other fun resin board ideas include:
Monopoly: decorate the table with Monopoly money.
Clue: paint colorful question marks on the table around the board.
Backgammon/Chess/Checkers: mount a game board or paint the pattern onto the tabletop with acrylic paint.
Scrabble: mount the scrabble board and decorate around the board with small decorative letters.
To see more of Dan:
Subscribe to his YouTube channel: TheDanocracy
Follow him on Instagram: @danocracy
Like him on TikTok: danocracy
Please leave any questions or comments below - and let us know what custom game board ideas you come up with!
Do you want to learn more resin art projects? See below our how-to tutorials.
- How To Make Resin Keychains
- How To Resin A Bracelet
- How To Make A Resin Geode Phone Grip
- How To Make Resin Pens
