If you've ever thought to yourself, "I bet I could make my own pen," you would be write! (See what I did there?)
Creating your own custom epoxy pen is a wonderful little craft that is both fun and functional. You can create your own designs using ArtResin, wood, color tints, glitter, all sorts of materials. In this blog, we are joining Todd Duka from Duka Heritage as he shows us how he likes to create his own unique pen blanks.
Let's get started!
In this example we will be adding wood to our casting. You can also create a pen with just ArtResin and ResinTint or Alcohol Ink. There are endless possibilities and ideas. Follow our instructions for crafting pens with resin.
Here's what you'll need:
- ArtResin epoxy resin
- Wood blocks (optional)
- Pen blank mold
- Pen kit
- ResinTint (or a colorant of your choice)
- Pen turning mandrel + bushings to match your pen kit

Step 1. Select Wood Block & Cut it Down
Select your wood block and cut down to size in order to fit into your mold.

Step 2. Mix up Colorants
Mix up the colorants of your choice. We recommend ResintTint. Adding Metallic Pearl to the mixture brings out a beautiful pearlescent result.
Be sure to keep the resin mixture fairly opaque so as to prevent seeing through to the pen body tube.

Step 3. Place the wood block into the mold and fill the mold with your colorant(s) of choice.


Step 4. Place the mold into a pressure pot
Pressurize the pot to at least 50 psi. Placing a mold with resin into a pressure pot eliminates all bubbles giving you a crystal clear result.

Step 5. Remove the mold from the pressure pot and then the resin block from the mold

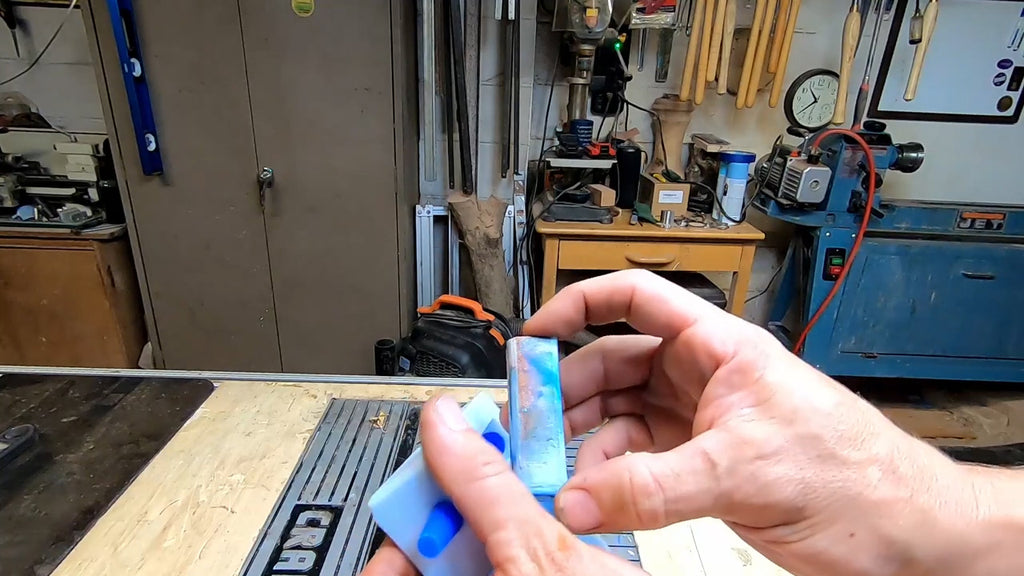
Place the pen blank in a lathe or drill press. Bore your blank to the appropriate size based on your pen kit.


Step 6. Place pen body tube into the blank
Using a medium CA glue or 5 minute epoxy (i.e. some kind of quick-setting glue), apply adhesive to both the pen tube and the inside of the blank. Insert the pen tube into the blank, rotating as you go to ensure a good bond.


Using a pen mandrel and the appropriate sized bushings, secure your piece in your lathe and turn to your desired shape.

Step 7. Sand your newly shaped pen body to 320 grit to prepare for finishing

Step 8. Clean the pen body thoroughly.

One popular method of pen finishing is to use CA glue. This method will leave you with a glass like finish that will last a lifetime.
Apply 3 coats of thin CA glue while the lathe runs, curing the glue with activator between coats. Repeat using medium CA glue to build up the finish to your desired depth.

Step 9. Sand the Pen Body
Sand the pen body using 320 grit sandpaper to ensure that the CA glue finish is level.

Polish using MicroMesh sanding pads.
Wet sand the pen body working through the steps from 1500 grit all the way to 12000 grit.


Using your freshly polished pen body, assemble your pen as per the included instructions for your selected pen kit. These steps vary based on your selected pen style.


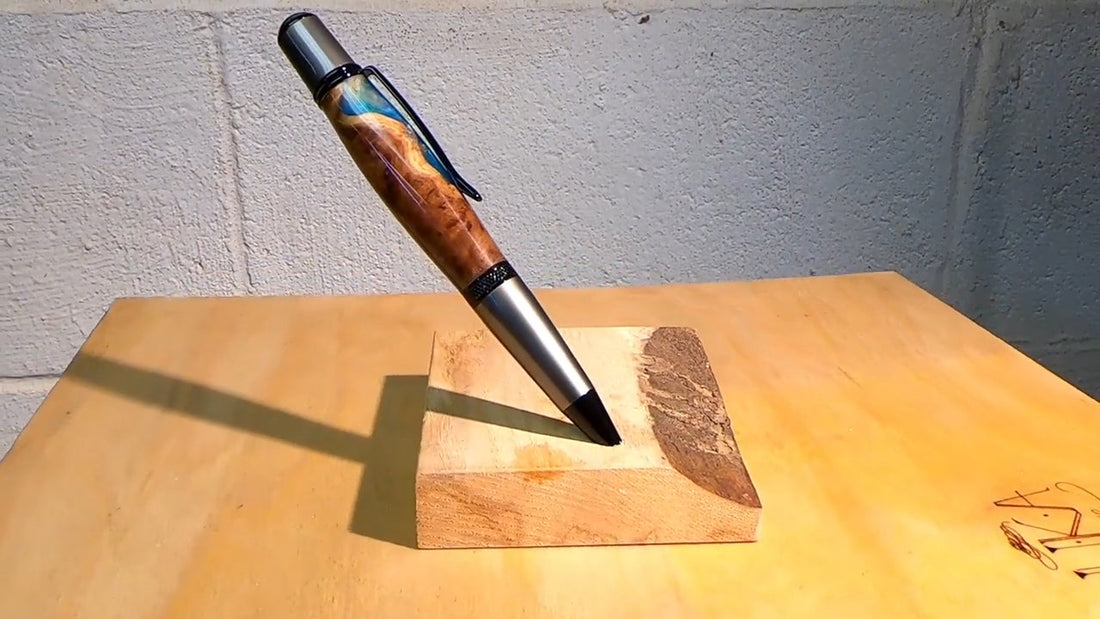
Voila! Behold your wonderful resin pen creation :)

Did you enjoy our tutorial?
There are many resin pen ideas that you can try by yourself.
Do you want to learn more resin art projects? See below our how-to tutorials.
