What's the difference between resin art and acrylic pour?
If you're new to fluid art, you may have wondered what the differences are between resin art and acrylic pouring. Both techniques use colorful, liquid mediums to create beautiful artwork, but they differ in their application.
The end results for both acrylic pours and resin art are mesmerizing, with every drip and swirl creating a spontaneous design. No two pieces are ever alike and, as the artist, the technique used is your choice.
So ... which method should you try?
Let's take a closer look at resin art and acrylic pours to help you decide.
What is Resin Art?
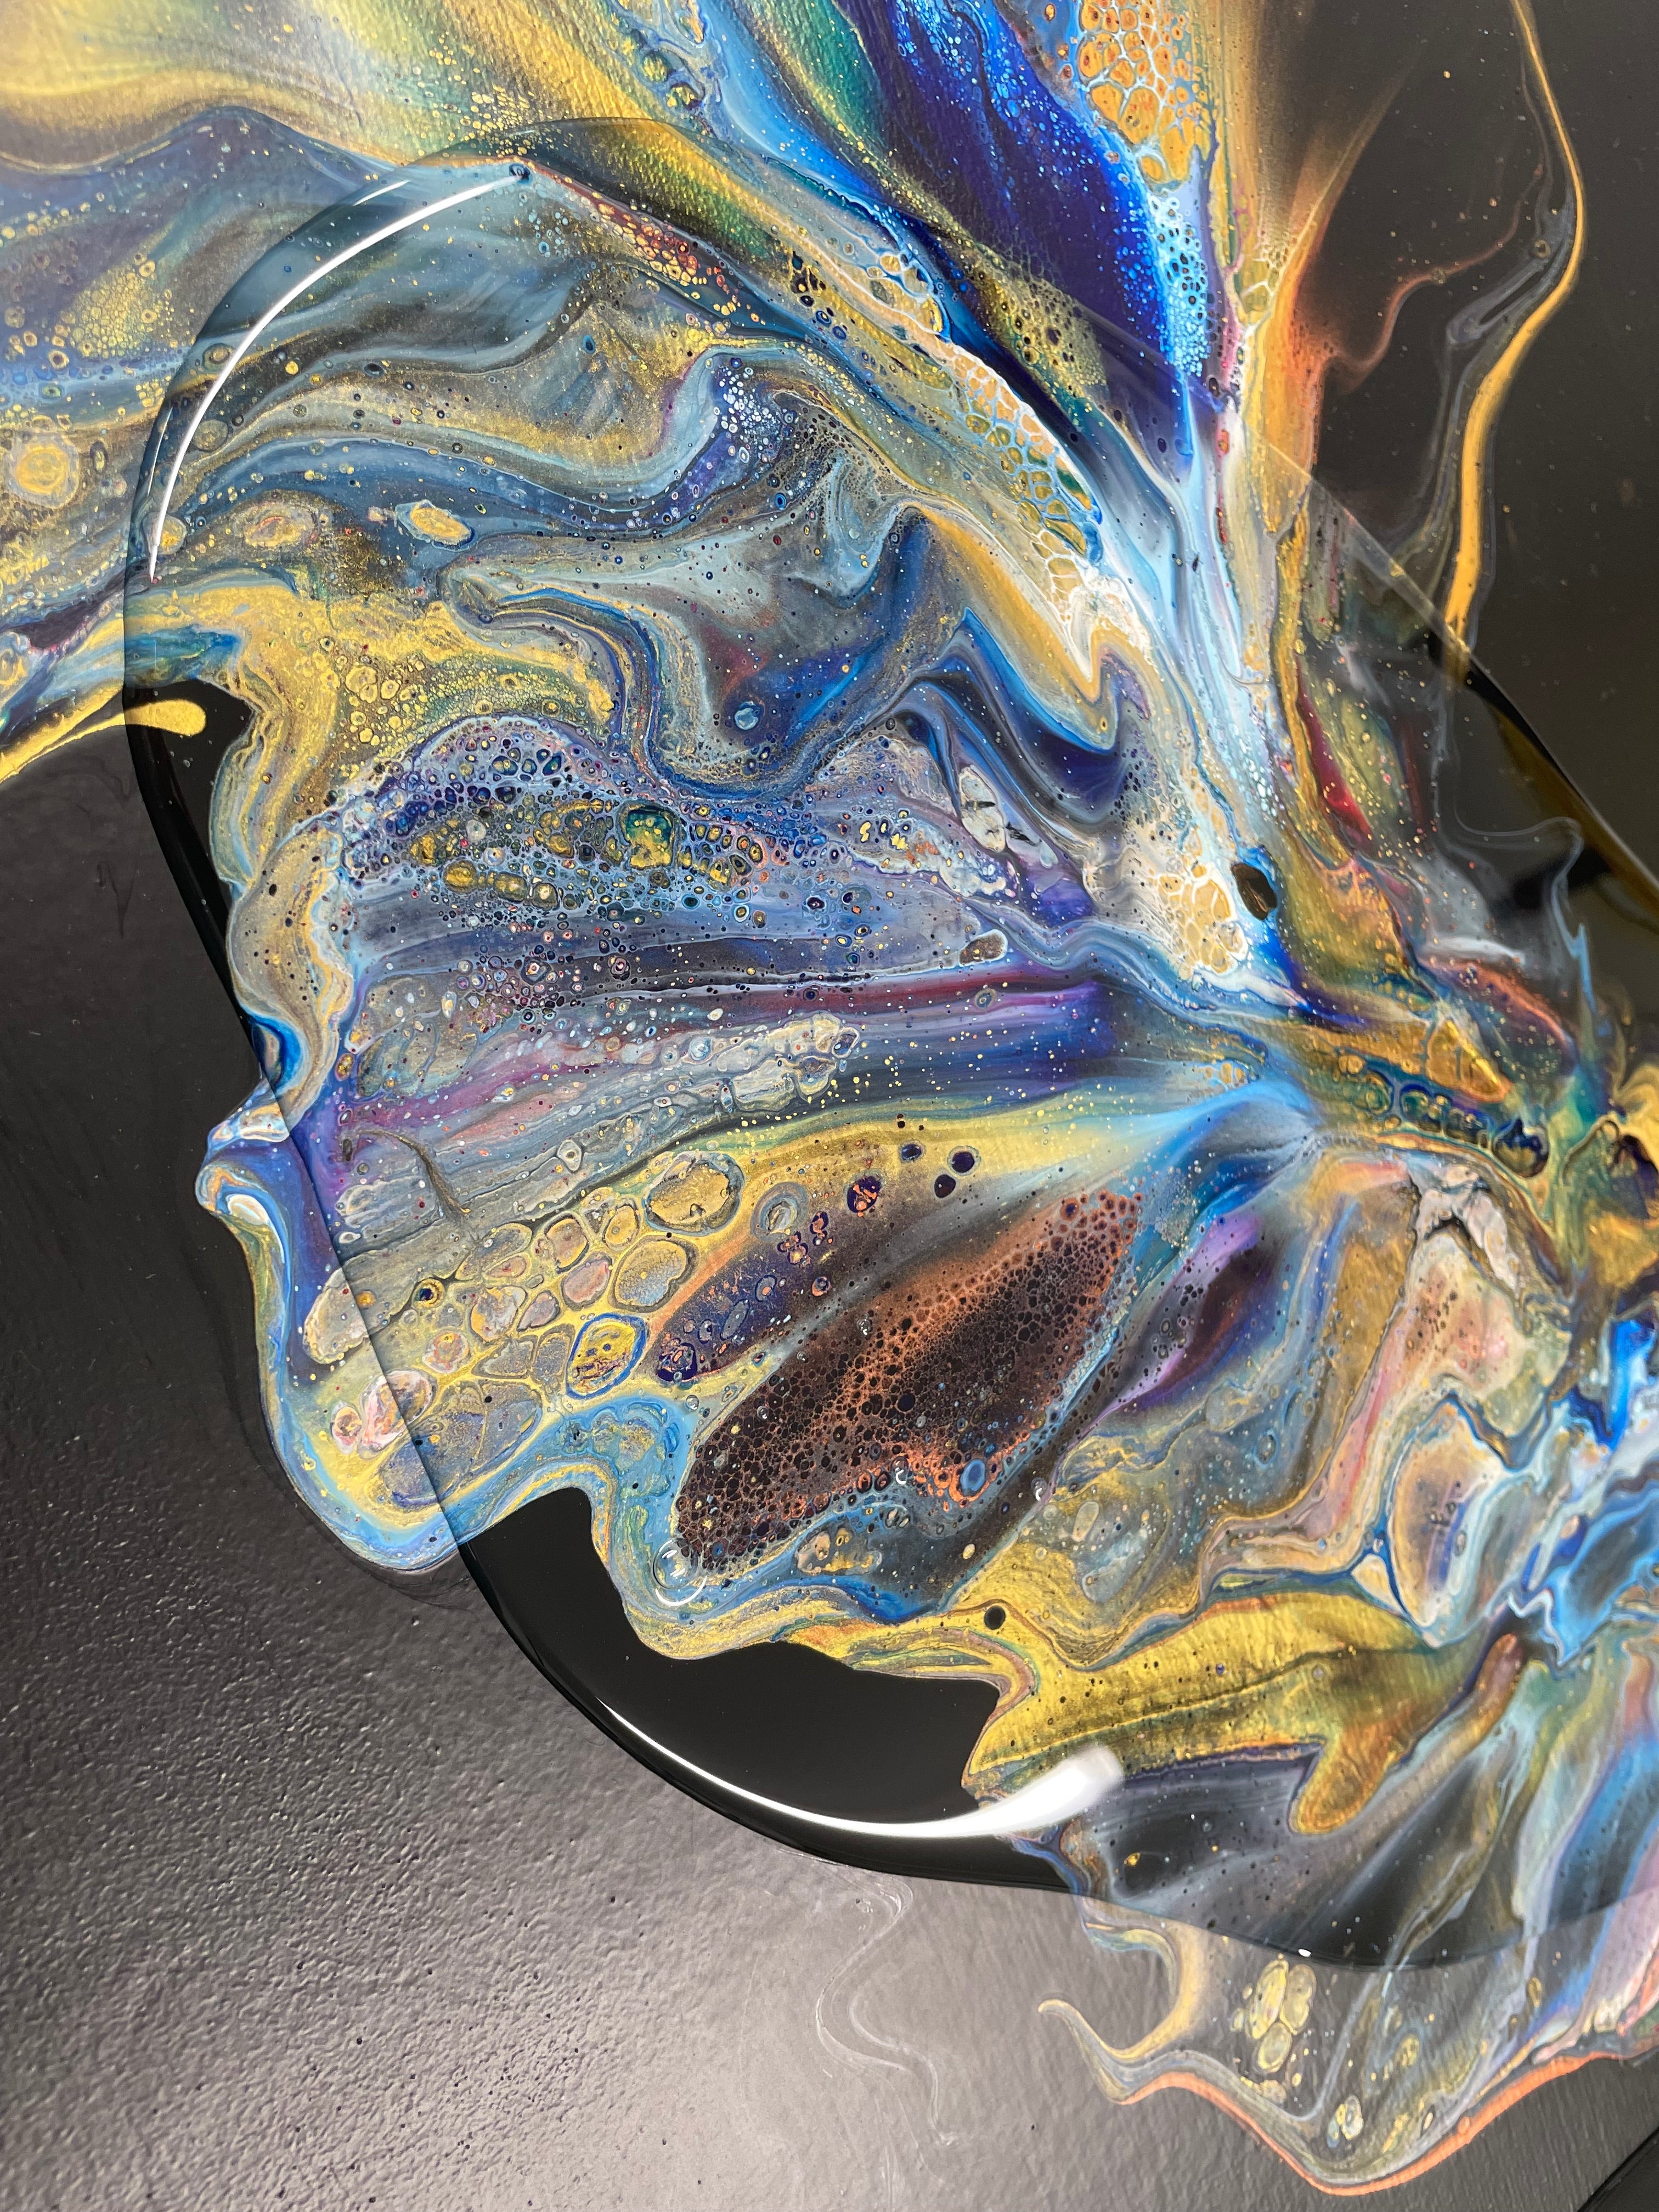
Resin art is known for its high gloss finish, created by layering multiple coats of either clear or pigmented resin, with each layer adding more depth and dimension to the overall piece. Depending on the artist's vision, finished resin art can range from simple and elegant to complex and multi-layered.
Resin should be poured in thin layers, but you can achieve a thicker coat by applying multiple layers, one at a time. Doing so provides ample opportunity to create depth by incorporating materials between layers. For example, you can embed objects such as leaves, shells, crystals, glass, paper, or photographs between resin coats. You can apply gold leaf or paint directly onto a cured resin layer. You can use tinted resin to create beautiful swirls, marbled patterns, cells and lacing, or ocean art. You can make geode art by embedding crystals in resin layers tinted with mica pigments and glitter. The options are limitless for those who wish to experiment with this medium!
While epoxy resin is mainly used for decorative purposes, such as wall art, you can also use resin to create functional artwork. For example, you'll find many resin art pieces being used as coasters, trinket dishes, and serving trays.


What is An Acrylic Pour?
Acrylic pouring (also known as fluid art or Dutch Pouring) is a process that involves pouring diluted acrylic paint onto a surface to create an abstract design. The artist begins by mixing acrylic paint, water, and a pouring medium, then applying the mixture to create marbled swirls of color on canvas, wood, or glass.
Once poured, the paint flows freely, creating fascinating patterns as it spreads out. The fluid acrylics create a beautiful marbled effect unique to this medium but do not dry to a high-shine finish.
See our tutorial on how to create a Dutch Pour painting.


The Difference Between the Two Techniques
Resin art and acrylic pour are both fluid art techniques, but they differ in terms of execution and final product. Here are some of the key differences:
Medium
To create a resin fluid art piece, it is essential to use a good quality epoxy resin formulated for artwork. There are two reasons for this. First, resin made for art has a medium viscosity ideal for fluid art. It’s honey-like consistency is thick enough that it won’t run off the edges of the surface you’re applying it to, and it will hold a design without the colors running together and becoming a muddy mess. Second, resin for art is intended for in-home use: look for a high-quality resin brand that clearly states it is non-toxic, has a low odor, and is free of VOCs and solvents.
Read more about ArtResin's safety in our blog ArtResin Is Safe For Home Use.

For an acrylic pour, you need acrylic paint, water, and a pouring medium to help thin out the paint and make it pourable. You can buy pouring medium at an art supply store or prepare your own pouring medium with white PVC glue. The pouring medium also prevents the paint from cracking or drying too quickly, which is essential for achieving a marbled effect.

Processing Time
Resin art is simple but requires some set up before you get started. Epoxy resin comes in two parts, a resin, and a hardener. When the two parts are measured equally and mixed thoroughly, a chemical reaction is prompted that transforms the mixture from a liquid to a solid. For best results, follow the label instructions accurately to ensure the resin cures as expected. Once the resin is mixed, pour it into small, individual cups, adding the colorant of your choice to each cup. Once mixed, you have about 45 minutes to pour the resin before it gets too thick to work with.

The beauty of an acrylic pour is that you can prepare your paint colors ahead of time - once you're ready to create, the process is simply a matter of pouring onto the canvas. You can use different techniques to apply your paint: create a random design by layering different colors into one cup, flipping it onto the canvas, then lifting the cup to release the paint. You can also pour individual colors onto the surface, tilting the canvas from side to side to blend them organically. Or, you can be a little more strategic by pouring a little of each paint mixture on the canvas and blowing the colors together with a heat gun to create a pattern.

Surface
When creating any fluid art, it’s important that you pour onto a sturdy, flat surface that has been propped up and off the work surface. Use a level to ensure the piece is perfectly horizontal: a flat surface encourages the paint or resin to spread evenly and prevents gravity from distorting your design. You can buy panels in several styles and sizes at any art supply store. If the panel is not primed, apply a coat of white acrylic paint or gesso first.
Epoxy resin is heavy: for this reason, it’s best to pour resin onto a wooden panel or a canvas board, both of which have the strength to support its weight. You may find that a stretched canvas panel will sag in the middle under the weight of the resin, causing it to pool in the center.

An acrylic pour, on the other hand, can be done on a stretched canvas. However, if you plan to add a glossy top coat of epoxy resin to your dried acrylic pour, it’s best to use a wood panel.

Color Palette
Use a wide range of colors, from bright and bold to subtle and subdued, but choose colors that blend well and won't become muddy when mixed. For example, blue and yellow blend to create green, whereas blue and orange will make brown. An easy way to create interest is by layering different shades and opacities of the same color, or layering solids and metallics: whites, golds and blues work particularly well for this. When it comes to the color choices for your flow art project, the sky's the limit!

Artists typically create resin fluid art using several shades of tinted resin, either translucent or opaque pigments, or a blend of both. Translucent resin helps to create depth as it allows light to pass through to create a 3D effect. On the other hand, opaque resin will give your piece a more solid look. You can use mica powder to give resin a shimmery effect! For best results, use a highly pigmented colorant designed specifically for resin. Start with less than you think you need and add more as necessary. Be aware that if you add more than 6% colorant, the resin may not cure properly.
To learn which resin colorants work best, please see our blog How To Color Clear Epoxy Resin.
A benefit to pouring with acrylic paints is that they are easy to find in every shade, from primary colors to neons to metallics. Since every brand is formulated differently, it's a good idea to use paints from a variety of brands: as the colors blend, the different formulas will react and create interesting effects such as cells and lacing.

Be aware that acrylic paint typically dries with a matte finish, which may result in a muted effect overall: many artists like to top their dried acrylic pours with a coat of clear, glossy resin to restore the vibrancy and shine.
Curing Time
If you're working with resin, you'll need to allow sufficient time for the piece to cure before it is dry all the way through. The curing process can take from 24 to 48 hours to fully harden. An acrylic pour, on the other hand, can take much longer to fully cure. Once the paint has been applied, it will take 24-72 hours until it is touch dry and 14-30 days to dry all the way through.
Heat, humidity, and air circulation can all affect the drying time, so keep these factors in mind when working with this medium. Whether you're working with resin or acrylic, it's always best to protect your wet piece with a dust cover to prevent dust, hair floating in the air from landing in your work.

Durability
When it comes to longevity, resin art is in a league of its own. Resin art is one of the most durable art forms you can create and once cured, it is completely water-resistant and can withstand a fair amount of wear and tear.
Acrylic pouring paint is also a durable medium, but not as resistant as resin: the paint can chip or crack over time. For this reason, a clear coat of epoxy resin is an easy way to seal and protect an acrylic pour for the long term.

Temperature resistance
The best temperature to store both resin art and acrylic pour paintings is at room temperature. When cured resin is exposed to temperatures above 120F or 50C (for example, in a hot car) it can soften. It will harden up again once it cools down, but it could warp while it’s soft and become forever distorted.
To learn more about high temperatures and resin, please see our blog How Does Hot Weather Affect Resin?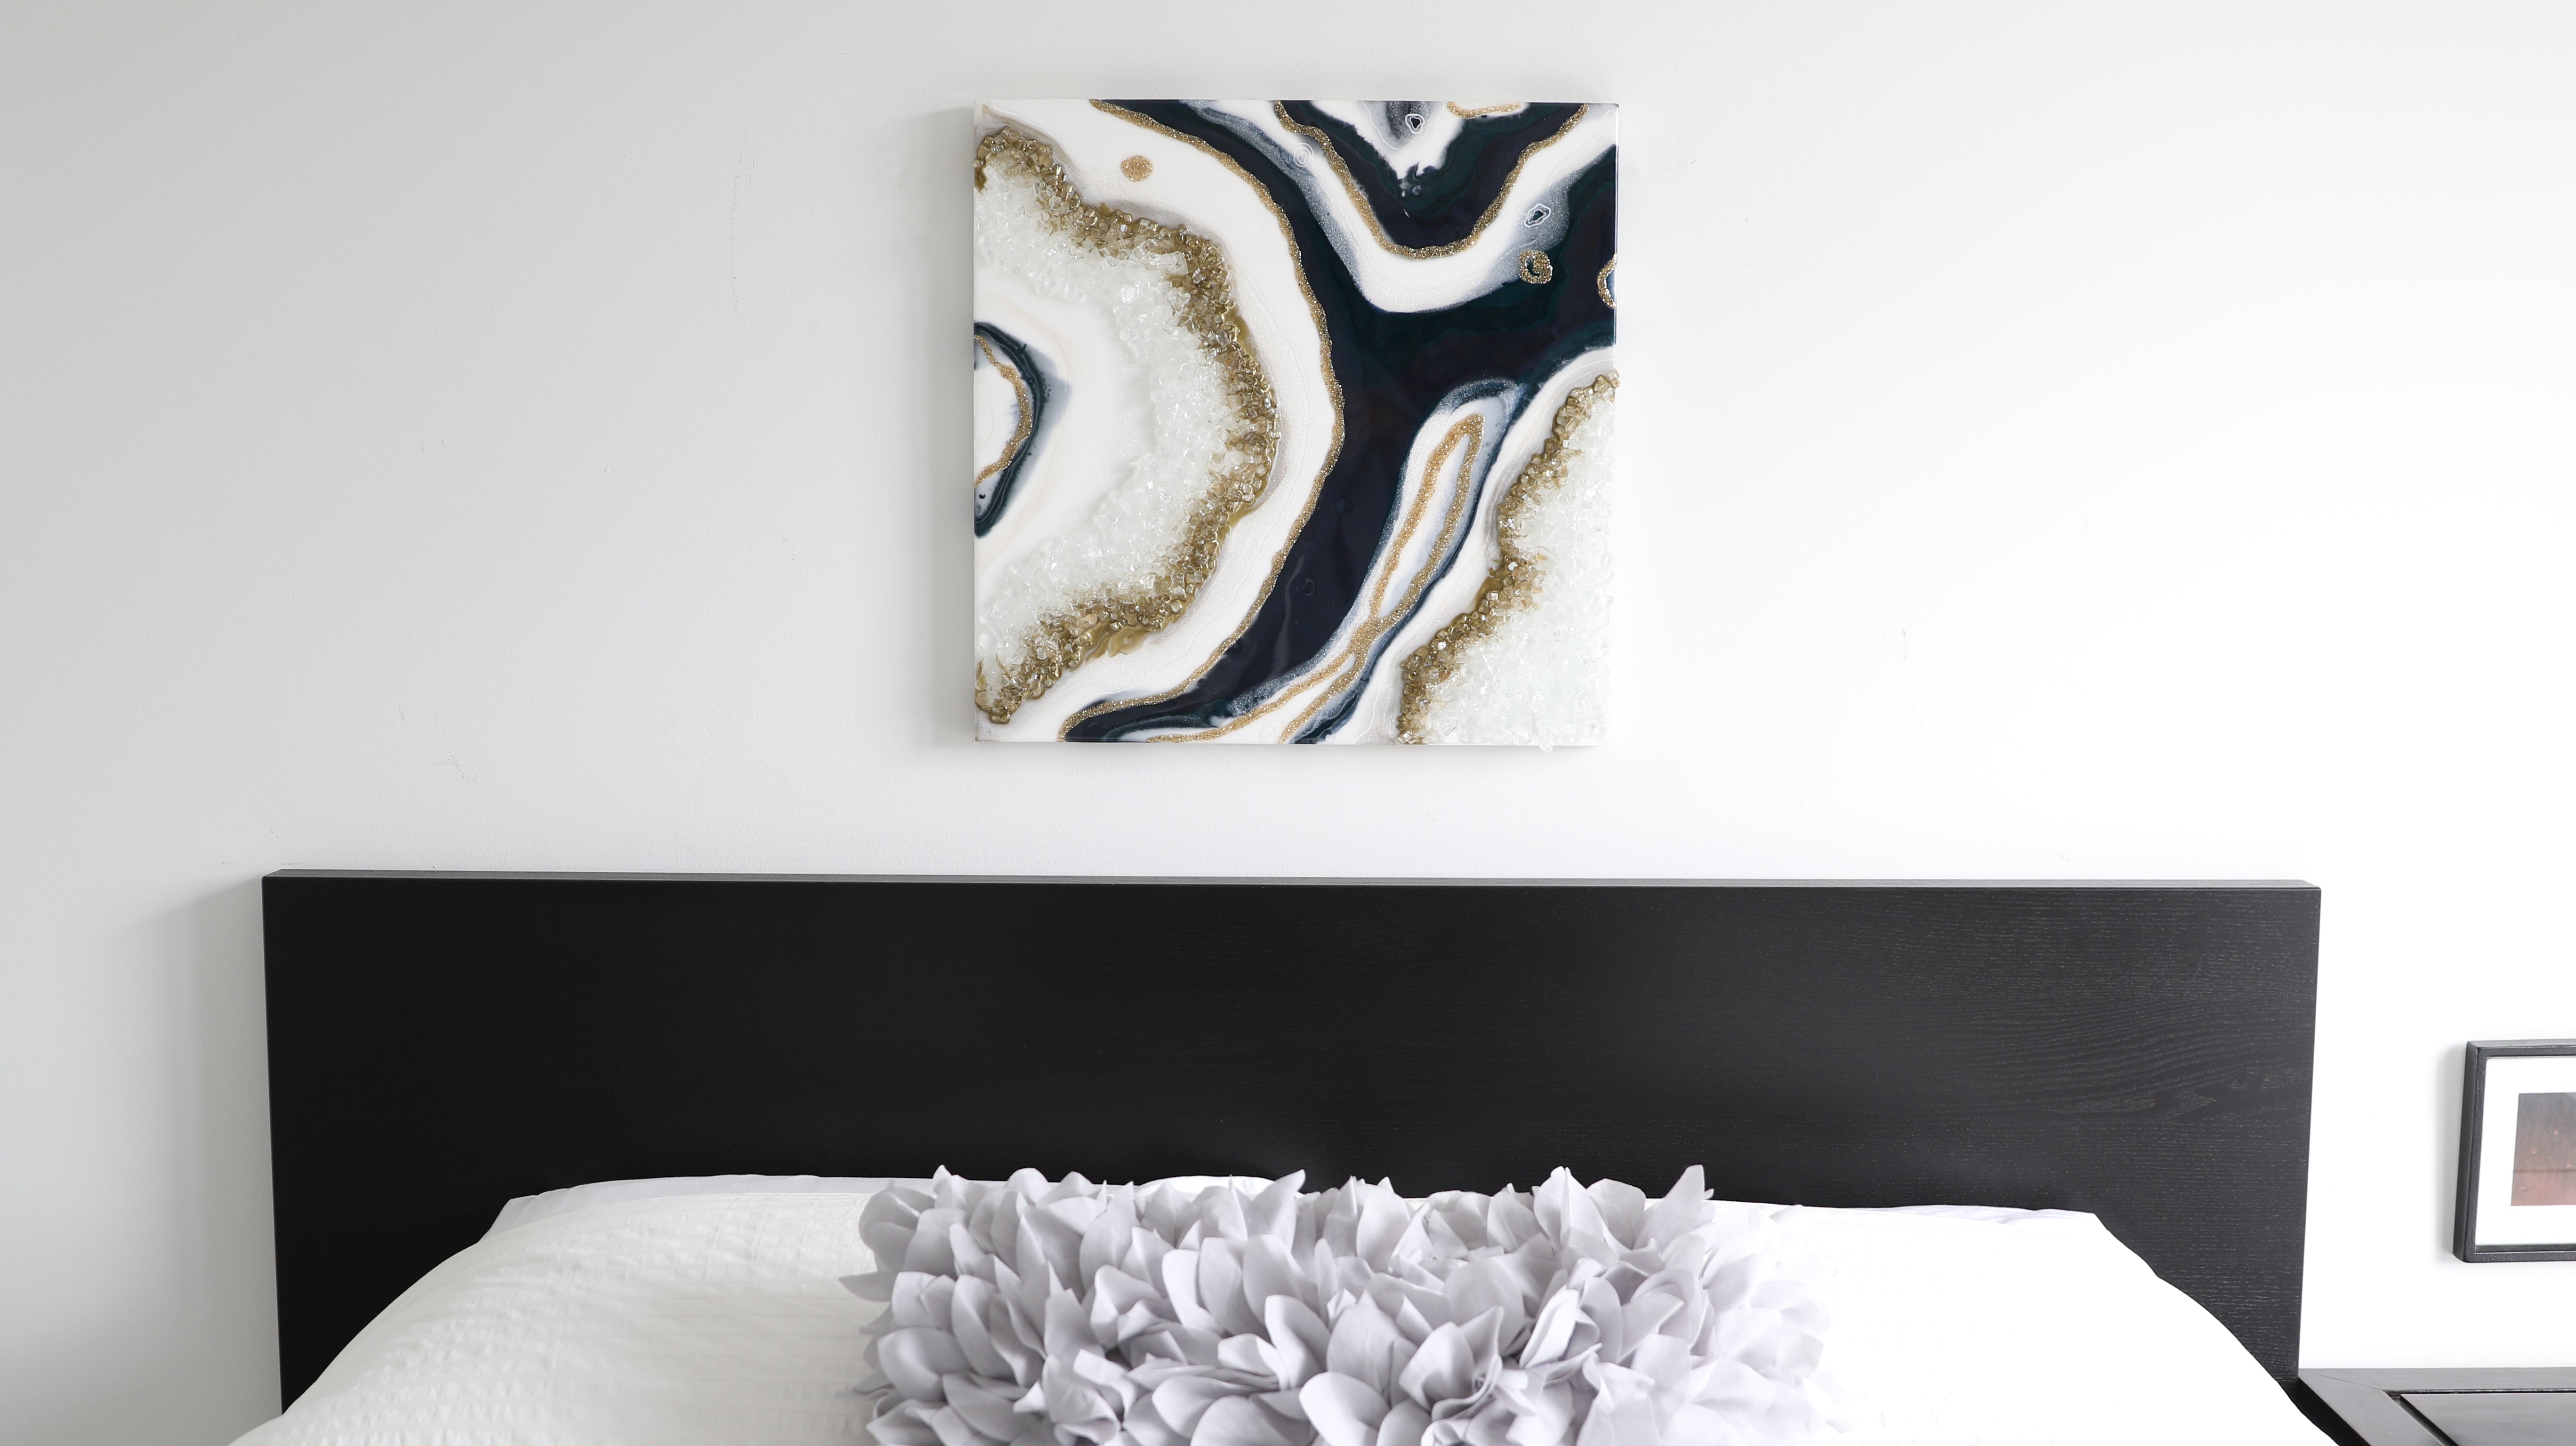
On the other hand, acrylic paintings are less affected by heat and more prone to damage by exposure to the cold. Freezing temperatures can cause acrylic paint to become brittle and crack.
Keep in mind that UV light is powerful and damaging. Both acrylic pour paintings and resin art should be kept out of direct sunlight to prolong their life.
Learn how ArtResin helps protect against UV damage in our blog What Is HALS and UV Stabilization?

How Much Do They Cost?
To DIY resin art, the epoxy resin and colorants will need to be purchased separately. Many resin brands offer small, introductory kits: for example, you can find a high-quality epoxy resin ArtResin Epoxy Resin starting at $40 per kit, which will cover 4 square feet. As you get more comfortable, you’ll find the larger volume kits are more cost-effective. The colorants may be an investment initially, but they will last for years since you only use a small amount at a time.
You’ll also need basic supplies such as gloves, plastic measuring cups, stir sticks, and wooden panels, but luckily these can be found inexpensively online or at the dollar store. To get started with resin art, you can expect to spend approximately $50-60 on supplies.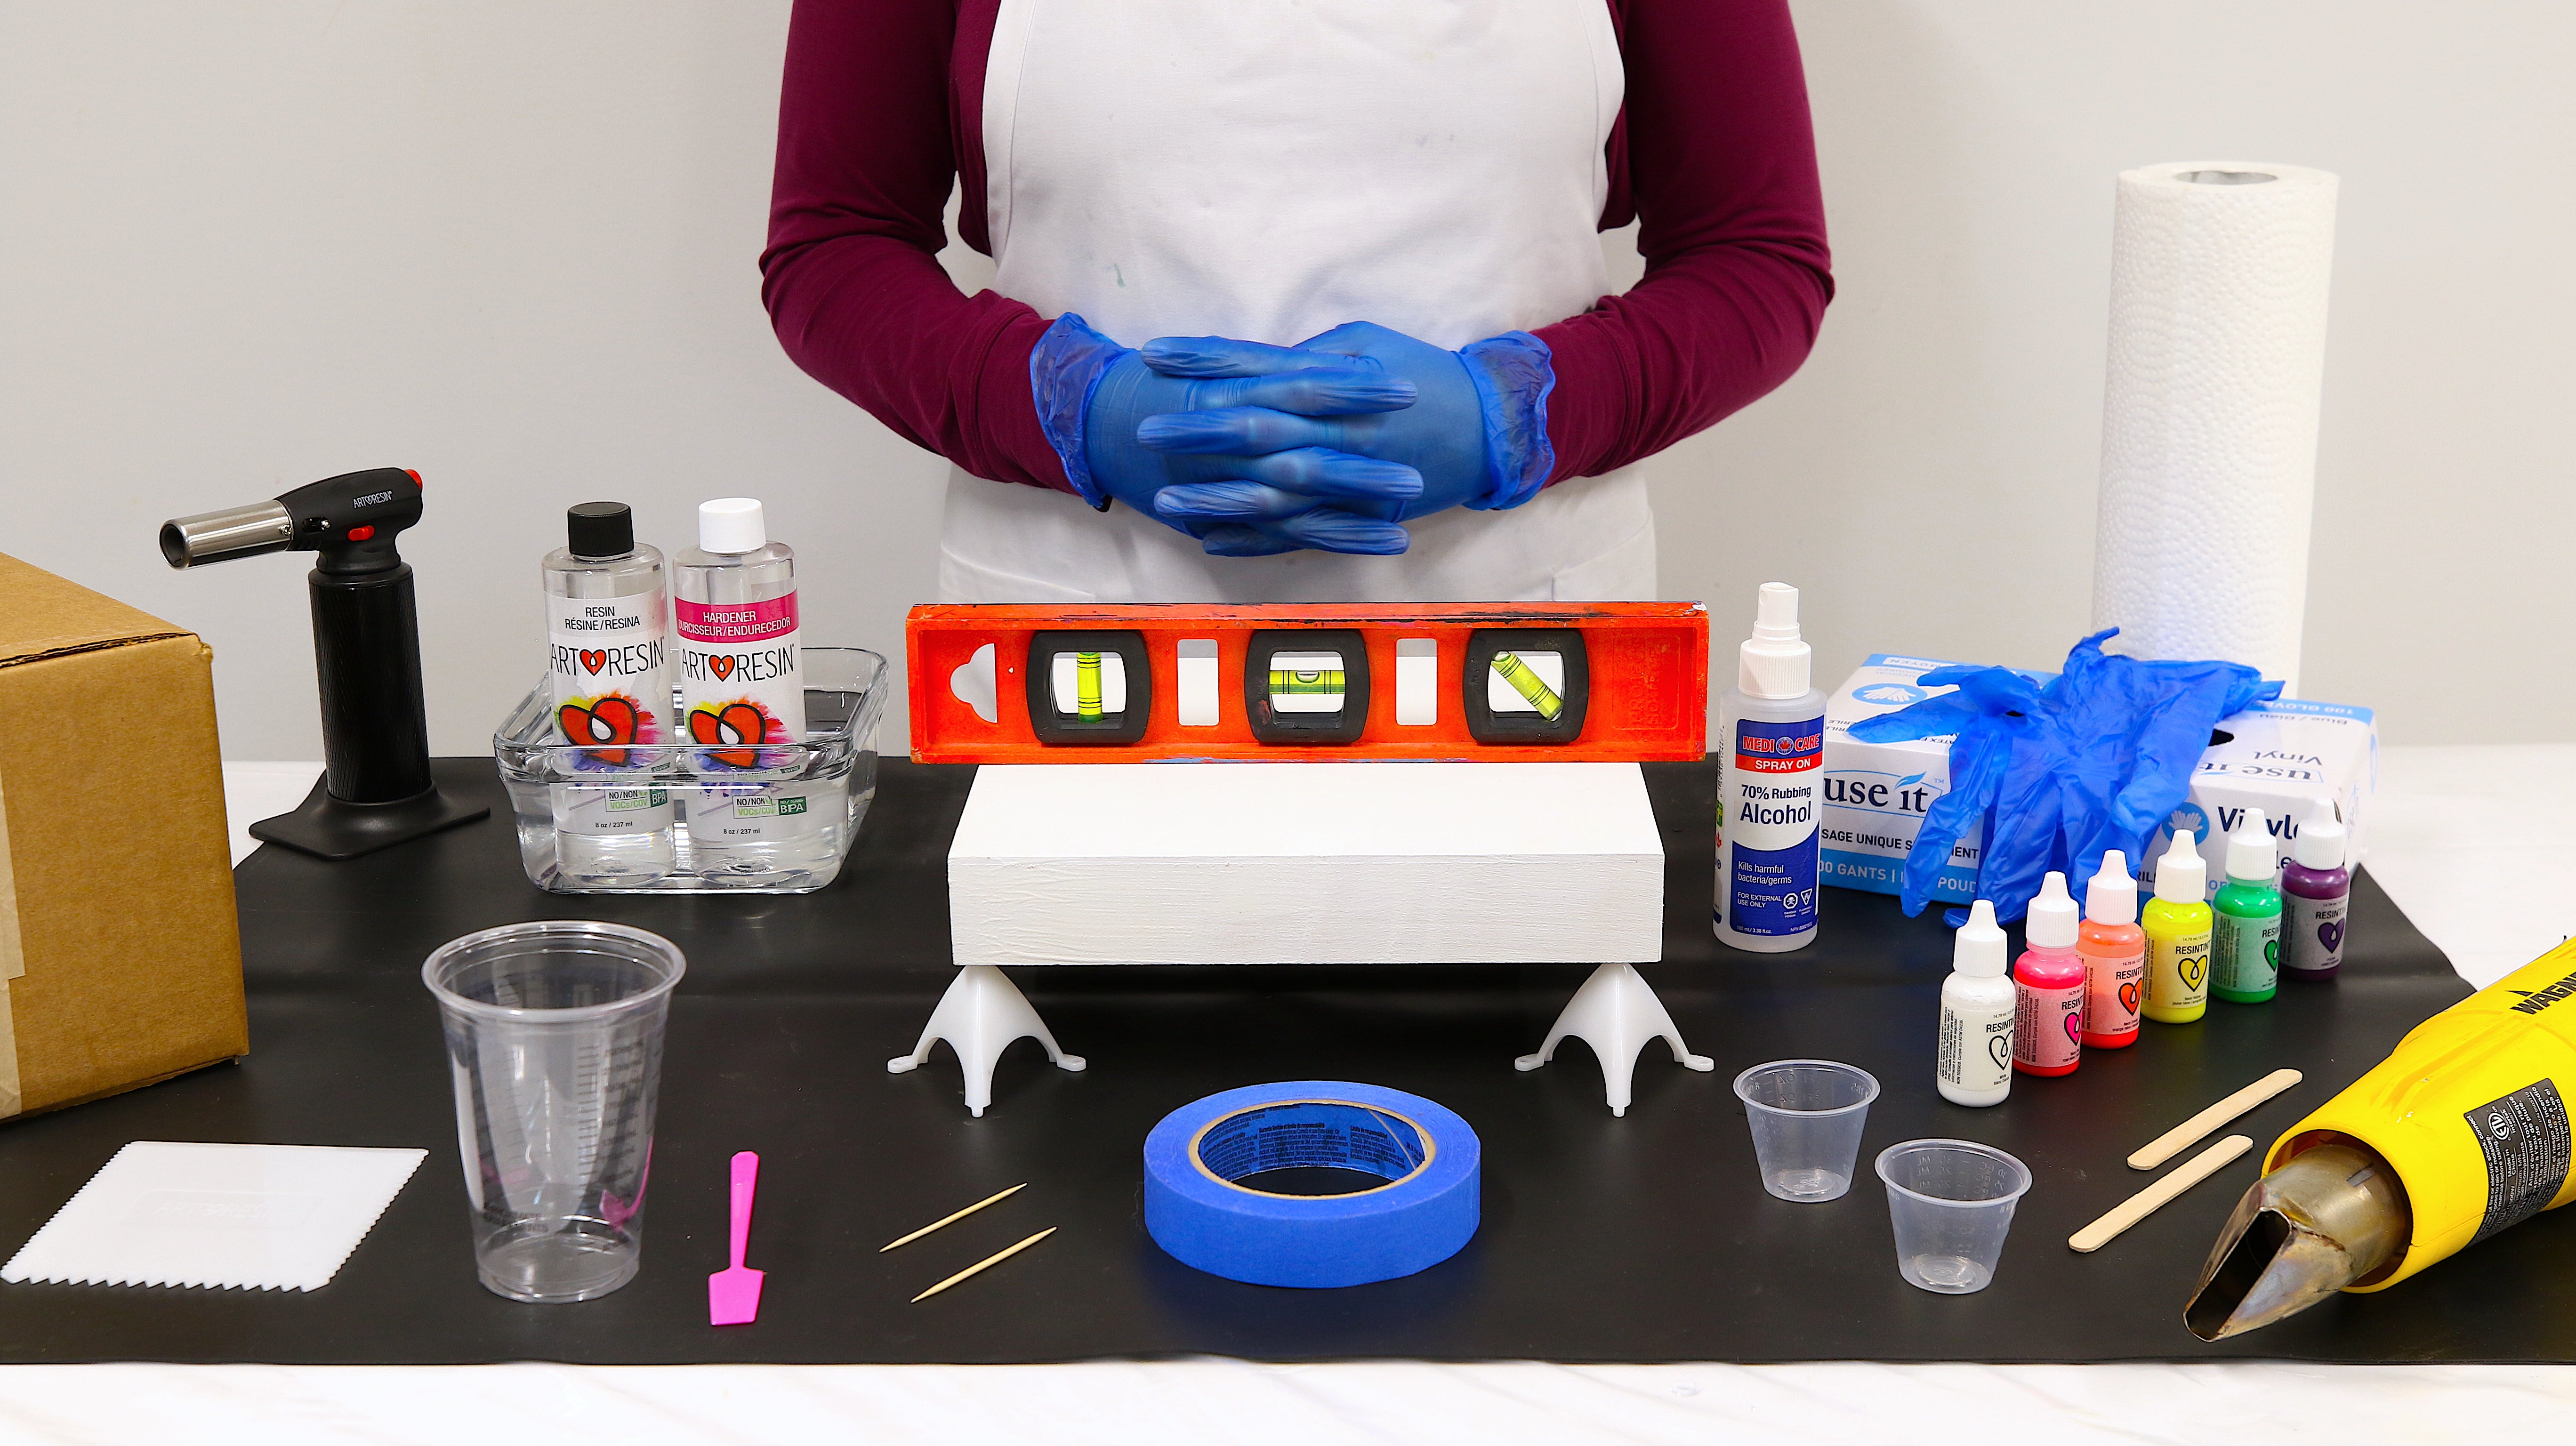
While acrylic pouring is cheaper overall, the cost can still add up if you're using high-end paints and prepared pouring mediums. If you're a DIYer, you can prepare your own pouring medium to keep costs down and start with a small palette of individual paint colors that you can build on over time.
In addition to an assortment of paint and a pouring medium, acrylic paint pouring will also require a canvas or wood panel, plastic cups, a blow dryer and heat gun or torch.

Get Creative and Have Fun with Your Art
Resin art and acrylic pours are both fun, creative projects. Whether you're a beginner or a seasoned artist, these techniques are easy to learn, and the results are stunning. So, what are you waiting for? Start exploring and see where your creativity takes you!
Are you new in resin art? Read our guides below to help you get started:
- Resin Art Beginners's Guide
- Butane vs Propane Torch
- Top Resin Mistakes Made By Beginners
- What Is The Best Resin For Beginners
- Top 10 Easy Resin Projects For Beginners
- How to Resin On Canvas For Beginners
- Resin Materials For Beginners
- What Resin Art Sells The Best?
- Casting Resin Vs Epoxy Resin
- How To Make Money As An Artist
ArtResin: The Original Epoxy For Resin Art.
