What Is Dutch Pour Painting?
Dutch Pour Painting is a fluid art technique where acrylic paint, mixed with a pouring medium, is poured onto a panel in various colors, and then blown out across the surface using a hairdryer. As the colors spread and blend across the panel, they create dynamic ribbons of color and beautiful, abstract patterns and designs.
The Dutch Pour technique is so named as a nod to Dutch artist Rinske Douna, who helped popularize it.

Tutorial 1 - Dutch Pour Abstract
Ellice Yang is a contemporary abstract artist from Toronto, Canada, known for her gorgeous Dutch Pour paintings. She uses the color and movement typical of this of the Dutch Pour technique to explore the ideas of harmony and balance. Ellice loves finishing her paintings with a glossy resin finish to further enhance the depth and vibrancy in her work.
In this tutorial, Ellice walks you through how to create your own Dutch Pour painting, sharing her favorite tools, tips, and techniques along the way.

Watch the full video tutorial:
What Do You Need For A Dutch Pour?
- Plastic liner to protect your work surface
- Disposable gloves
- Wood artist's panel: Ellice used a 24 x 36"
- Acrylic paint in Black, White, Magenta, Red Violet, Sky blue, Winsor Blue, Prussian Blue, Light, Gold, Dark Gold, Bronze
- Distilled water to mix your paints
- Scale
- Plastic mixing cups & stir sticks, 1 per paint color
- Squeeze bottles, 1 per paint color (optional)
- Tabletop spinner or a Lazy Susan (optional)
- Level
- Hair Dryer with a cool setting
- ArtResin
- Graduated measuring cup
- Stir stick
- Heat gun or torch
- Dust cover
Step 1: How To Mix Dutch Pour Paint

Ellice recommends a 2:3 ratio of water to paint. Sticking to this ratio will help you achieve the ideal consistency for your Dutch Pours or fluid art.
💡 TIP: If you’re working with thicker or more opaque paint pigments, you may need to add a little more water. Ellice advises against adding more than 30-50% water, as too much can weaken the paint's binding.
Place a plastic cup and mixing stick on a digital scale and set it to zero.

Add 30 ml of good quality paint.
To determine how much water to add: multiply the paint amount by 0.7.
For example: 30 ml of paint x 0.7 = 21 ml of water, giving you a total of 51 ml of paint mixture.


Mix thoroughly. To check the consistency, let the paint drip off the popsicle stick and watch how the trace in the cup disappears—it should vanish in about 2-3 seconds for the right consistency.


Step 2: Test The Paint Consistency
Before you begin your Dutch Pour, it’s important to test the paint consistency to ensure all your colors will flow smoothly. It's most important for the base paint (in this case, the black) to have the perfect flow, as it will help carry the other colors when they’re blown out.
On a white piece of paper, drop a small blob of each paint color.

Tilt the paper to see how the paint moves. In this test, Ellice noticed that the white paint is the thinnest and runs freely, while the red violet, gold, and black will need a little more water.


If needed, add water and stir or shake the paint thoroughly. After adjusting, recheck the consistency to make sure all the colors flow evenly.


Step 3: Prepare The Panel
Ellice prefers working on a wood panel with a 2" gallery depth. It offers a smooth, level surface that’s sturdy enough to support the weight of the resin and has clean, crisp edges for a modern look. Ellice starts by painting the panel white, using gesso, and allowing it to dry thoroughly. She then applies painter’s tape to the bottom to catch any drips.

Next, place the panel on a spinner or Lazy Susan to easily access it from all angles, ensuring all the edges are covered. Make sure the canvas is level so the paint doesn’t run off as it dries.
💡 TIP: Ellice uses this spinner designed by artist Jessica Winterstrom.

Ellice prefers to stand on a step stool while she works over the canvas to provide her with a better angle.
Next, pour the black base paint over the panel. Use a blow dryer on the cool setting to spread the paint evenly to the edges. As you blow the paint out, you’ll get a feel for the consistency of the base by how well it flows. You’ll know you’ve got it right if it spreads easily.
💡 TIP: Always use a hair dryer with a cool setting—heat can alter the paint’s consistency.


Touch up the edges with your gloved hand, spinning the panel as needed to reach every side.

Finally, use a torch to remove any bubbles.


Step 4: Layer The Paint
As you start layering, keep your composition in mind—think about the shape of your design and the flow you want your final piece to have. It’s also important to layer colors that work well together and won’t turn muddy when blended.
Ellice begins with Prussian Blue, creating 2 lines in an arched shape across the panel.

Next, she adds 3 lines of Red Violet on top, which pairs beautifully with Prussian Blue. The two will mix to create a rich purple where they overlap.

At this point, Ellice recommends adding a metallic color. She chooses copper, which brings a striking contrast and enhances cell details when blended with other colors.

Then, she layers on Titanium White. Since it's opaque, a small amount will go a long way.

Ellice adds a generous amount of Winsor Blue, especially at the edges of the panel.

Following that, she applies Sky Blue, which complements Winsor Blue nicely.

She adds a bit more Titanium White, then introduces two golds: a generous amount of darker gold will sink to the bottom to form cells. She then adds a lighter gold on top, finishing off with a few more drops of white.


After you’ve applied the paint, flood the area around your colors with your base paint. This will help the colors blow out smoothly when you use the blow dryer. It's helpful to have an idea of how you where you want the paint to flow so you can apply the extra base in the right spots.


Torch out bubbles with a quick pass of the torch.

✅
Step 5: Blow The Paint Out
With your hair dryer set on both the cool and low setting, blow gently over the base paint, directing the paint towards the edge of the colored arch.


Torch one more time.

Next, it’s time to blow the paint out! The way you angle the blow dryer makes a difference: if you hold it horizontally and blow straight across, you’ll get a smoother, continuous flow. For a fanned-out look, tilt the dryer to a more perpendicular angle—or try a mix of both.


Once the paint is spread out, take a look at what you like or want to tweak.

Ellice loves how the colors pop against the black background but feels the edges could use a bit more definition. She dips her finger into some gold paint, lightly dragging it to create delicate lines that fade away.
If the lines look too thick, a quick breath can soften them so they don't feel forced.


If you notice any areas where the paint feels too heavy, Ellice suggests blowing on it or using a palette knife to pull it out and thin it down.

Now it’s time to add some details with the torch. Torching specific areas will break up the surface, helping to create cells and soften spots where the color feels too heavy. As you torch, you’ll notice cells forming—keep going if you want more, or keep it subtle, depending on your style. Once you’re happy with how it looks, carefully cover your piece and let it dry for 3-4 weeks before applying the resin.


Step 6: Apply The Resin
After 3-4 weeks, the paint will be fully dry, leaving the surface with a flat texture and a matte finish. Once you apply the resin, it will instantly enhance the colors and dimension, bringing your artwork to life!
To prep the painting for resin, Ellice varnishes the edges and lets them dry. She then tapes off the edges with high-quality painter's tape to keep them clean.

Next, she prepares the ArtResin.
If you're unsure how much ArtResin to use, enter your panel’s dimensions into our Resin Calculator. For example, Ellice's 24 x 36" panel needs 15 oz of resin and 15 oz of hardener for a total of 30 oz.

Wearing gloves, measure equal amounts of resin and hardener into a graduated mixing cup. Stir well for 3 minutes, making sure to scrape the sides and bottom of the container to ensure thorough blending.


To ensure the resin is completely mixed, Ellice likes to transfer the resin into a clean cup and stir a bit more.

When pouring, Ellice recommends starting in the center of the panel, pouring as close to the surface as possible to minimize air bubbles. She saves a little resin in the mixing cup for touch-ups.

Ellice spreads the resin out to the edges with a flat-edged spreader.

With the remaining resin, she touches up any areas that need look a bit thin or have bare spots. For Ellice, this is typically the edges.

Next torch out air bubbles.

Look out for bits of dust particles in the light, using a toothpick to fish them out.

Torch again after 5-10 minutes.
Cover the piece with a dust cover and let it cure for 24 hours.


Once cured, carefully remove the dust cover and the tape from the edges.

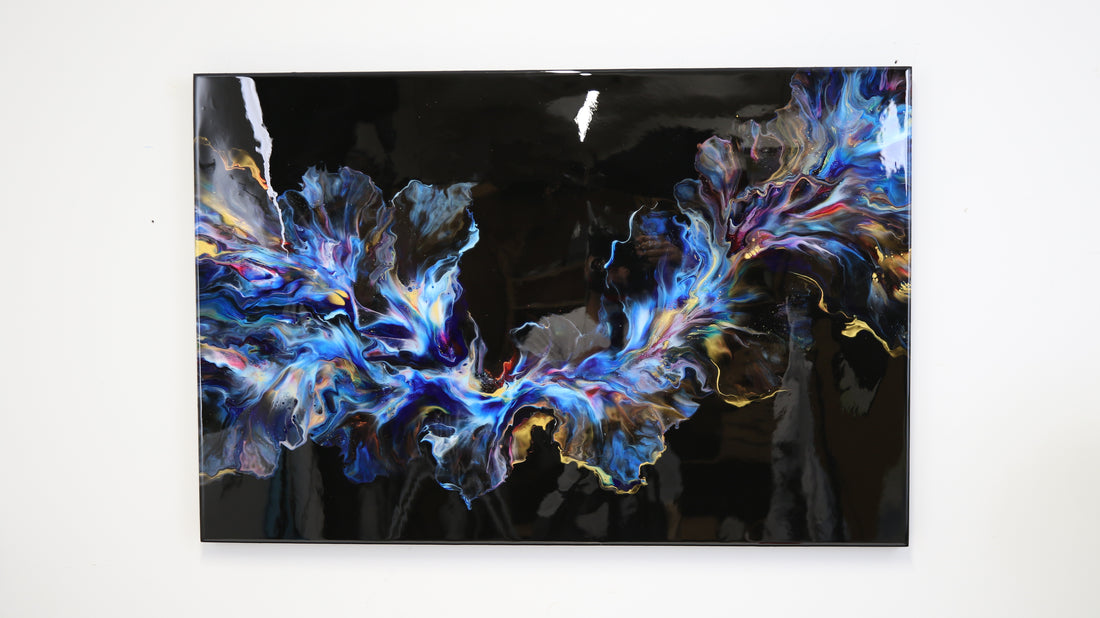
And finally, the best part ... the reveal!! ArtResin gives paintings a professional, glossy finish that makes the colors look rich and vibrant!
A huge thanks to Ellice for sharing her techniques and tips with us!
To see more of Ellice's art:
Visit her website: www.elliceyangart.com
Follow her on Instagram: @elliceyang_art
Tutorial 2 - Dutch Pour Sunflower
Guest artist Christine Fitzgerald specializes in Dutch Pours and enjoys putting her own creative spin on what she sees in nature. In this blog, Christine demonstrates her most popular fluid art design, a Dutch Pour Sunflower painting, sharing invaluable tips and techniques she has learned along the way.
Watch the full video tutorial:
Sunflowers are a favorite for so many people, so Christine wanted to capture a Dutch Pour sunflower as realistically as she could. She used multiple shades of yellow, in addition to metallic paints, to replicate the depth and dimension you’d see in nature.

Supplies You'll Need:
- 16 x 20 wood panel, painted white
- Liquitex Basics White Acrylic
- Artist Loft Black Acrylic
- 4-5 acrylic paint colors in the palette of your choice. Ideally, half should be metallic. Christine used Artist Loft Copper, Liquitex Basics Primary Yellow, Folk Art Paint Company Color Shift in Deep Yellow, Liquitex Basics Naples Yellow, Liquitex Basics Deep Yellow, and Pebeo Iridescent Gold.
- Pouring medium, like Floetrol, or make your own with white glue and water
- Cups and stir sticks - one per color
- Torch
- Stands to prop your panel up (painter’s pyramids or plastic cups)
- Hairdryer (with the nozzle attachment on)
- Masking tape
- ArtResin Epoxy Resin
- Nitrile gloves
- Measuring Cup
- Mixing Stick
- Spreader
- Plastic drop sheet to line your work surface
- Dust Cover
Explore our resin art tools & supplies!
Step 1: Prepare The Panel & Paint
The day before you intend to pour, paint the wood panel white using acrylic paint or gesso and allow to dry for 24 hours. Line the work surface with a plastic drop sheet or a vinyl shower curtain. Ensure your tools are on hand and easily accessible. Prop the painted panel off of the work surface using painter's pyramids or plastic cups.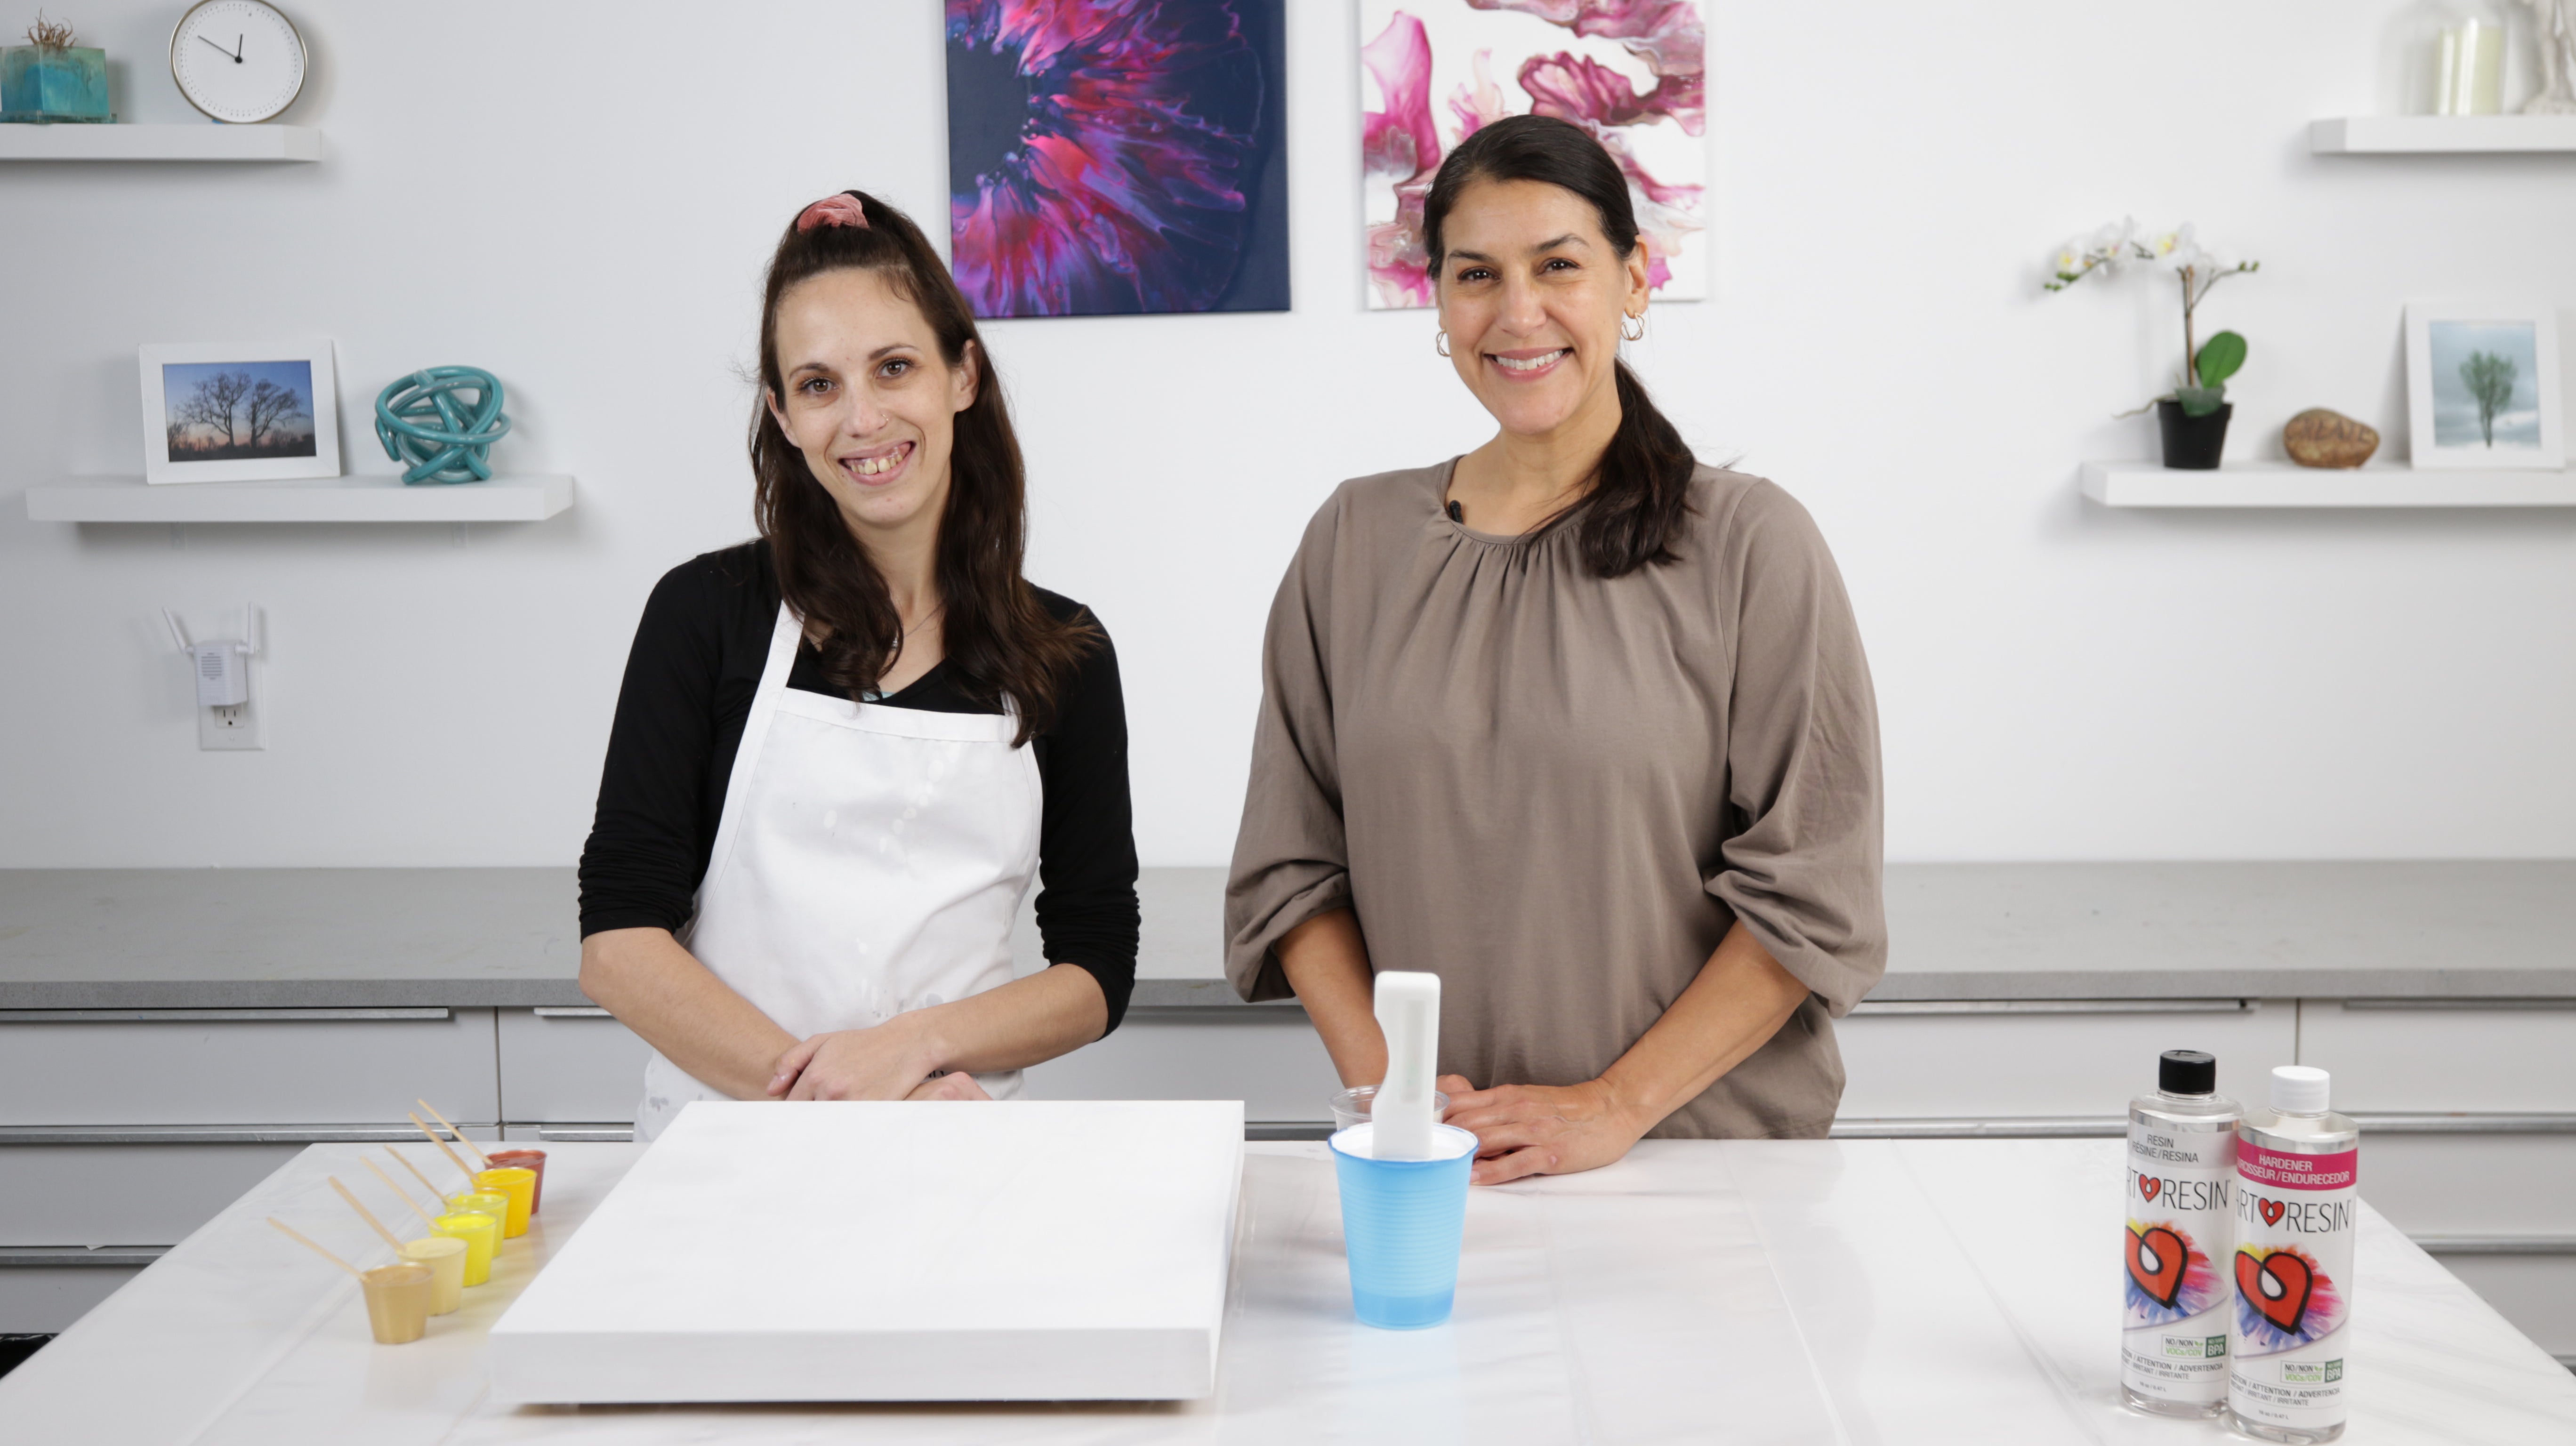
Choose your palette, using 4-6 colors, plus white and black. Christine recommends that half the paint colors should be metallic to provide dimension. You can use store bought metallic paint or add a bit of gold acrylic to your solid acrylic colors to give them some shimmer.
–––––––––––––––––––––––––––––––––––––––––––––––––––––––––––––––––––––––––
A Tip From Christine: Use a variety of brands when choosing your acrylic paints. Each brand has its own unique formula - these different formulas will react with each other to create better cells.
–––––––––––––––––––––––––––––––––––––––––––––––––––––––––––––––––––––––––
Next, prepare the paint by adding the pouring medium. Use a pre-made pouring medium (such as Floetrol) or create your own pouring medium, as Christine does, using white school glue and water. The glue acts as a binder, preventing the water from breaking down the pigment which could diminish the paint’s opacity and vibrancy.
A general guideline is to mix two parts glue, one part paint and enough water as necessary until it’s the consistency of pancake batter. It should be fluid enough to pour and be blown out with the hair dryer. Each brand of acrylic will have a different thickness so the amount of water may vary. Ultimately, all the color blends should end up with the same consistency so that the paint moves at the same rate.

Use large plastic containers to blend each paint color with the pouring medium. Once the paint is a pourable consistency, like batter, then pour each color into small plastic shot glasses. The smaller cups will make it easier to control the amount you pour.

For this project, we prepared approximately 1 oz total of each color blend, approximately 8 oz of black and approximately 16 oz of the white blend.
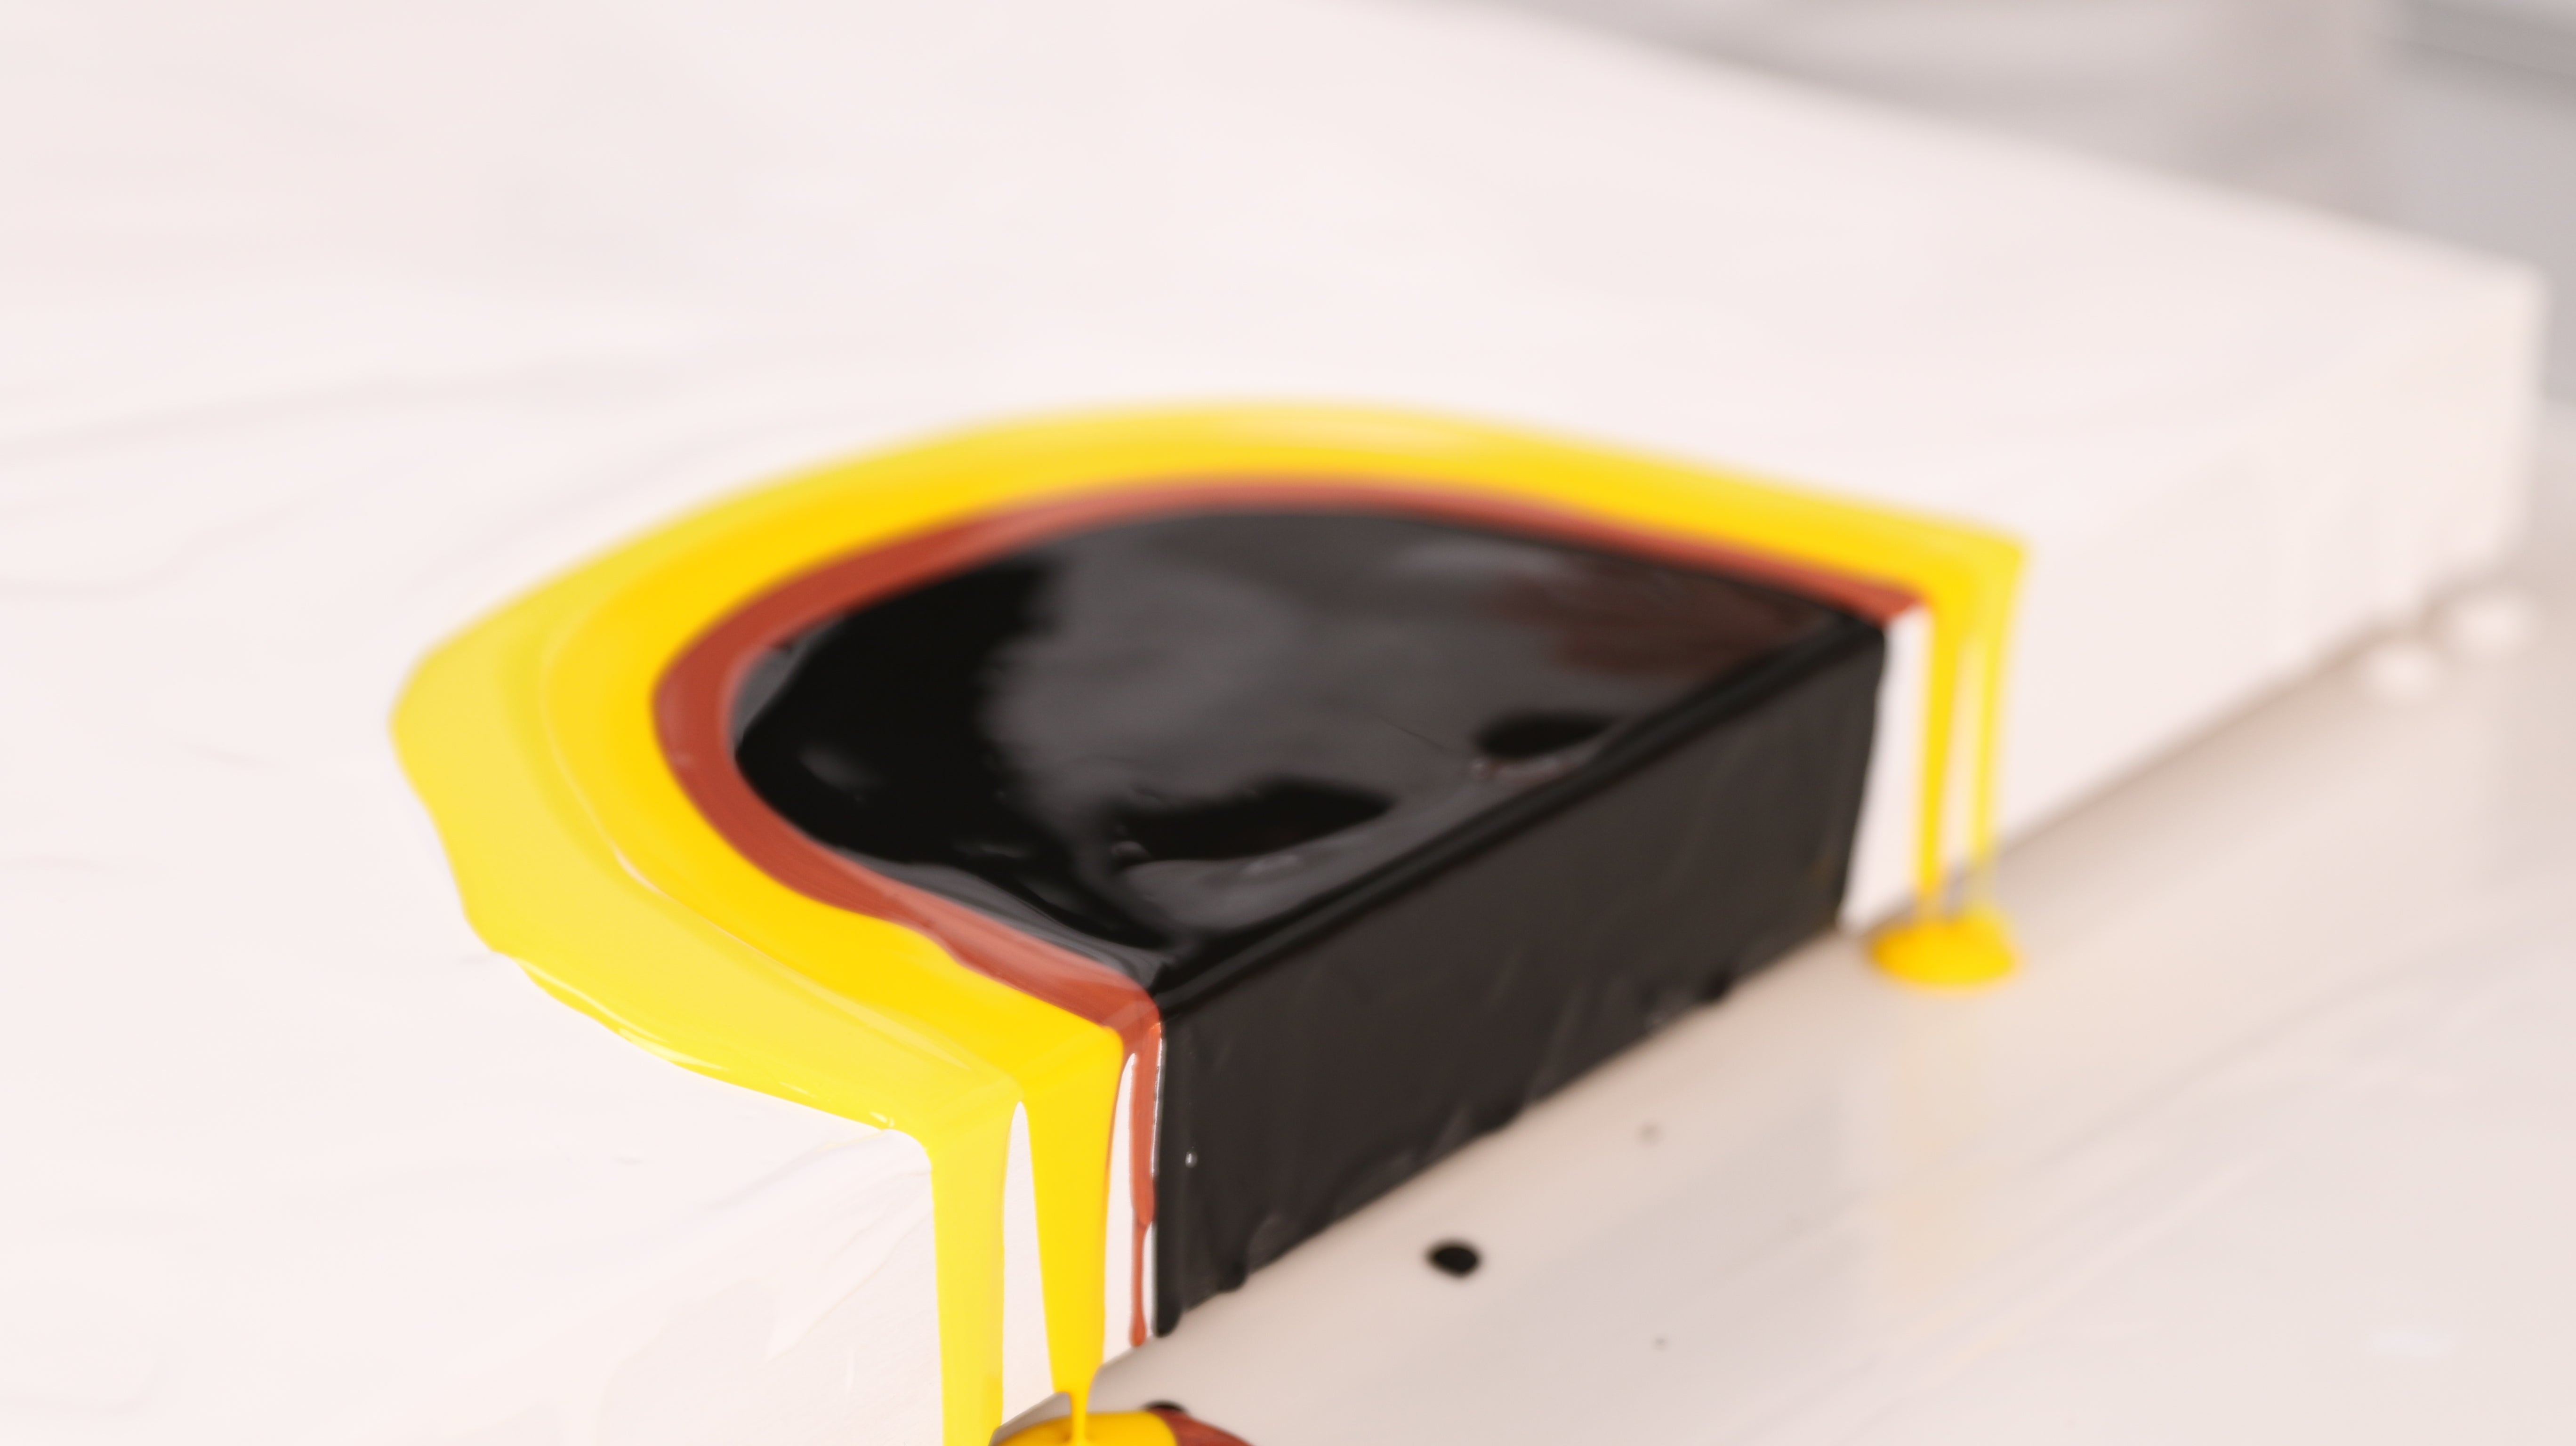
Step 2: Create The Sunflower's Center
Using a wooden craft stick, draw the outline of the black sunflower center on one side of the panel.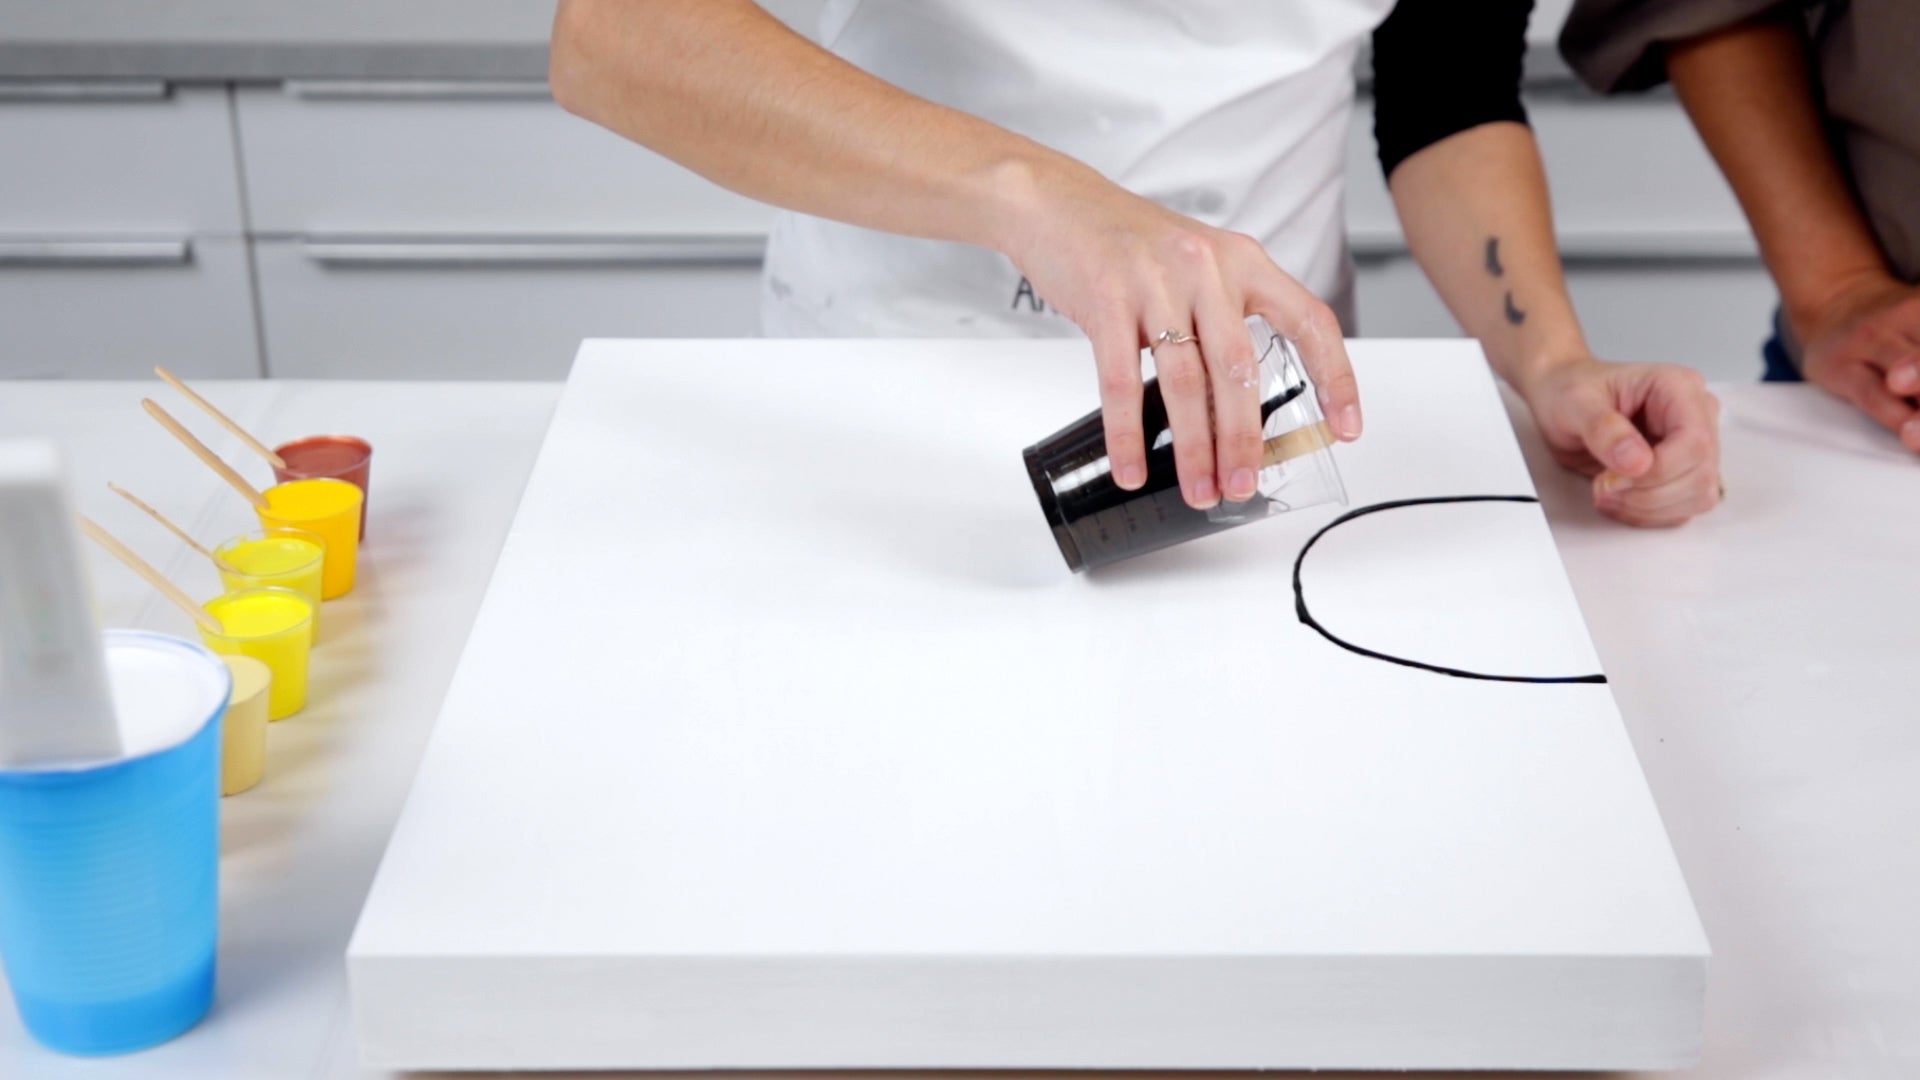
Fill in the space by pouring the paint from the cup, spreading it out with the craft stick, ensuring it spreads down the edges of the panel. Apply a generous amount of paint so ensure a good flow.
Step 3: Apply The White Base
Apply a generous amount of white over the entire surface of the panel - it’s always better to have more than less. Spread the paint out evenly so that the entire panel is covered in paint.
Spread the white paint alongside the black, leaving a gap between the two for the other paint colors. If you don’t leave space, the paint will blend too much and can go muddy.
Give a quick pass with the torch to pop any bubbles that might be hiding under the paint.
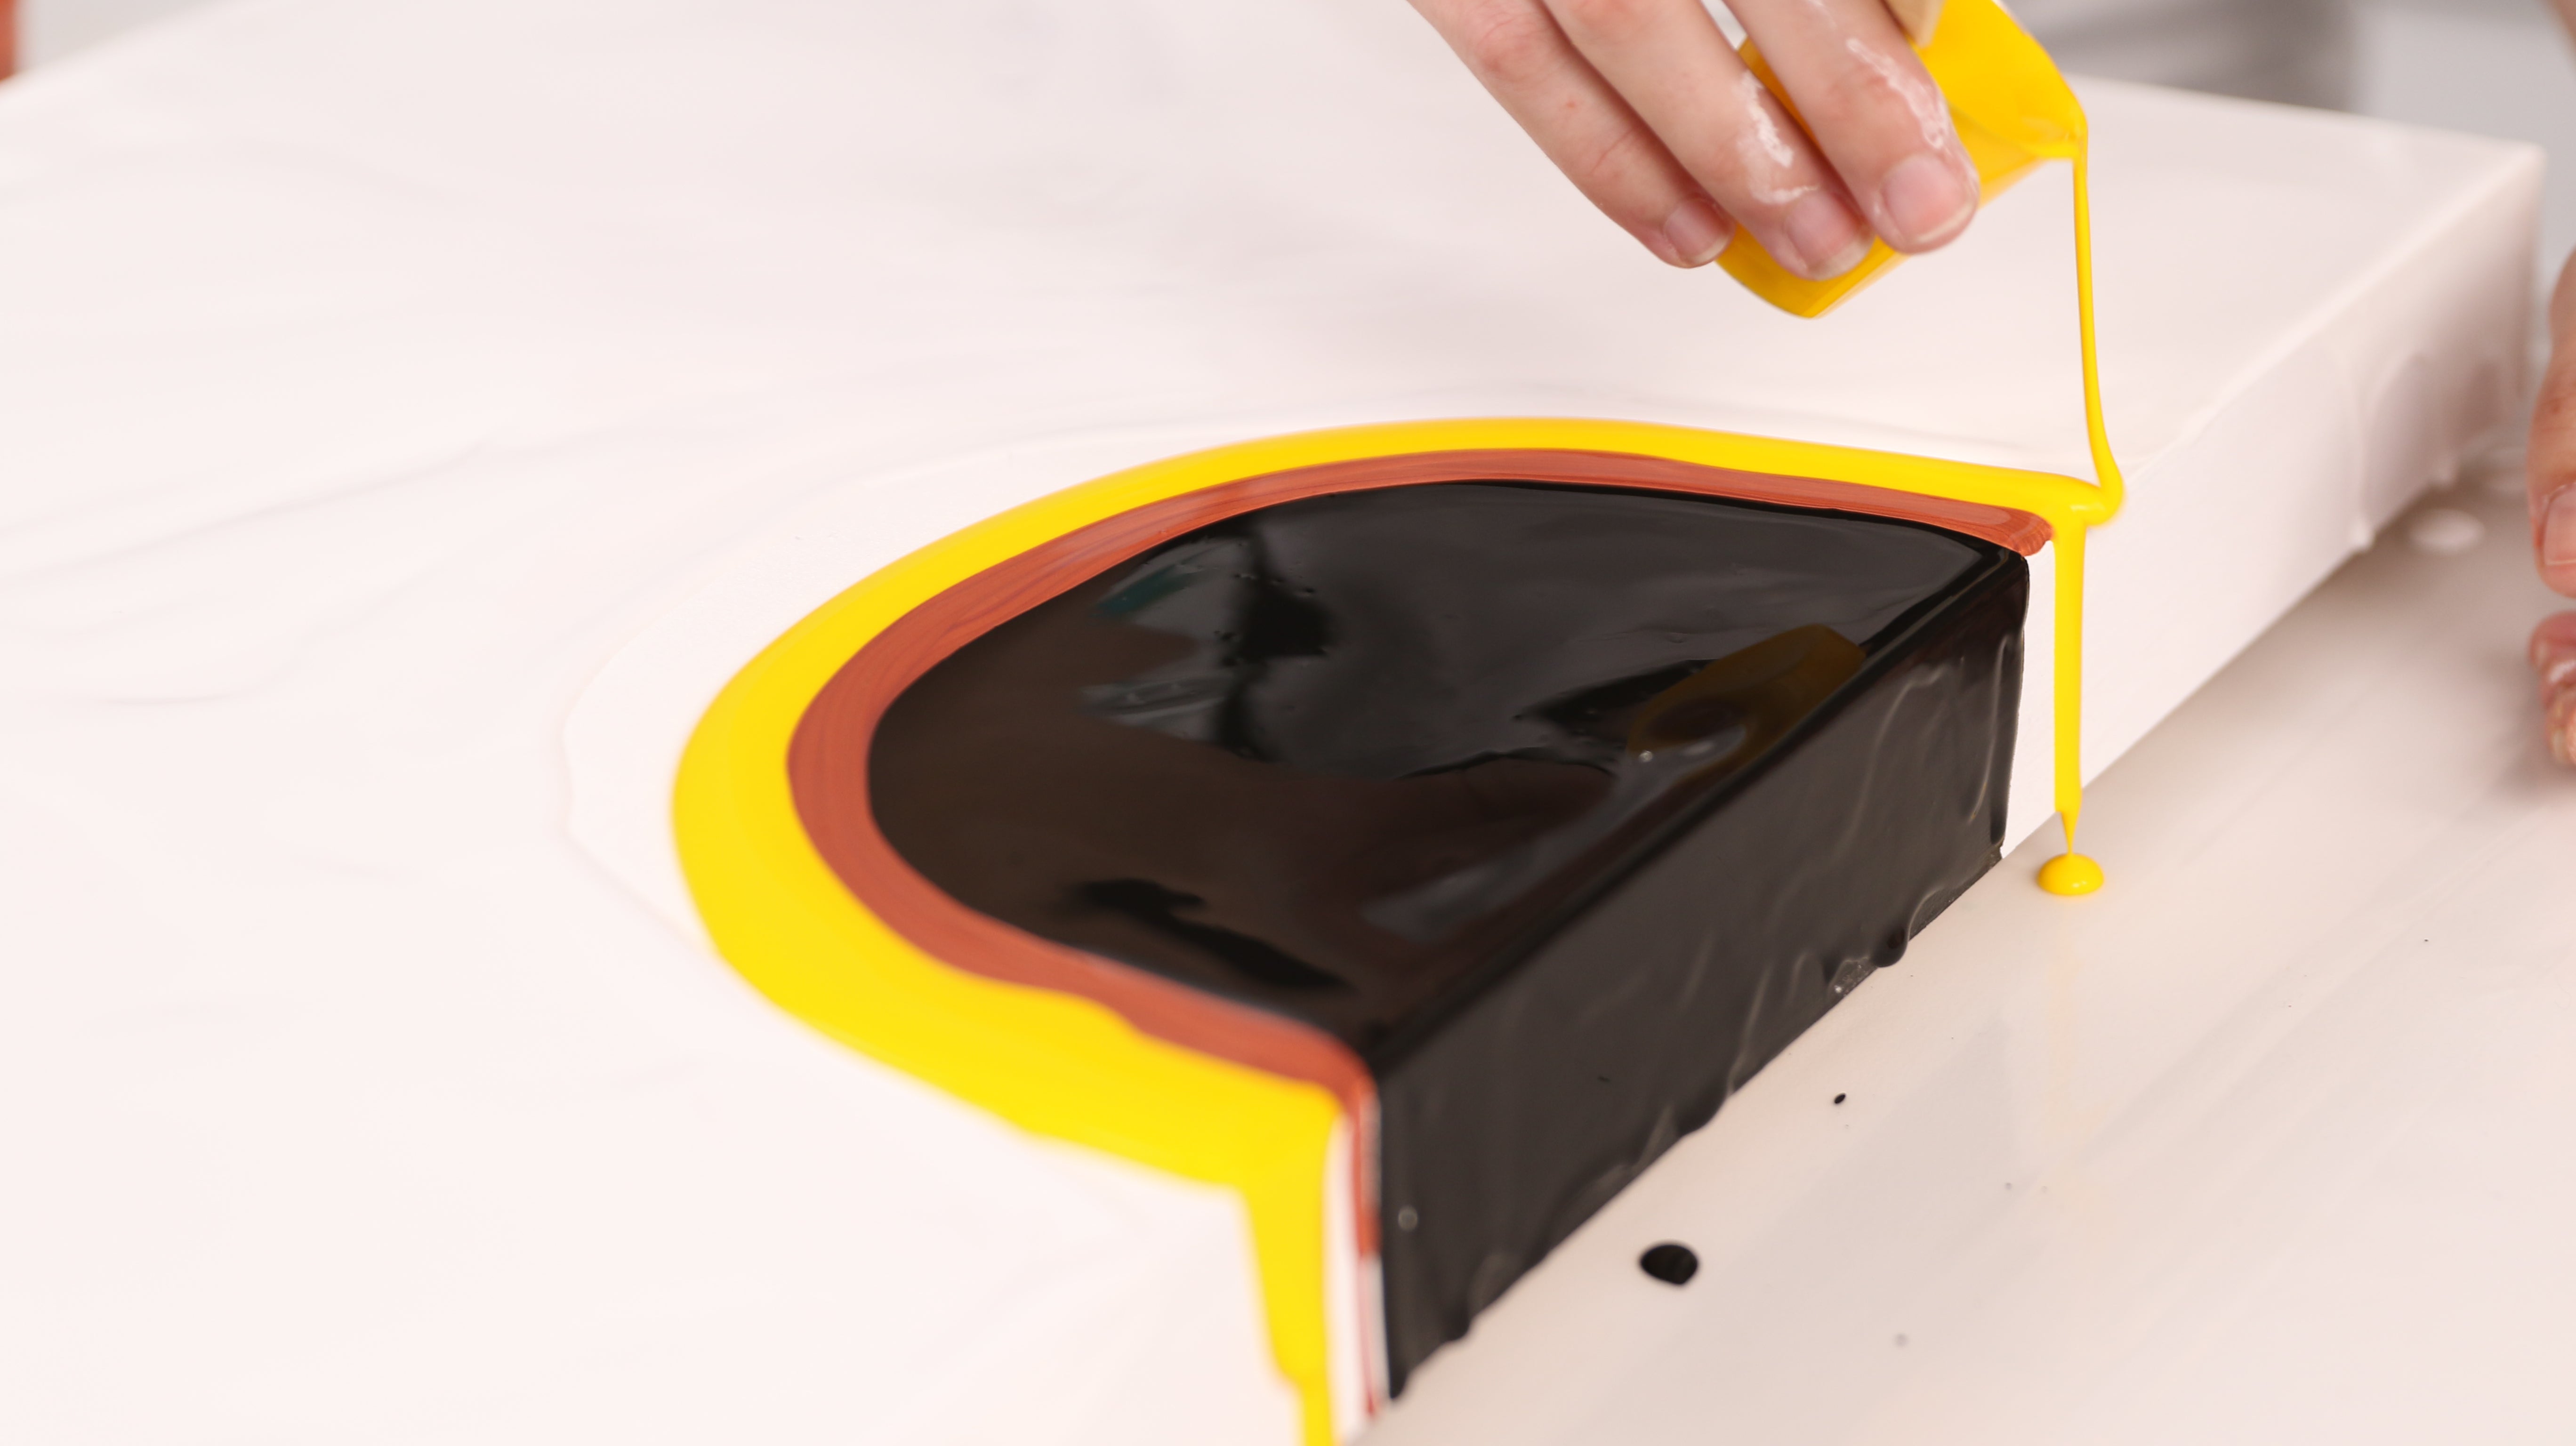
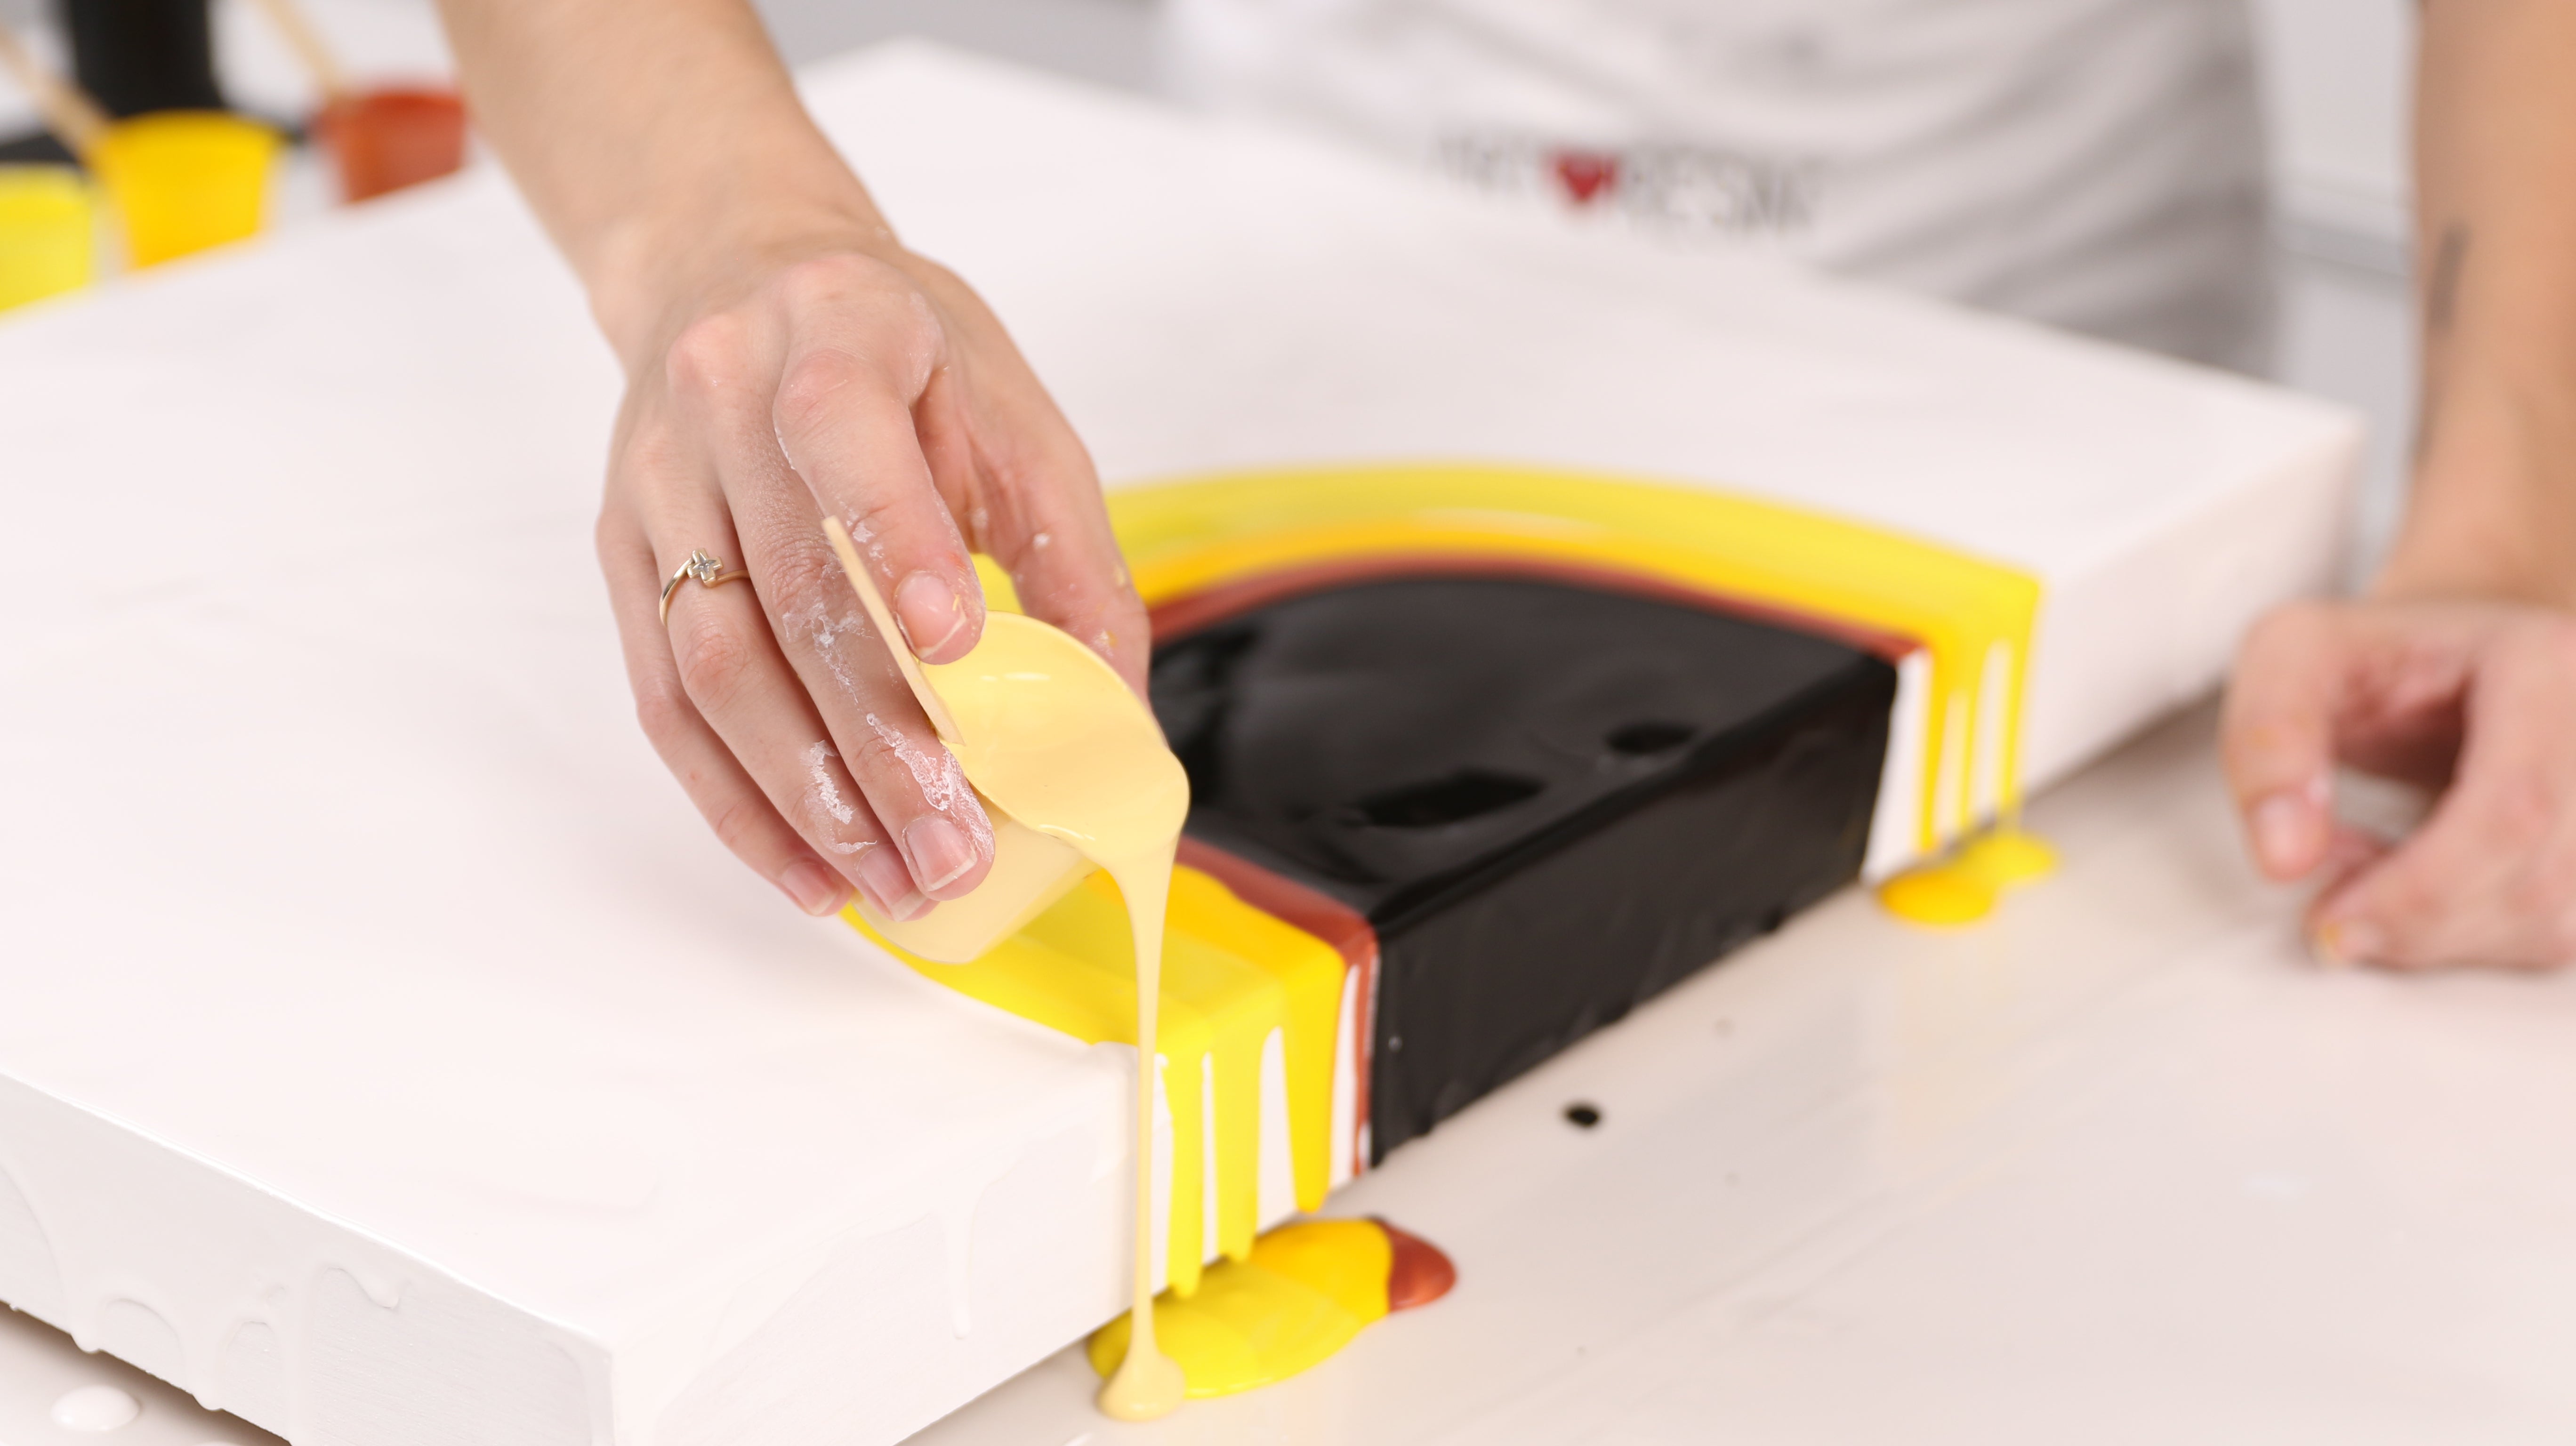
Step 4: Create The Petals
Starting with the copper, pour as close to black as possible, even overlapping slightly to create cells from the paint colors lying on top of each other.
Apply the rest of the colors, one by one, following the same pattern as the copper. Start with Liquitex Basics Deep Yellow. Follow this with the Color Shift Deep Yellow, the Primary Yellow and finally the Naples Yellow poured side by side in between the black paint and the white. Make sure you carry the design down over the sides of the panel.

Using a popsicle stick, drizzle petal shapes on top of the design you’ve just created. Christine suggests using gold only as an accent in this way because it has a tendency to take over. When blown out with the hairdryer, the lines will look like the veins you’d see in a flower petal.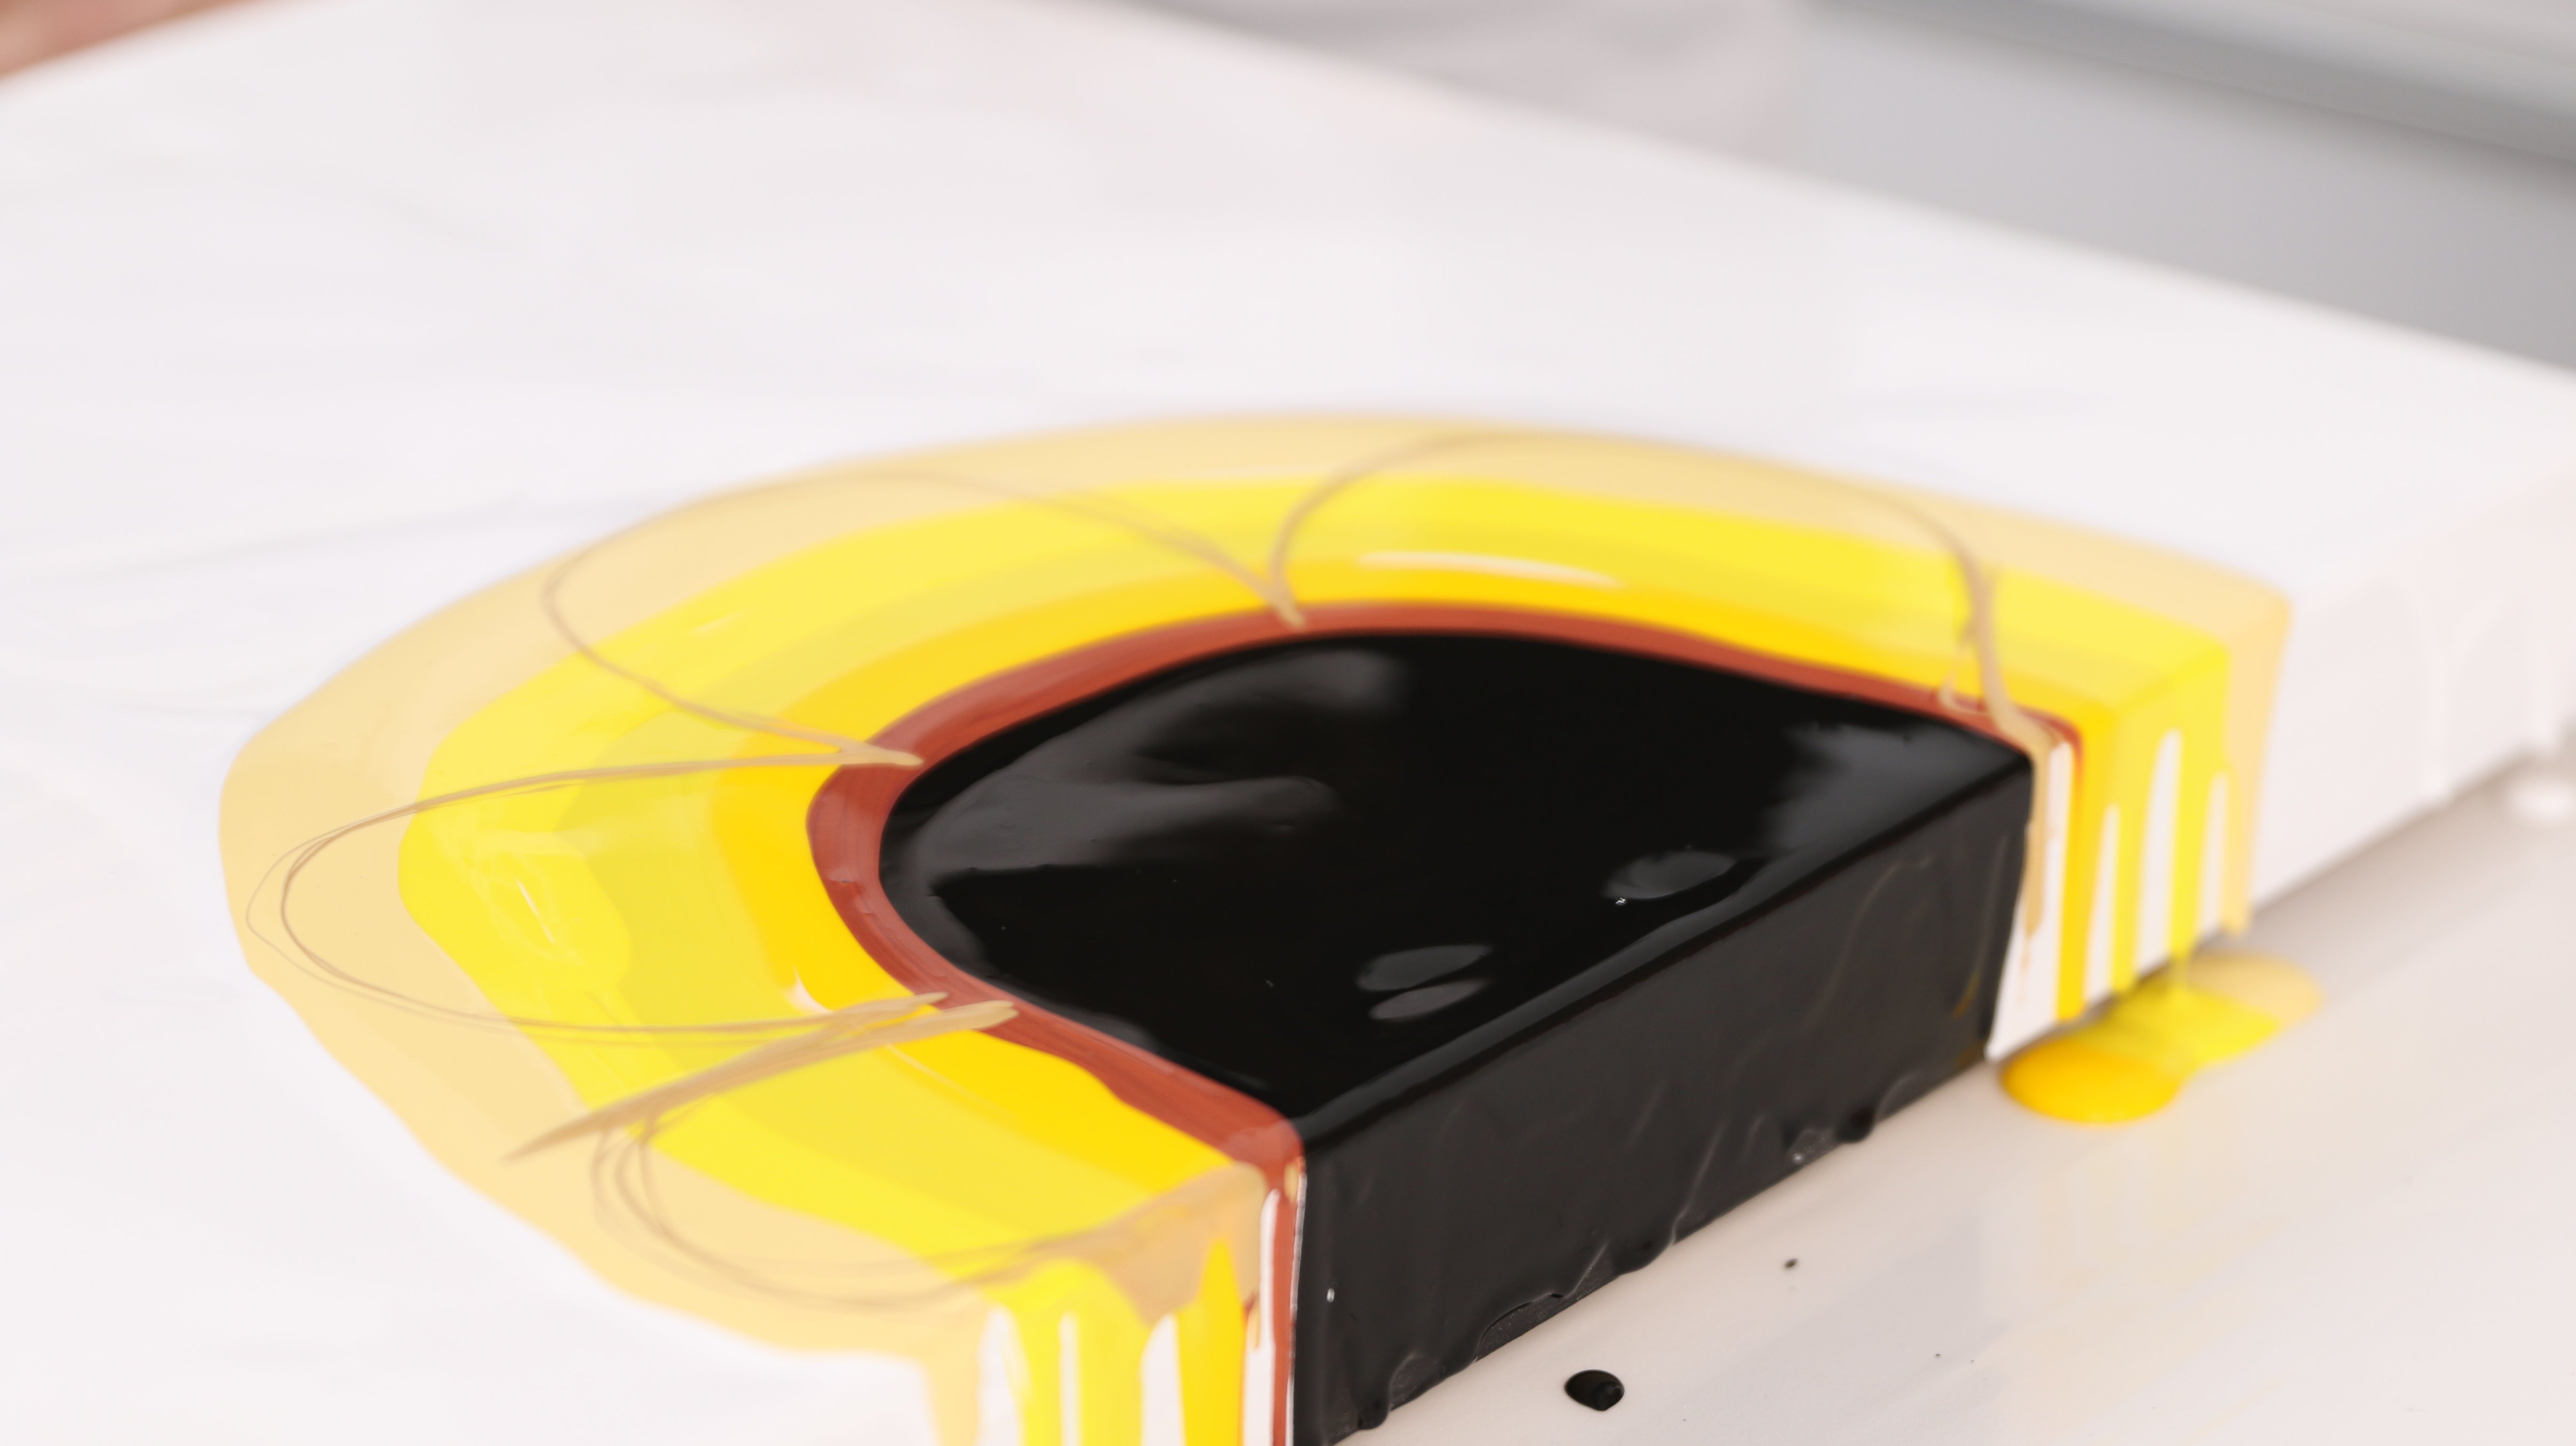
Go over the gold petal shapes with copper, and then once more with the Liquitex Basics Deep Yellow to give it a little more depth.
–––––––––––––––––––––––––––––––––––––––––––––––––––––––––––––––––––––––––
A Tip From Christine: Don’t overthink it as you’re applying the paint. Remember, it doesn’t have to be perfect. The great thing about fluid art is that it’s forgiving and your piece will still turn out beautifully.
–––––––––––––––––––––––––––––––––––––––––––––––––––––––––––––––––––––––––


Divots or dry spots need to be filled in or they will create breaks in the flow when you blow the paint. The body of the painting should have a generous layer of white to encourage the colors to flow across the panel. 

Once the gaps have been filled in, the surface has been evenly and generously coated with paint, and you've given one final pass with the torch, we are ready to blow the paint with the hair dryer.
Step 5: Blow Out The Paint
Holding the hairdryer upside down, angled down and with the nozzle attachment on, blow the paint from the black center out into the body of white paint to create petals. Repeat this petal by petal, blowing the paint in one fluid movement so that you don't interrupt the flow.
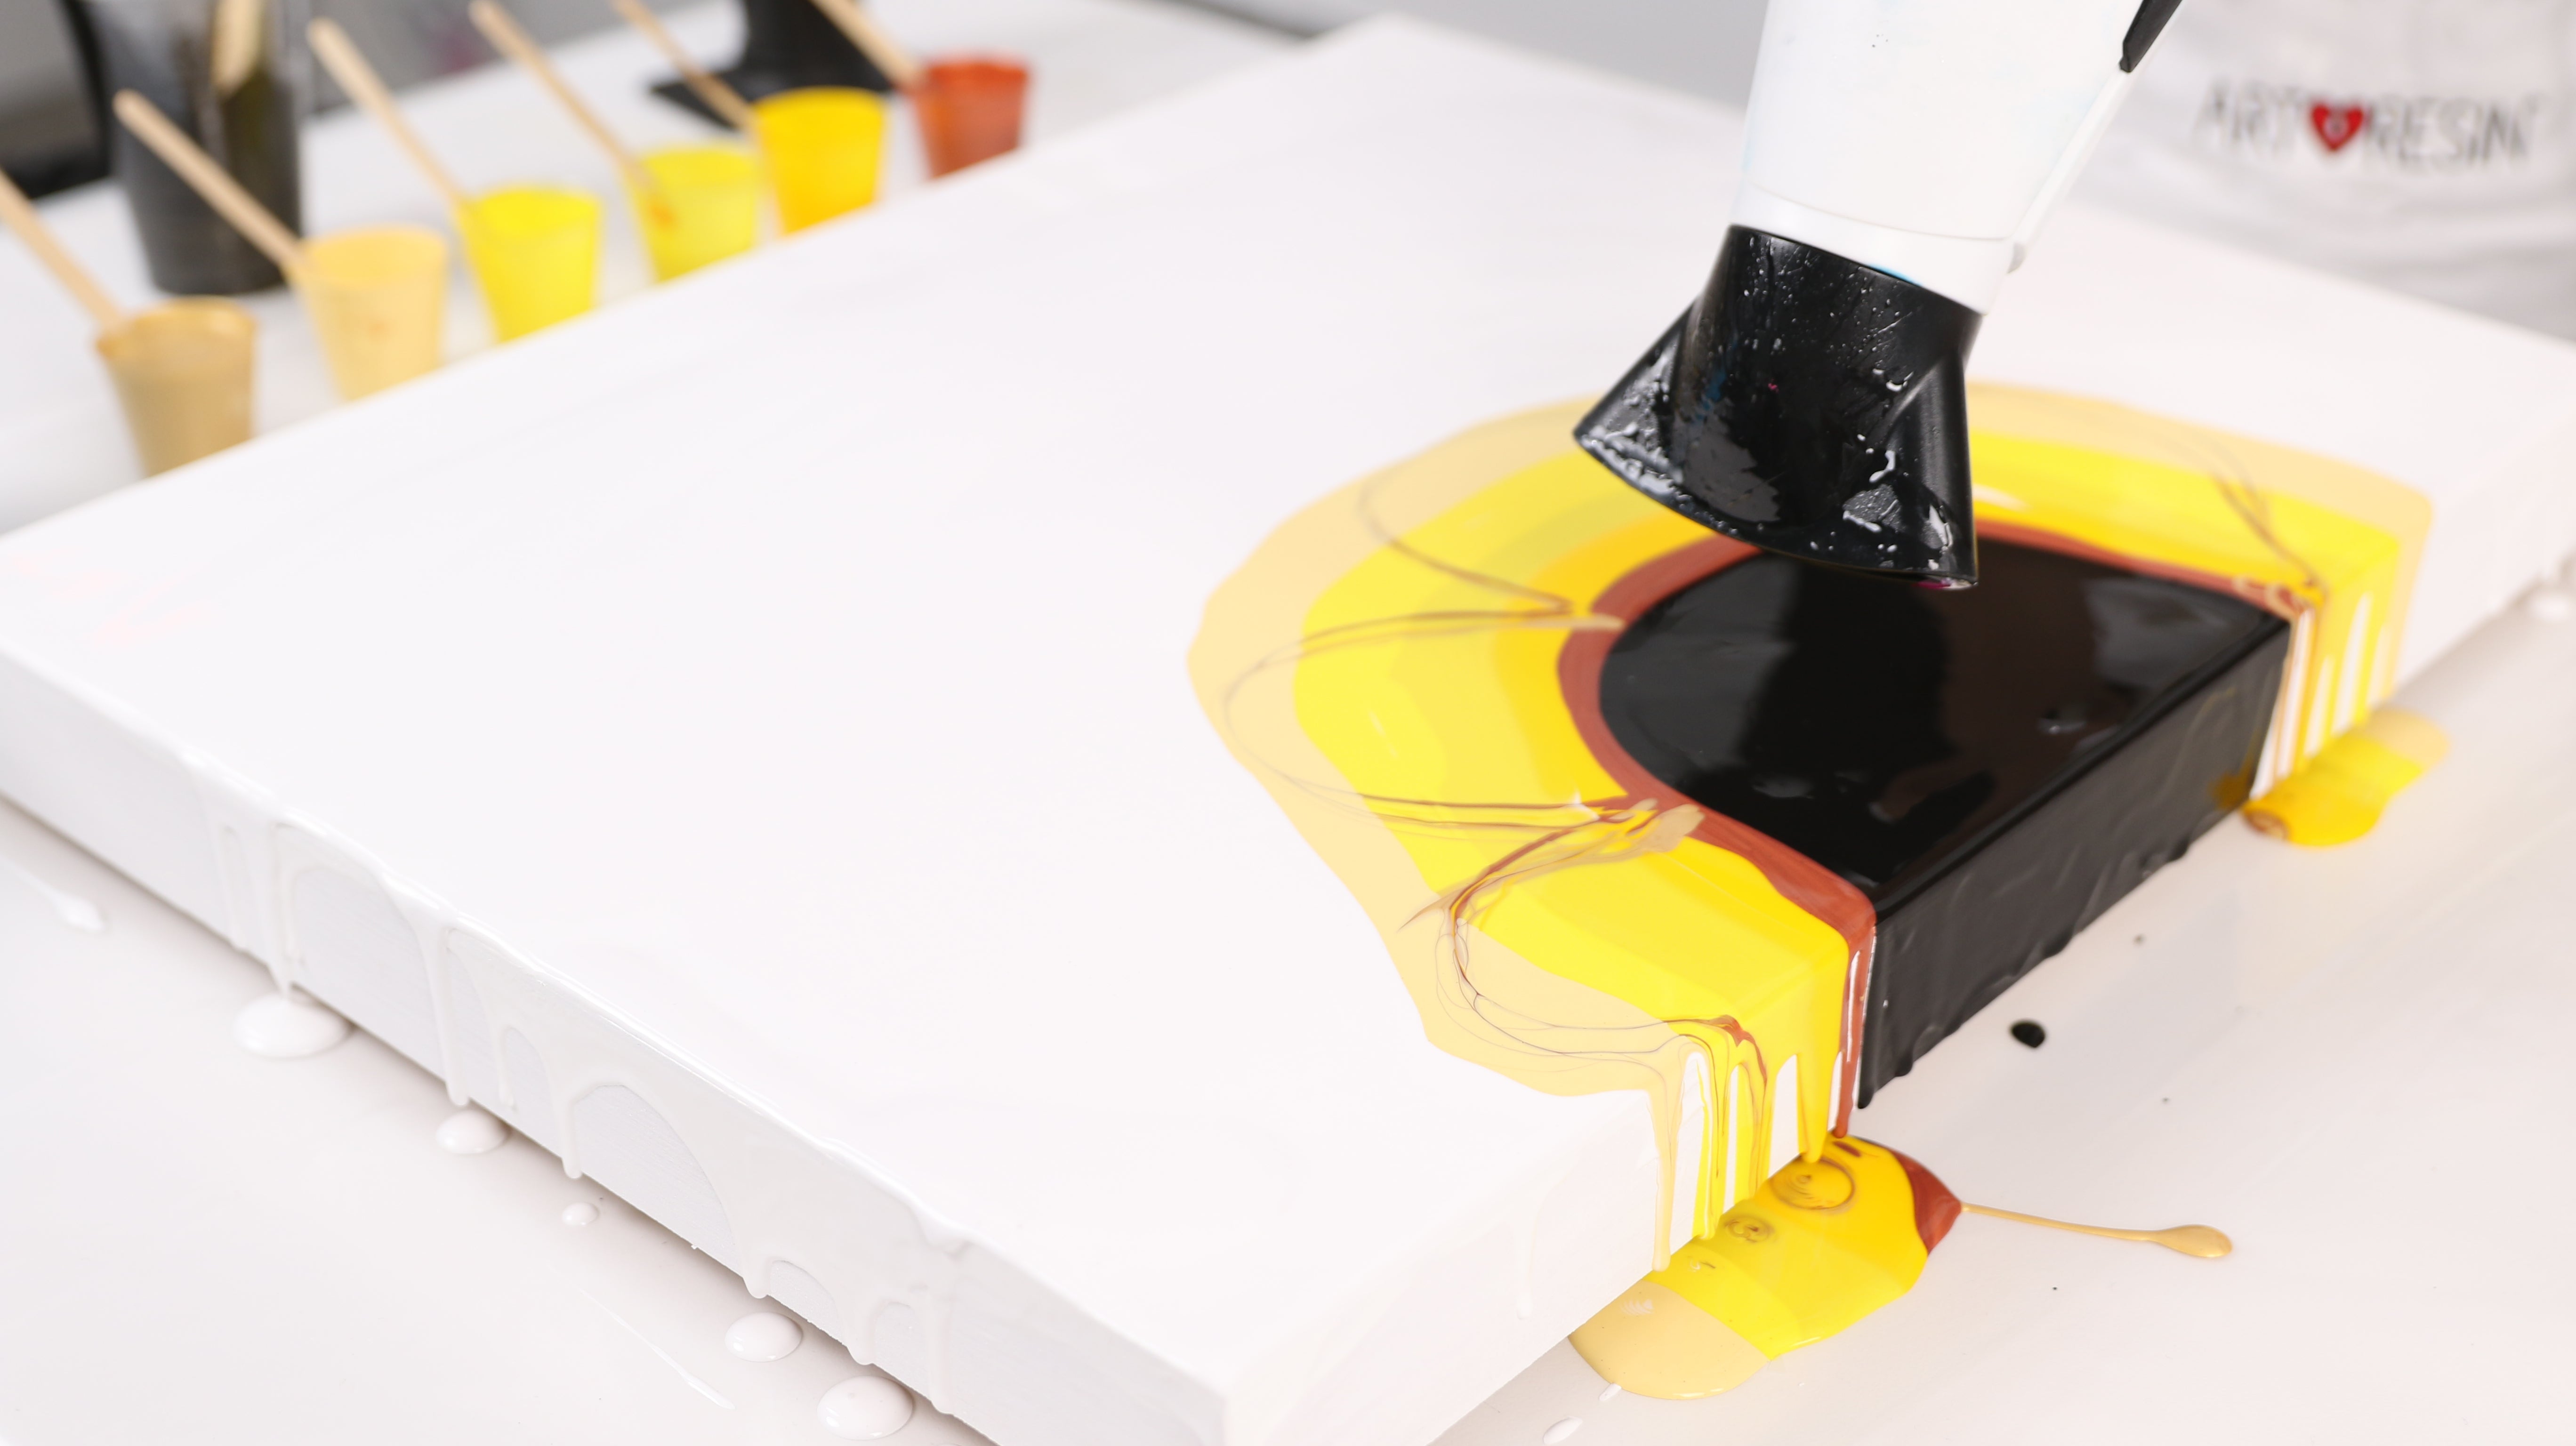
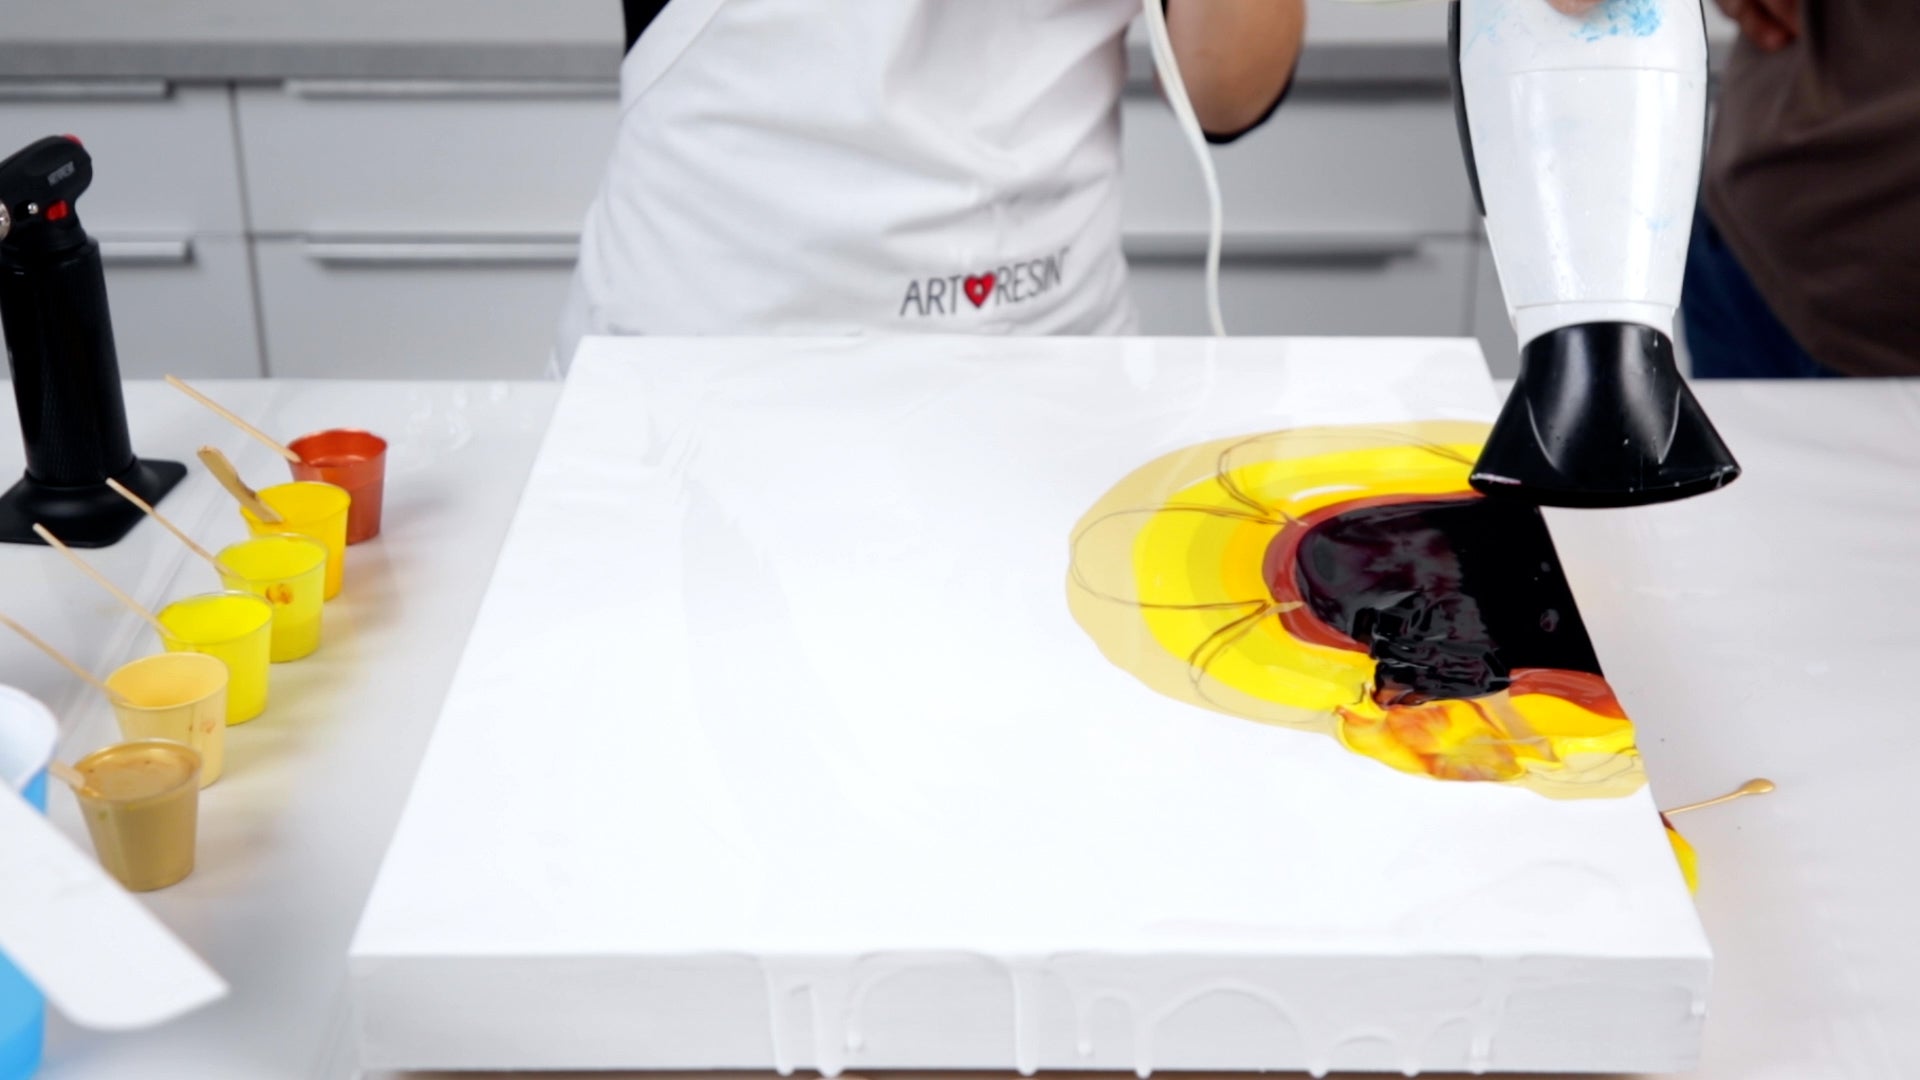
Repeat until you’ve created petals radiating out all around the black center.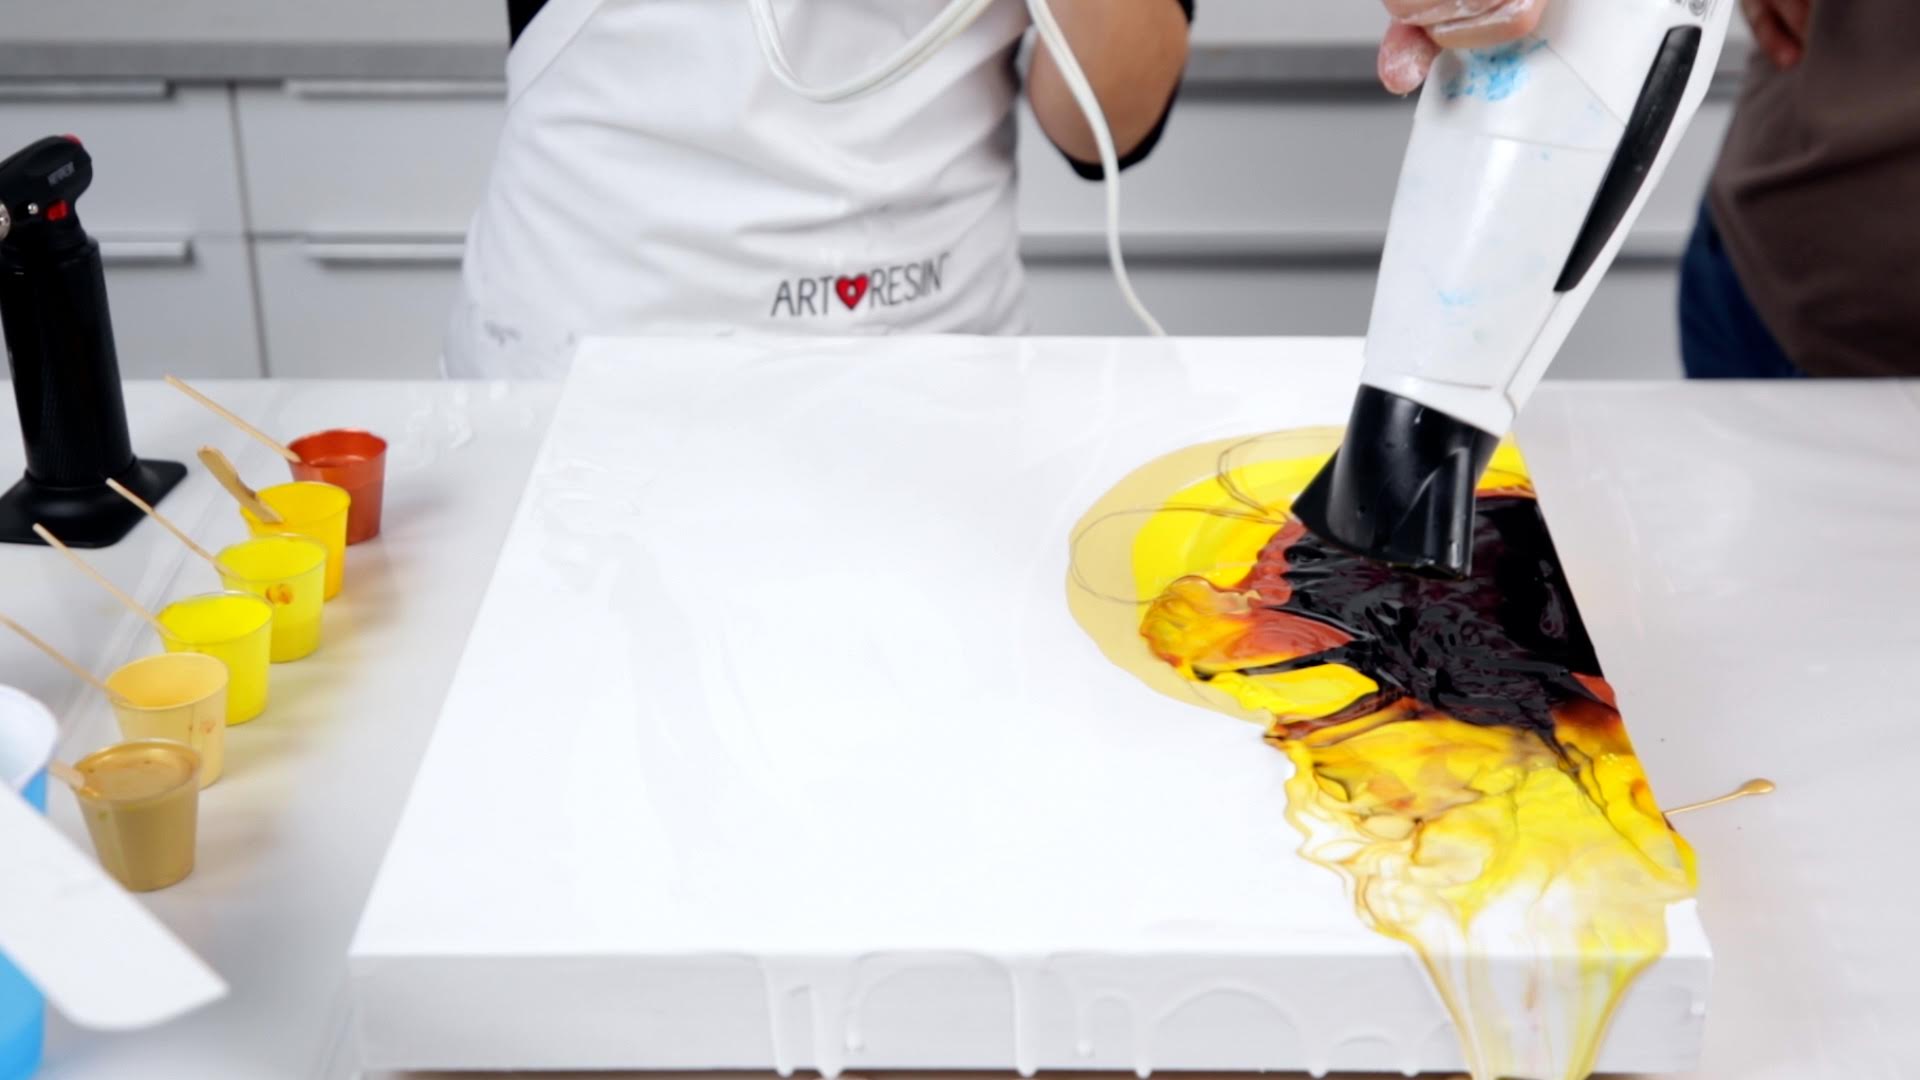


_________________________________________________________________________
A Tip From Christine: Heat Guns vs Hair Dryers
Although you can use a heat gun, you will get better results from a hair dryer. A hair dryer has more power and the nozzle attachment will help to achieve a petal shape. The air from a heat gun is more concentrated and doesn't blow around as forcefully as the air from a hair dryer does. Blown air is what pushes the paint around the panel to create the ribbons and cells associated with Dutch Pour painting.
_________________________________________________________________________
Blow with your mouth (or through a straw) on to soften harsh lines around the black center or on any other areas that need to be tidied up. Blowing out harsh lines will soften them and create cells. A hair dryer is too intense here and not as precise for fine detail work.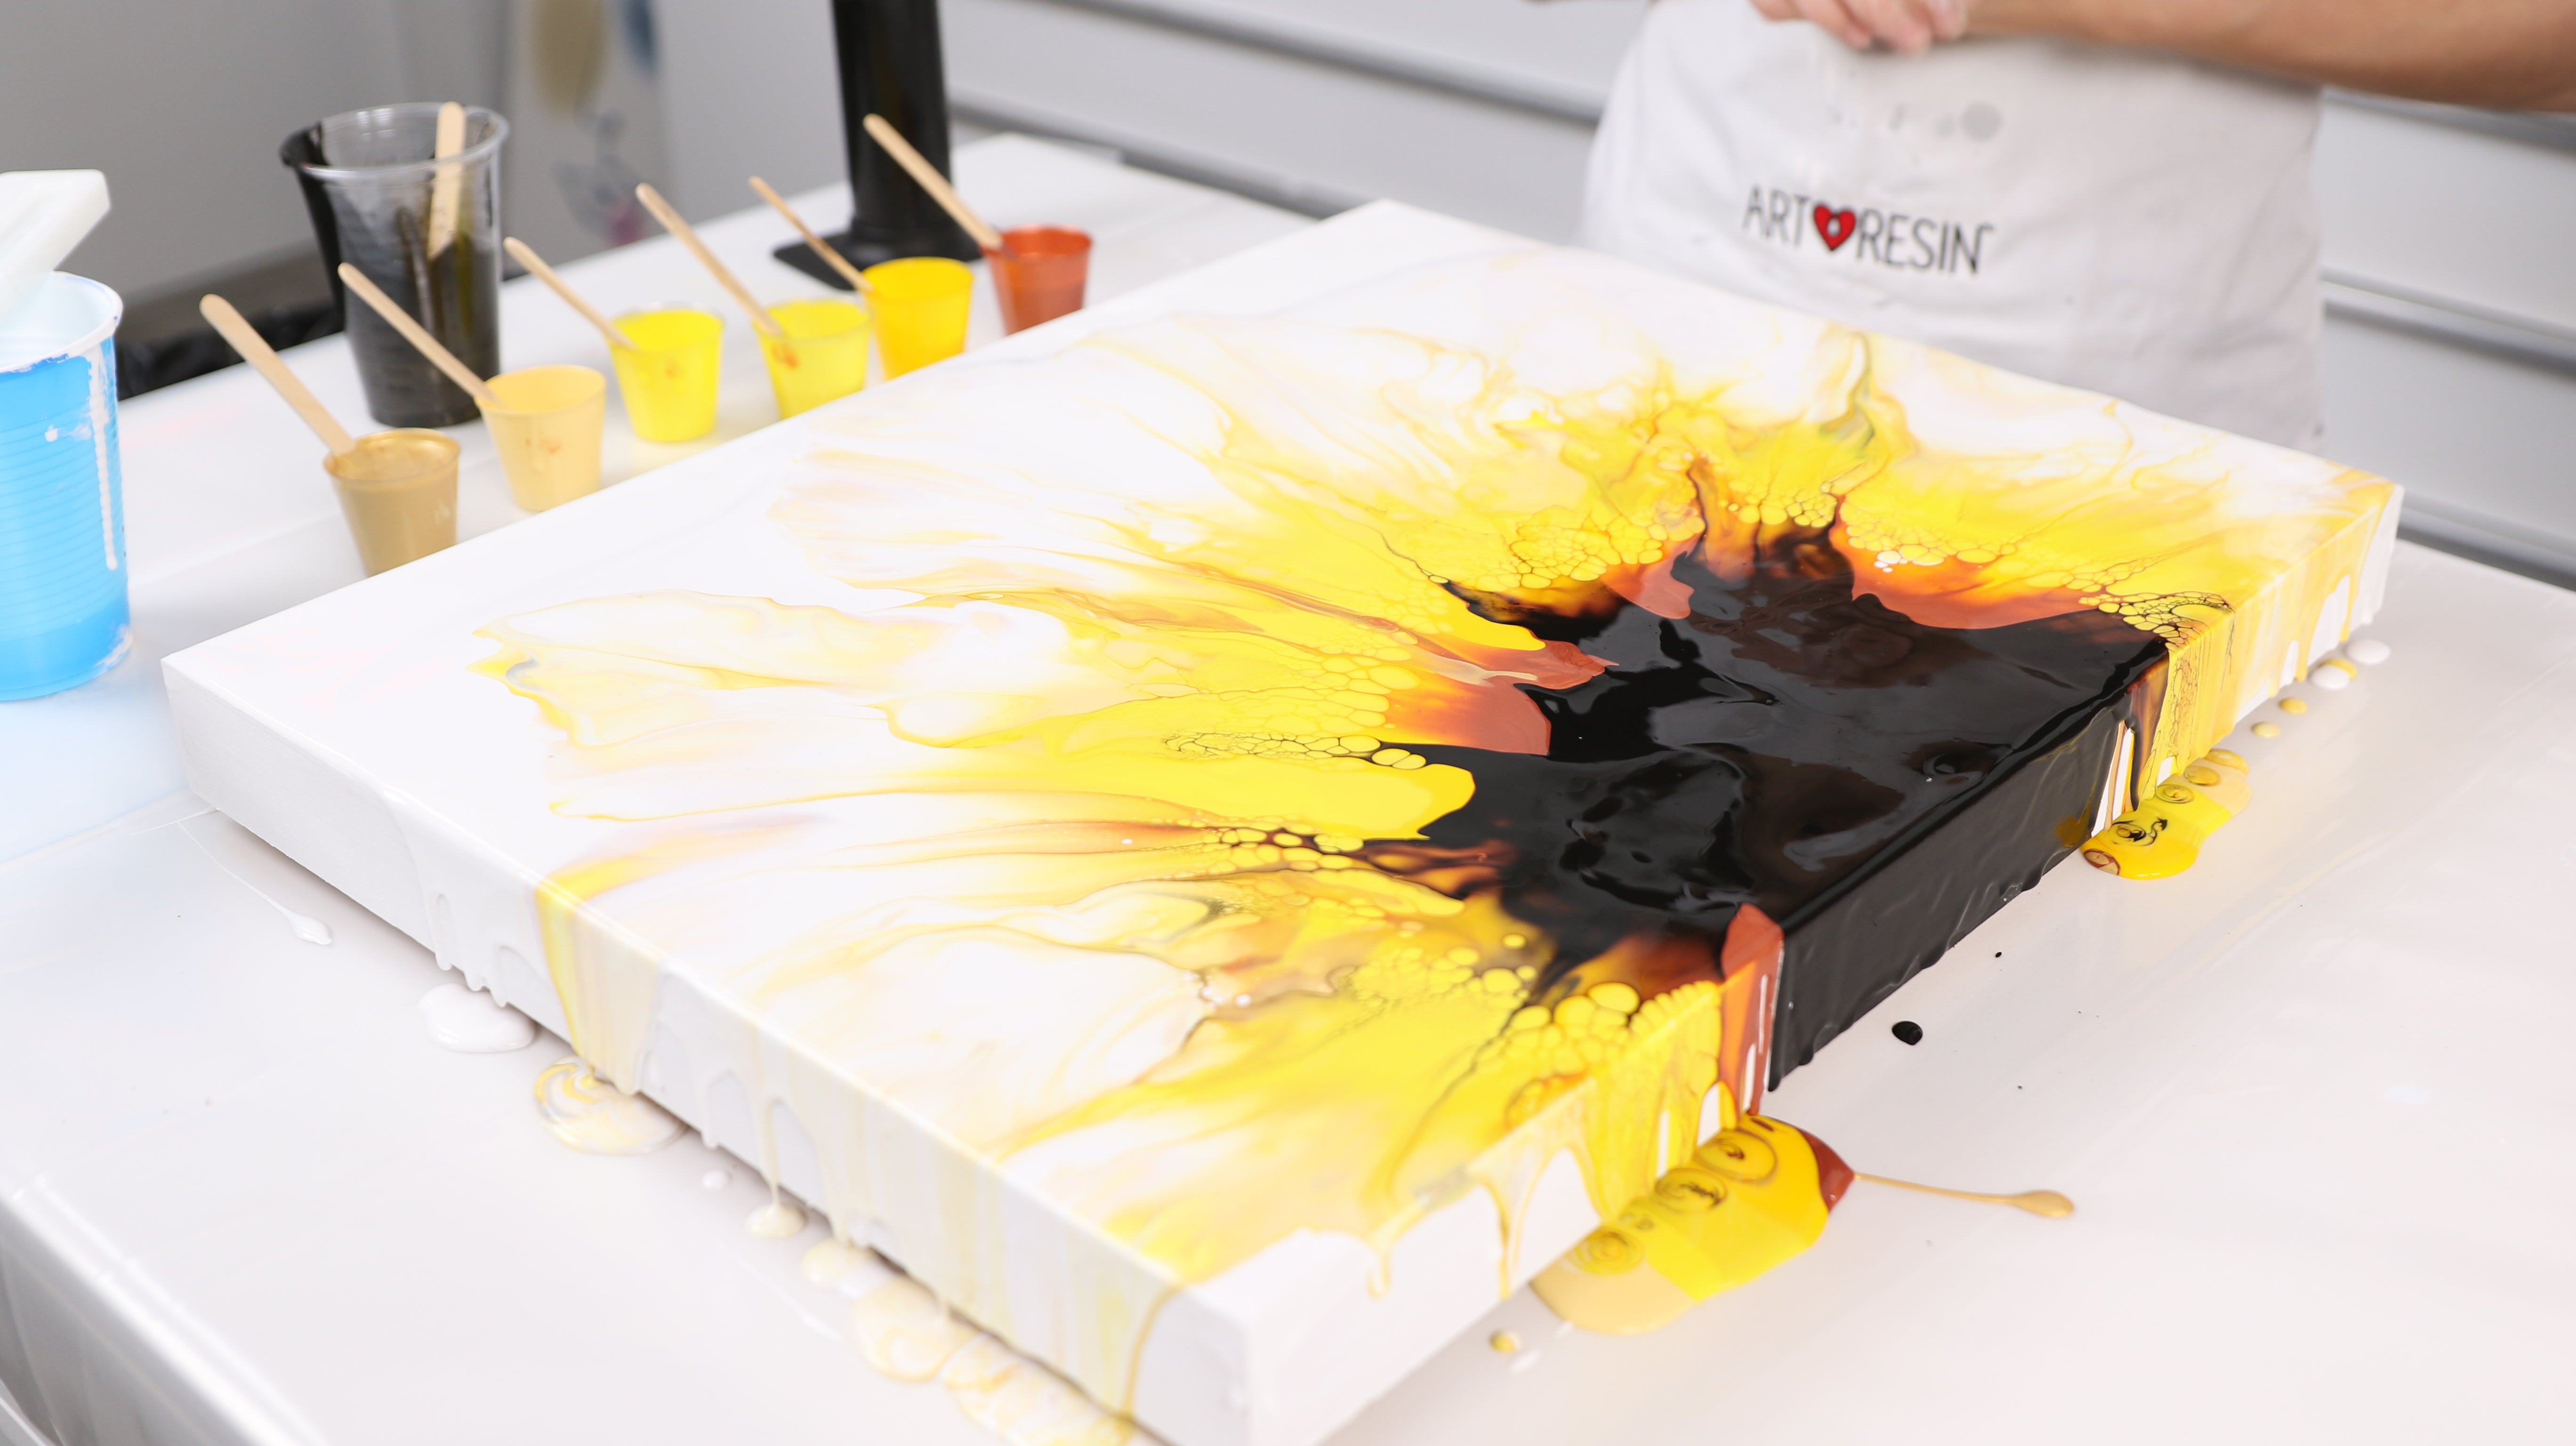


Torch one more time to get rid of air bubbles. If you find any areas are too white, give them a quick pass with the torch to encourage the paint color below to rise up to the surface. 
The paint takes about 2 hours to dry so you have some time to play with the composition when doing a Dutch pour. The paint will be dry to the touch in 2-3 days, but won’t be ready to resin for about a month.
Step 6: Apply The Resin
Wearing gloves, measure and mix the ArtResin according to the label instructions.
💡 TIP: To determine how much ArtResin you'll need to cover your panel, simply enter the dimensions into our Resin Calculator. The Calculator will let you know how much resin and hardener you'll need and even which kit to buy.
For our 16 x 20" panel, we need 11 oz total, made up of 5.5 oz of resin and 5.5 oz hardener. 


Pour the resin over the center of the piece, guiding it over the entire surface of the painting using a spreading tool. 

You can tape off the edges with painter's tape if you wish to leave them clean, or used your gloved hand to guide the resin over the edges.
Cover with a dust cover (we like using an empty cardboard box or a clean plastic tote) and allow to cure for 24 hours. 
Thanks, Christine, for sharing your Dutch Pour Sunflower technique with us!
To see more of Christine's art:
Visit her website: www.colourfitz.ca
Follow her on Instagram: @colour_fitz
There you have it: 2 different Dutch Pour techniques to create a piece of resin art of your own!
We hope you enjoyed these tutorials! If you have any questions or comments, please leave them below.
Before you leave, check out the differences between resin art and acrylic pour.
Read our guides below to learn more about resin art:
- How to get thick layer of resin
- How to get a matte resin finish
- What is doming resin?
- How to get a non-gloss or matte finish
- What's the best way to finish edges?
ArtResin: The Original Epoxy For Resin Art.
