
Do you need to use a sealant before you resin?
In most cases, no, you don't need to use a sealant before applying ArtResin. However, there area few situations when sealing first makes sense. The most common are:
1. Preventing absorption - sealing helps stop resin from soaking into porous surfaces like wood or paper and creating dark spots.
2. Securing loose materials - small items like glitter, sand, gold leaf or collage pieces stay in pleace better when sealed.
3. Avoiding bubbles - some objects can release air into the resin; sealing them first can reduce surprise bubbles.
If in doubt, it never hurts to use a sealant first, but we always recommend doing a test on a scrap piece so you know exactly what results to expect.
Today we’re going to go over each of the reasons why sealing first can be a good idea and share which sealant works best in each case.
Watch the full video:
What sealant should I use on my artwork before I resin?
There are lots of sealants available on the market, from spray sealants to brush on sealants. Since availability varies around the world, it's difficult to recommend a specific brand – but we've included a few of our studio favorites below.
No matter which brand you choose, there are a few guidelines to keep in mind:
-
Choose a sealant that dries clear: Even better, choose a sealant labeled UV Resistant or Archival. The sealant should be working in conjunction with ArtResin’s UV light stabilizers and not against them. Different sealants yellow at different rates and when a piece appears to be yellowing, it can often be the sealant under the resin that’s yellowing.
-
Choose a sealant appropriate for your artwork:
There are sealants specifically suited for photographs, for charcoal drawings, for alcohol ink and so on, so read the label to ensure that you’re choosing the right product for your project.
-
Follow the directions:
Whichever sealant you choose, always follow the label directions. Make sure the sealant has thoroughly dried before you apply the resin or you may end up with a cloudy cure.
-
Test first:
Always test your sealant first, before you resin your final project. Whether it's a piece of wood, a spare photo or scrap piece of paper, testing the sealant with both your materails and substrate will help you know exactly what results to expect.

Should I use a brush-on sealant or a spray sealant?
Depending on your artwork, brush on sealants and spray sealants both have pros and cons. The material you plan to resin should determine the most suitable sealant for your project.
Brush on sealants such as PVA glue, Mod Podge, and acrylic gel medium are easy to apply, offer excellent control for fine details, can be worked into nooks and crannies on objects like wood or collage work, and offer great protection: typically one coat will suffice.
On the other hand, brush on sealants have a slower dry time, you may see brush strokes, they could damage delicate objects like dried flowers or butterfly wings, and can smudge drawings or ink.
Spray sealants dry quickly, provide a nice even coating without brush strokes, you can cover a large area in a short period of time, and many spray sealants are non-yellowing and offer UV protection.
On the other hand, you need drop cloths to prevent everything around you getting covered in sealant, they can have a really strong odor, you will need to wear a mask if you're not working in a well-ventilated area, and typically require multiple coats to get really good coverage.

Does it matter if the sealant is matte or gloss?
No, it doesn't matter if the sealant is gloss or matte. The resin will make everything look shiny in the end.
A few of our favorite sealants:
LineCo PH Neutral PVA glue:
Archival, dries clear, and easy to apply. Perfect for wood, puzzles, or any surface with nooks and crannies where the sealant needs to reach. You can also use acrylic gel medium.
Krylon UV-Resistant Clear Acrylic Coating:
Spray sealants come in many brands—Golden, Liquitex, Winsor & Newton, and Krylon all have excellent options. Krylon offers multiple sealants we've liked using including Matte, Low Odor Clear Gloss, and more. Their UV-Resistant Clear Acrylic Coating adds the extra benefit of UV protection. Apply in multiple light coats on photographs, art, paper, ceramics etc.
Kamar Varnish:
A non-yellowing spray sealant, Kamar Varnish is a favorite among alcohol ink artists because it doesn’t contain ingredients that can reactivate alcohol ink.

3 Reasons For Applying A Sealant
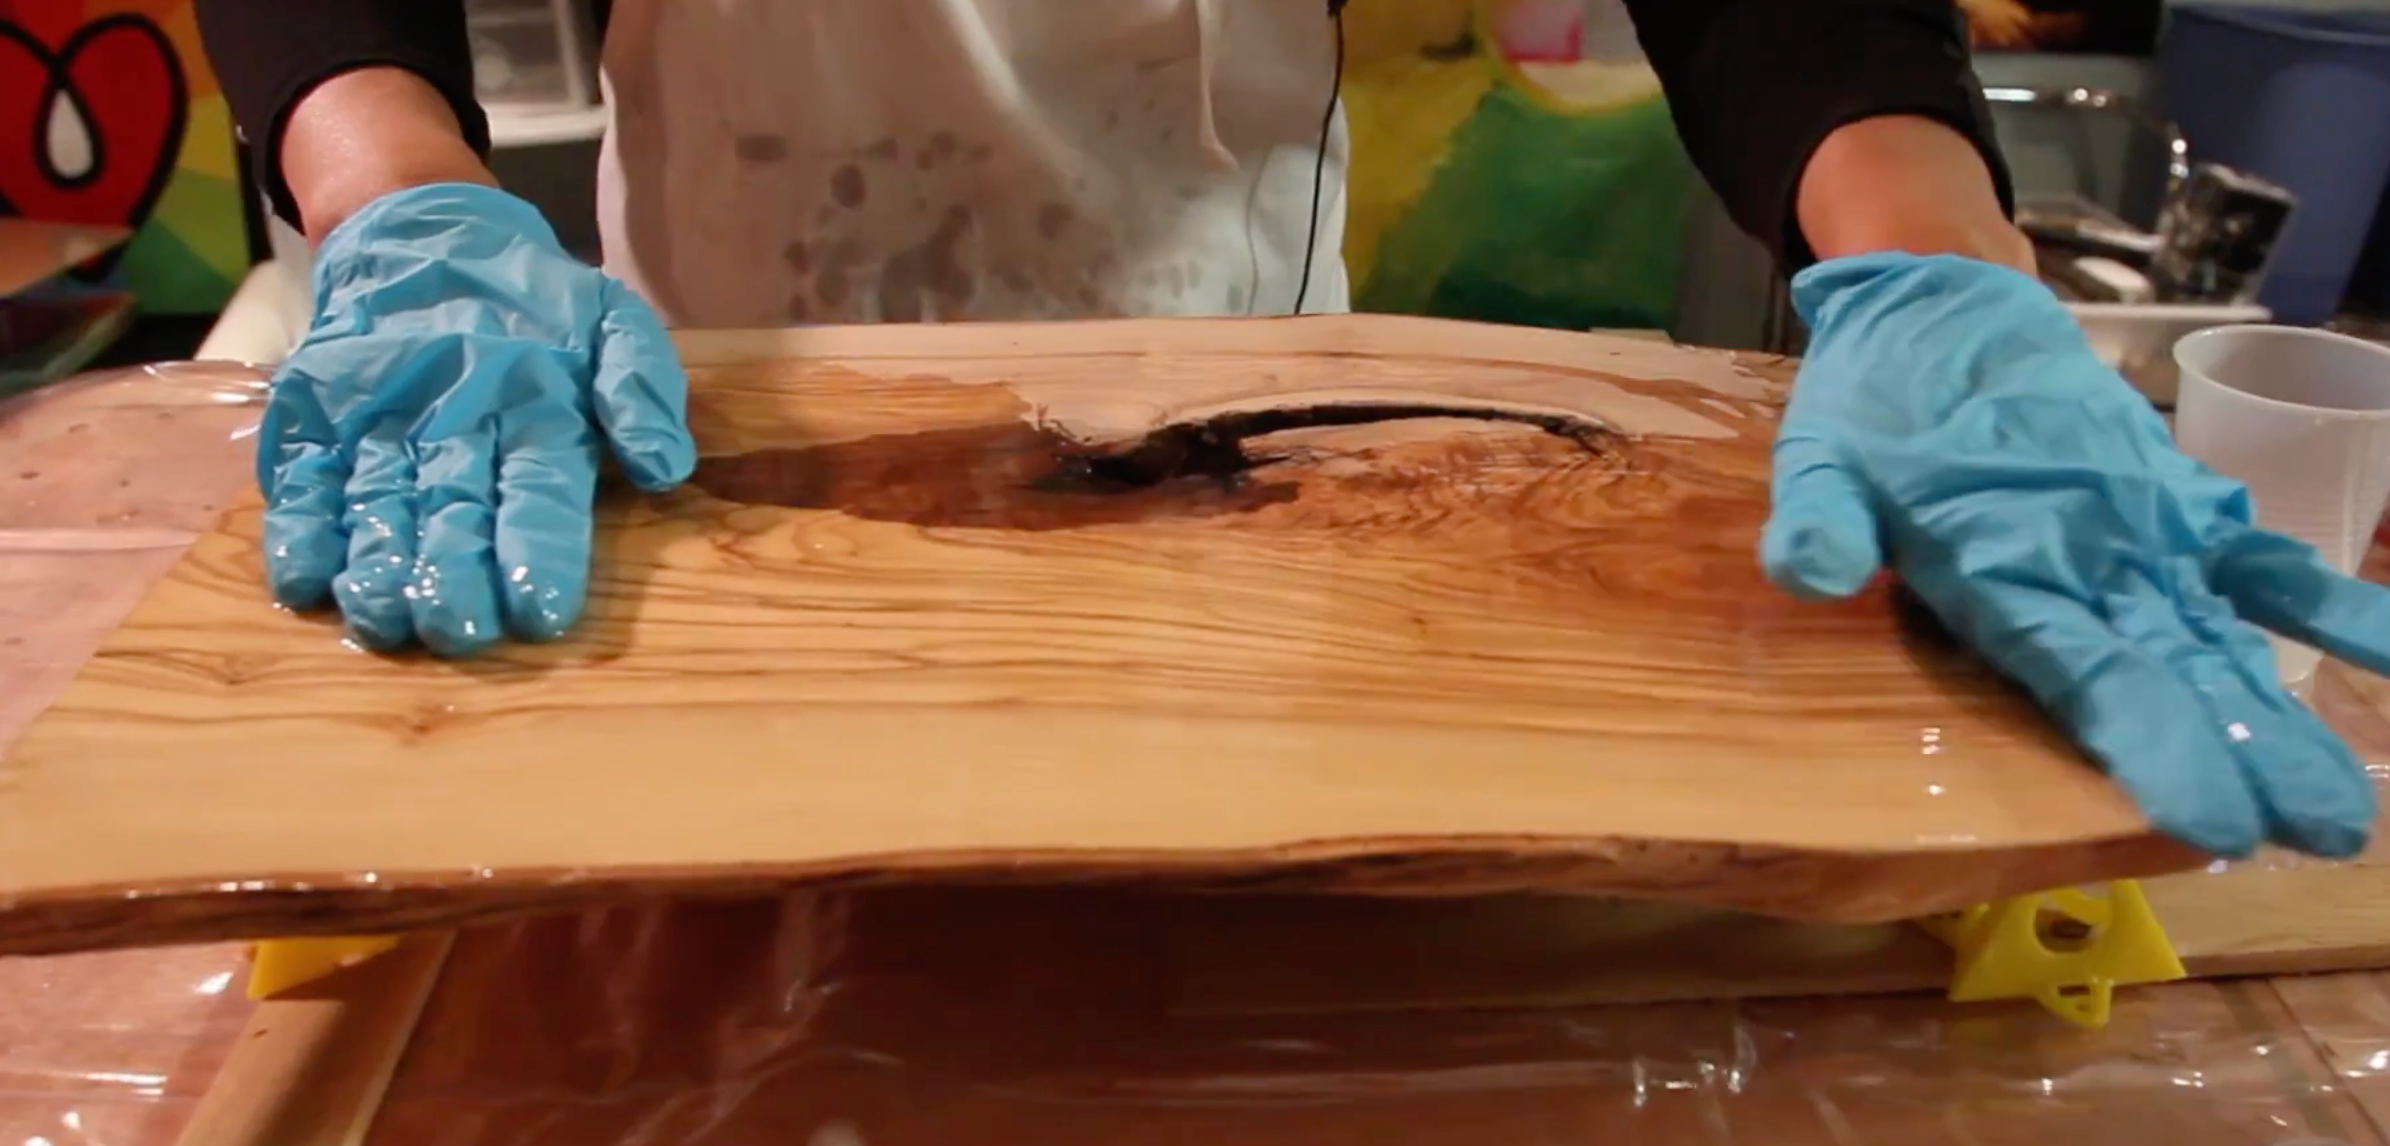
1. Sealing To Prevent Absorption:
Epoxy resin can seep into projects, causing dark or wet looking spots in paper, wood, fabric, cork, terracotta, clay, cement and other porous mediums. If the material darkens in a way you don't want, applying a sealant to act as a barrier against absorption is a good precaution.

Do I need to seal paper before I resin?
The best way to know whether your paper needs to be sealed is to test on a scrap piece first. You can drop on a bit of resin to see if it absorbs or sits on top. Paper is available in so many different varieties and qualities so it’s really important to be aware of the paper you’re resining over.
Typically soft, matte paper like pastel paper or low quality paper like construction paper or newsprint will absorb resin, so these will need to be sealed. You may need to seal more than once to prevent the resin from seeping into the paper.

Higher quality paper typically doesn't require sealing, for example cardstock, some types of watercolor paper, glossy photo paper or the glossy paper used in high end magazines.. These types of papers are typically coated - that is, it's coated with a sealant at the time of manufacture.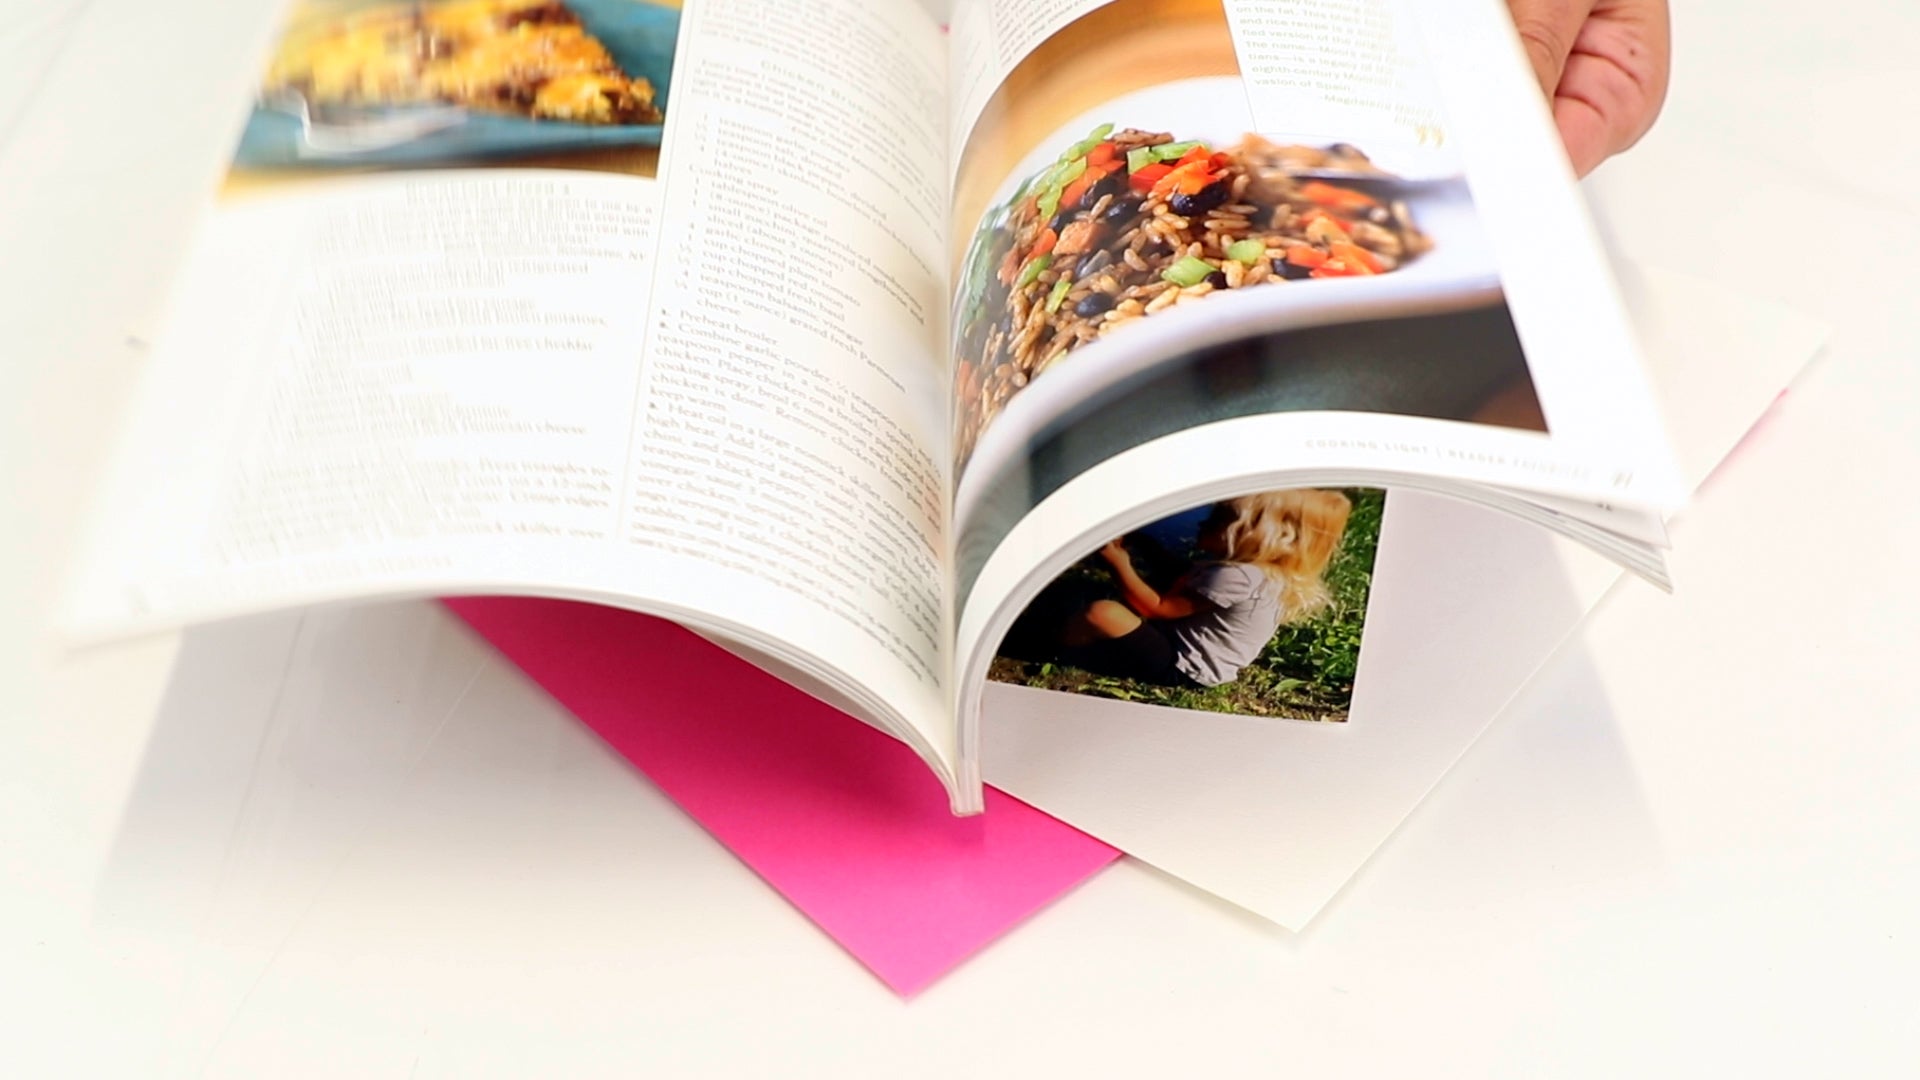
Do I need to seal a paper collage before I resin?
Even glossy, high quality coated paper may absorb resin if it has been torn or cut, like in a paper collage, because thr protective coating on the surface has been broken, exposing the interior of the paper.
If you're concerned about resin soaking into your paper collage, seal it first. The type of paper or materials you use will determine if you need a spray or brush on sealant, but a brush on sealant offers a little more control on a piece that may have folds, nooks and crannies.
💡 TIP: If you're mounting paper onto a wood panel and have cut the edges to size, don't forget to seal those cut edges too. This prevents resin from seeping in and creating dark, wet spots along the perimeter.

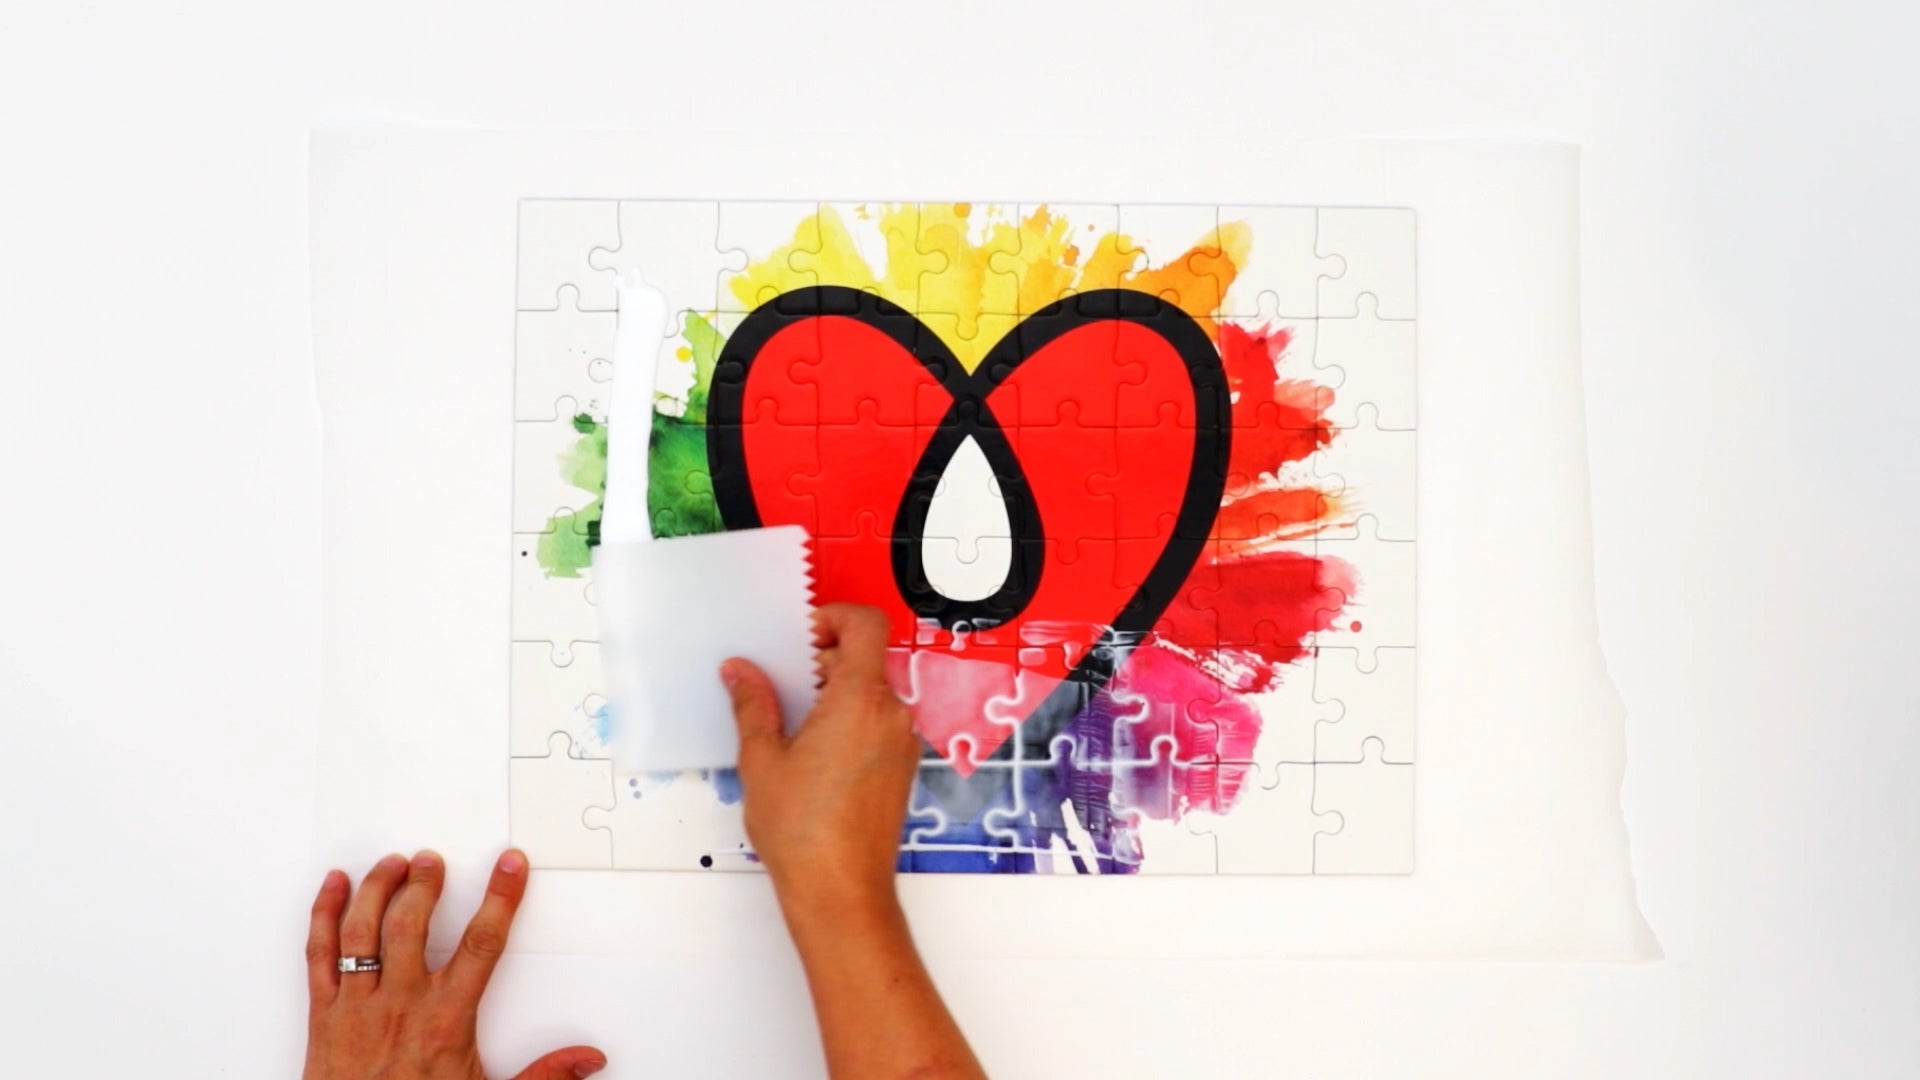
How do I seal a puzzle?
Puzzle pieces can also absorb resin. Though the surface image is usually glossy and coated, the resin can soak in along the edges where it has been cut, leaving a dark outline in the final piece. Before you resin a puzzle, brush on a couple of coats of sealant (including the back and the perimeter) to create a barrier that will prevent the resin from soaking in.

What type of sealant is best for paper?
As far as what sealant to use, it really depends on the your project, factoring in both the paper and the medium. If in doubt, test on a scrap piece first to let you know which sealant is most appropriate.
The paper should be sturdy enough to handle a brush on sealant. For example, a delicate paper like a stamp might curl and tissue paper could even tear by brushing on a sealant.

The artwork will also help determine which sealant is most appropriate: a brush on sealant might cause a charcoal or pastel drawing to smudge. In this case, there are spray sealants specifically for drawings. 

How do you seal paper before you resin it?
To apply a brush on sealant, use a clean brush (or a foam brush if you are concerned about brush strokes) and apply an even coat over the surface of the paper. Once the first side has dried, turn the paper over and repeat on the other side.

Use a toothpick to hold the piece in place if needed.
If you find that the paper has curled, allow it to dry. Place it in between two pieces of parchment paper, placing it in the pages of a heavy book for a day or two to flatten out.
To apply a spray sealant:
• Use smooth, steady movements.
• Apply several light coats, ensuring the entire surface is covered.
• To provide a really good barrier, you may need to spray multiple light coats
• For best insurance, spray sealant on paper, front and back. Allow the first side to sufficiently dry, then turn the page over and spray the back.
• If you've cut paper to fit a panel, don't forget to seal the cut edges as well.
⚠️ PLEASE NOTE: If you're not working in a well-ventilated area, wear a mask when using spray sealants.
How do you seal alcohol ink on yupo paper?
To seal an alcohol ink painting on yupo paper, use a spray sealant called Kamar Varnish.
Kamar Varnish won’t reactivate alcohol ink, causing it to bleed or smudge. Spray Kamar varnish over the entire alcohol ink piece in a light sweeping motion. Allow to dry according to label instructions.

Should I seal fabric before I resin?
Resin will make fabric stiff after it cures, but be aware that some fabric may absorb the resin, causing it to look wet or altering its color. Help to reduce this wet look by sealing the fabric with a brush on sealant first.
Again, we always recommend testing on a scrap piece of fabric so you know exactly what to expect: use a little drop of resin or water on both sealed and unsealed fabric so you know what it will look like after it's been resined.

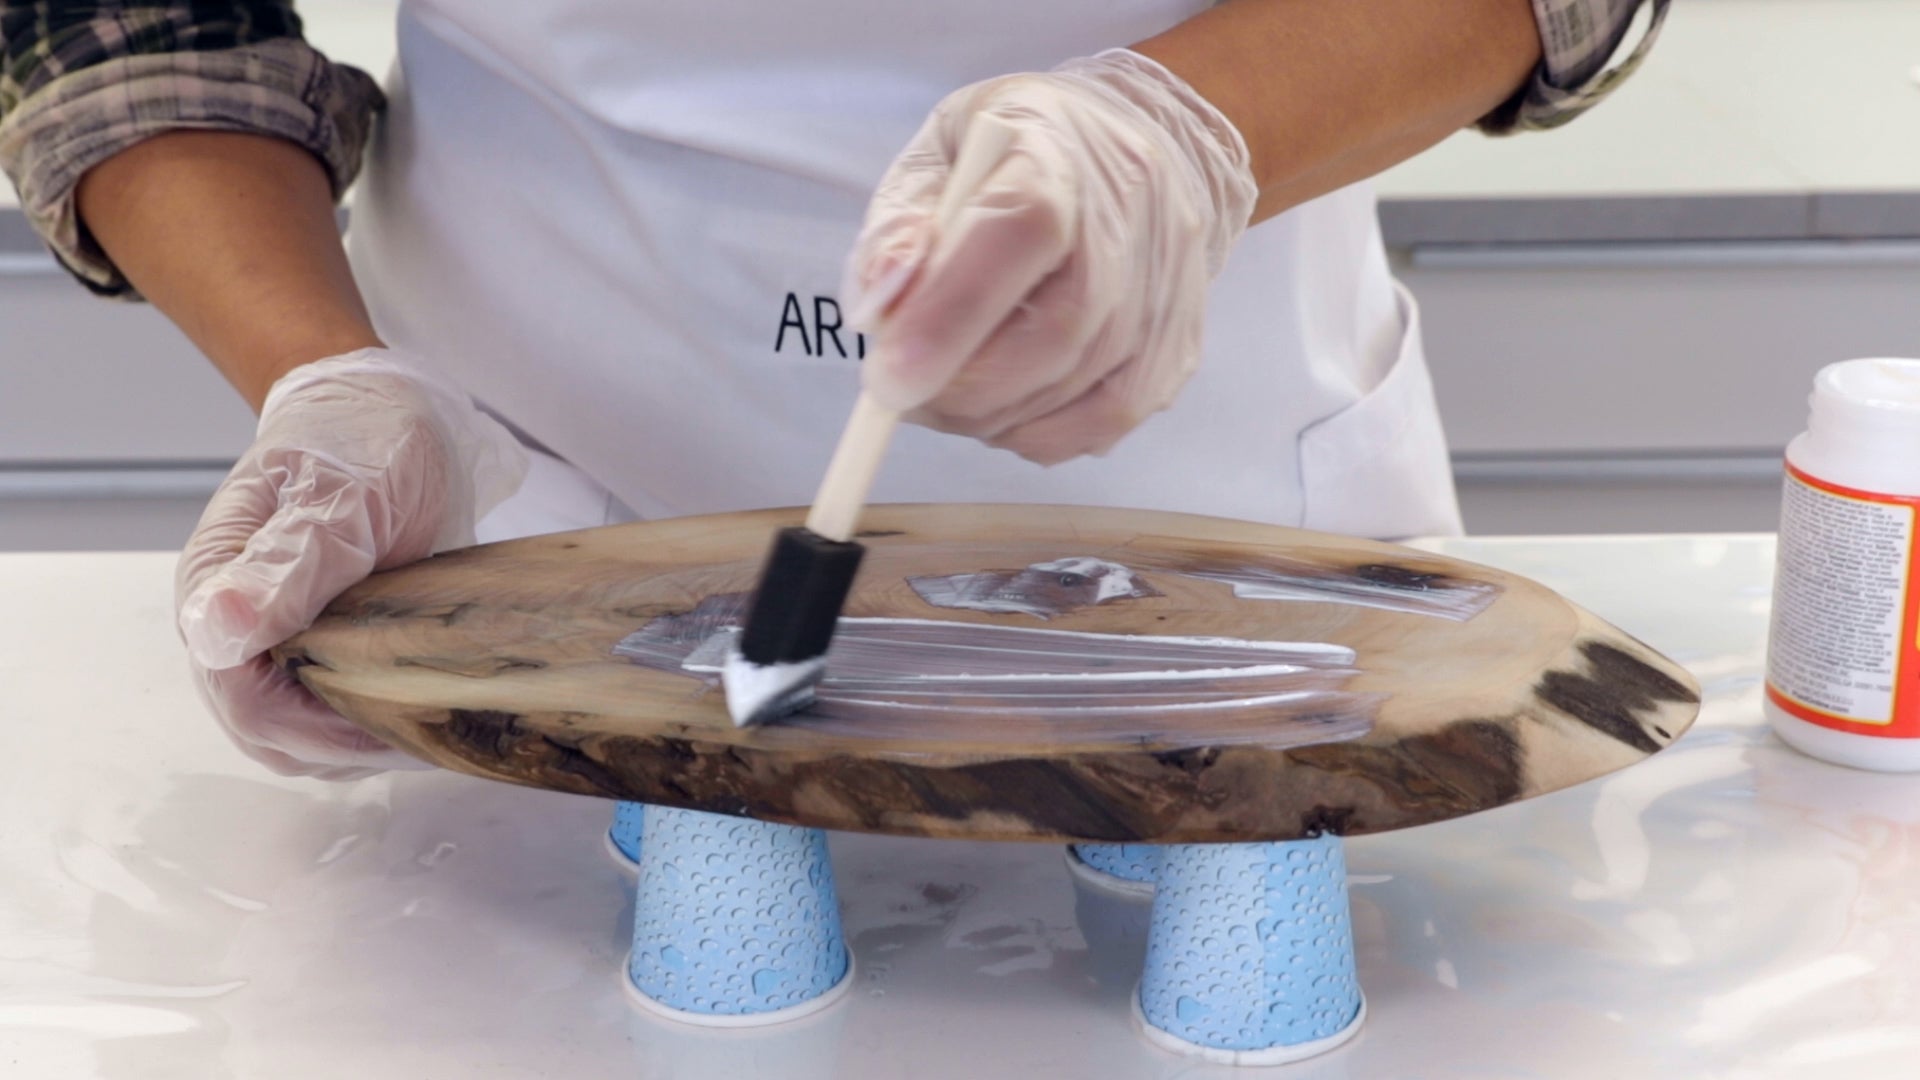
Do I need to seal wood before applying epoxy?
Wood looks gorgeous under a coat of resin, with a deep, rich color and enhanced grain, but since wood tends to absorb resin, it’s important to test first.
Just like paper, there are many variables when it comes to wood - the type of wood, the age of the wood, the color, the dryness and all of these factors can affect the final result.
You may find that some wood gets really dark under resin, or in the case of something like barn board, that weathered, silvery looking patina is lost. 
Testing wood before you resin is as easy as dropping a bit of water on the surface to see what it might look like once coated.
99% of the time, it’s going to look better, but if it does change color in a way you don’t want, then sealing the wood first can create a barrier to prevent the resin from soaking in and changing the color. 
A brush on sealant provides an efficient seal and allows you to work it into holes or knots in the wood.
Raw wood absorbs resin like a sponge, the barrier you create with the sealant will prevent you from potentially having to do multiple coats of resin - so that’s a nice bonus.
2. Sealing Over Loose Material
When pouring resin over a piece that has loose materials, be mindful of particles that might float away in the liquid resin. Glitter, beach art that contains real sand, dried flowers, butterfly wings or other natural objects, and drawings made with charcoal or chalk pastel might allow particles to become loose.
A spray sealant is a perfect way to protect artwork with loose materials, tacking them down to prevent particles from floating away in the resin.

3. Sealing To Prevent Bubbles
Organic materials such as wood and paper contain air which can release into resin in the form of bubbles. These air bubbles are typically large and release as the resin is curing, sometimes even a couple of hours after pouring. You might resin your piece, torch it, put the dust cover on and come back the next day to find that your piece has released a big fat bubble or cluster of bubbles.
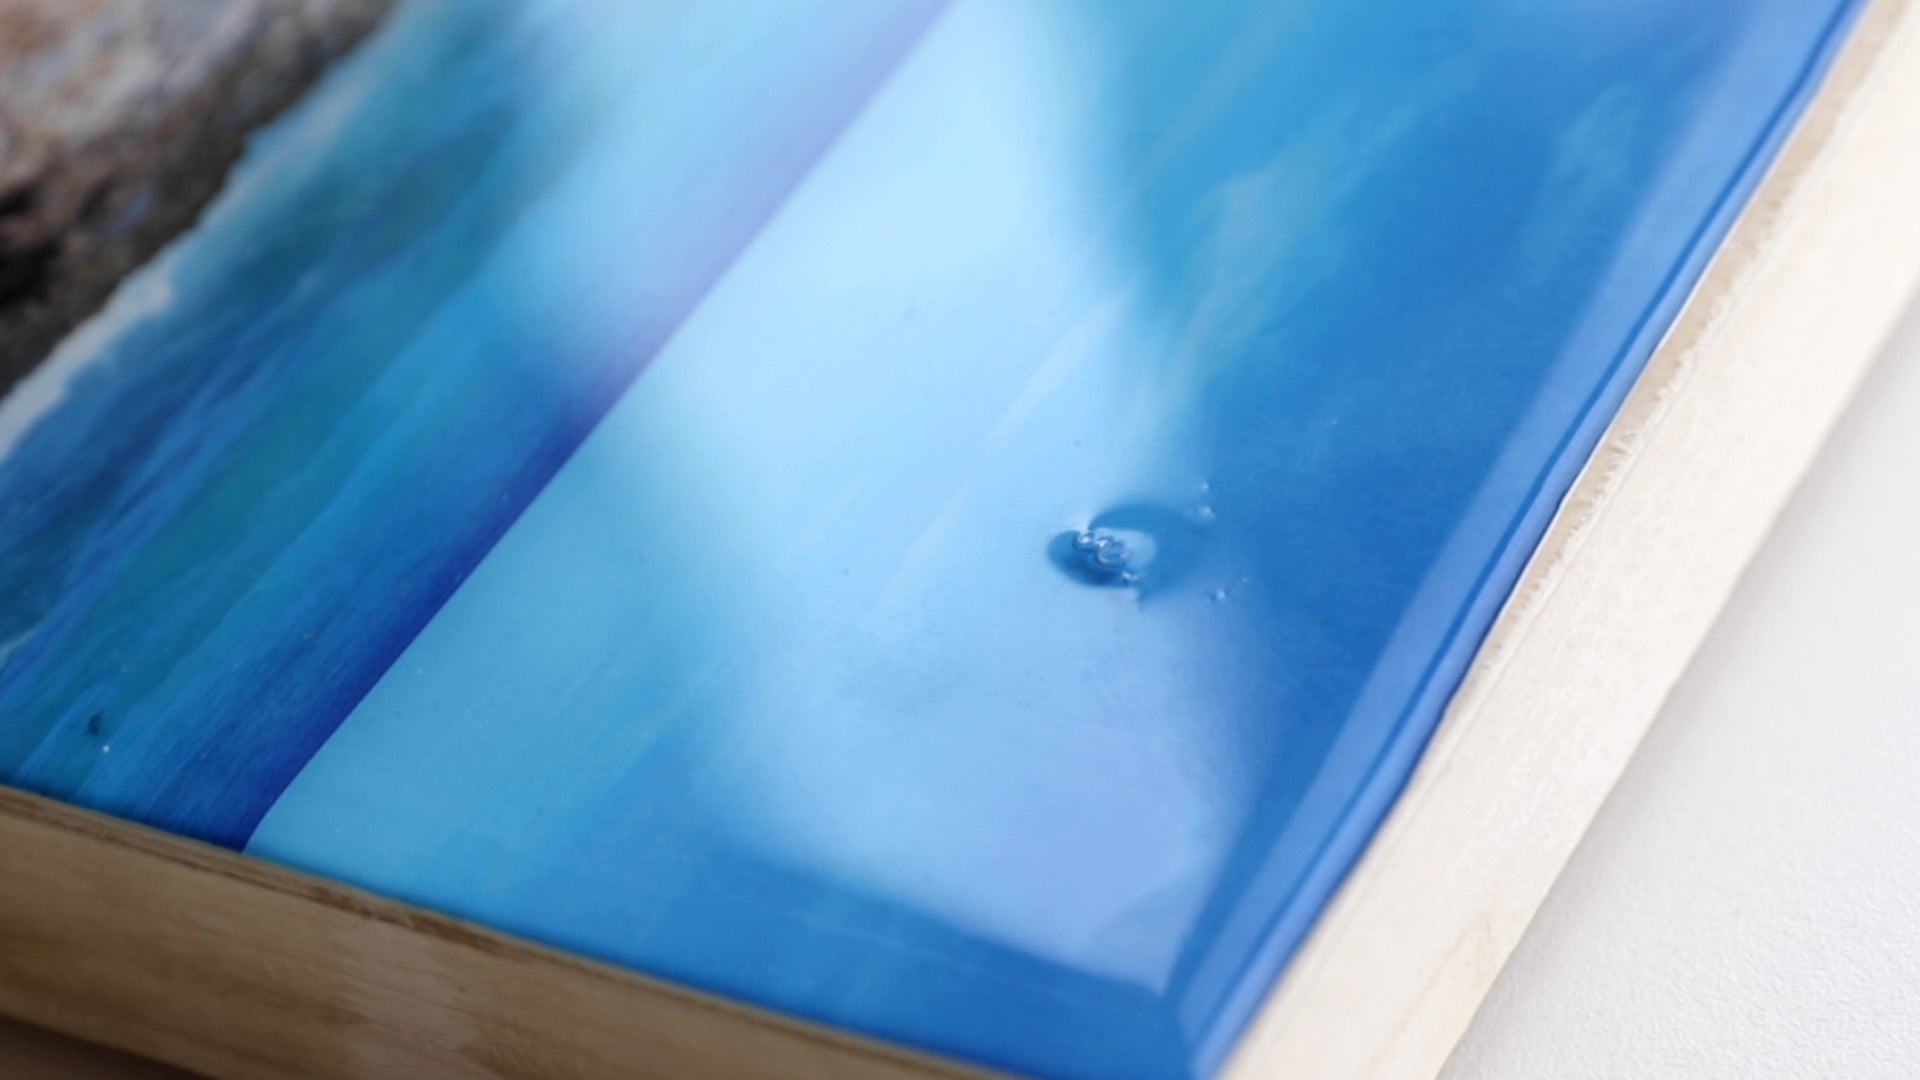
Bubbles can also occur with wood and there are several factors that might play a role: the type of wood, how dry the wood is, if there are any cracks, knots or voids in the wood and so on.
The best way to prevent unwanted air bubbles is to seal the wood first before you resin it. 
A brush on sealant is the best option for wood: it provides great coverage, creates an efficient barrier and is easy to work into cracks, knots and holes. You can use a very thin coat of resin applied with gloved hands or a foam brush, but be aware that even a thin coat of resin can alter the color of the wood.
As always, we advise testing first so you know exactly what results to expect.
Paper can release air bubbles into resin in a few different ways:
Paper Collages: Gaps and spaces in between paper collage layers provide an opportunity to trap air, which can release as bubbles into the resin.
A brush on sealant is easy to work into crevices with a small brush, but testing on a small scrap of paper will best determine whether a brush on or spray sealant is most appropriate.
Paper that has been mounted: Prints or photographs mounted on a wood panel, for example, can be prone to releasing bubbles. Air can get trapped in between the print and panel and release clusters of bubbles, so it’s important to mount your prints well.
Use a spray adhesive for even coverage and roll with a brayer to ensure a tight bond with no air pockets.


Embedded objects: Natural objects should be thoroughly dried and sealed prior to placing them in resin. Once placed in the resin, gently move your object around with a toothpick to allow any trapped air to release to the top.
In the end, it’s well worth babysitting your project, checking it regularly for the first couple of hours until the resin has thickened up.
Here's Rebecca with a recap!
There are a few reasons why sealing before you apply ArtResin is a good idea:
- To prevent absorption
- To tack down loose materials
- To create a barrier against air bubbles
You can use a spray sealant or a brush on sealant, but we recommend the following:
- Choose a sealant that dries clear.
- Choose a sealant that is most appropriate for your artwork.
- Allow the sealant to fully dry before you apply your resin coat.
- Most important, test first before you resin so you know exactly what results to expect.
We hope this answers all of your questions about sealing your artwork before you resin. If not, please leave your question in the comments below.
Learn how to use ArtResin over organic natural surfaces.
ArtResin: The Original Epoxy for Resin Art.
