
Epoxy resin is such a versatile product: once cured, it's as hard as a rock but before it reaches that point, ArtResin is quite flexible and can be shaped and molded to create free standing resin bowls, dishes and vases.
Resin artist Carmen Darley has been working with resin to create elegant home decor items such as coasters, geodes, serving trays and wedding favors. In this tutorial, she guides us step-by-step to tinting, pouring and shaping ArtResin to create a resin vase and a trinket dish.
Creating free form resin art in any shape, size or color combination you like is easy and fun!
Take a peek ....
How To Create A Resin Free-Form Vase:

What You'll Need:
- ArtResin epoxy resin
- ResinTint liquid colorants
- glitter or metallic leaf for embellishing your piece
- a vase or other hard form on which to shape your resin
- nitrile gloves
- plastic mixing cup
- small plastic cups and stir sticks, enough for each colour of tint used
- a piece of plastic to work on ( a cut piece of vinyl shower curtain works great )
- Maker's Studio Torch
- dust cover large enough to cover your piece
- scissors for trimming drips
Discover our resin art tools & accessories!
1. Assemble Your Materials Before You Start:
Gather your tools so that everything is on hand before you start, including your dust cover.

2. Prepare Your ArtResin And Tints:
Measure equal amounts, by volume, of resin and hardener and mix thoroughly for at least 3 minutes, scraping the bottom and sides of the mixing container as you go.
Read how to properly measure & mix resin!
Divide the resin equally among small plastic cups, allowing one per color. After you mix in the tint, ensure the resin sits and thickens for 15 minutes before you start to create your design. If you try to pour right after mixing, the resin will be too fluid: you'll end up with muddy colours and could lose your design.
Shake the ResinTint bottles well and use a few drops to tint each cup of resin, mixing well after each addition. Don't be afraid to mix and match to achieve the colours you wish to use.
We used:
- teal
- blue
- white
- clear (no tint added)
ResinTint is a highly saturated pigment based colorant, so it's always best to start with less than you need, adding more as necessary. Check the transparency by using the mixing stick to pull some of the tinted resin up the side of your cup: if the tint is too translucent, add a little more until you're happy with what you see.
💡 TIP: No matter which colorant you choose to use, don't add more than 6% of the total combined volume of resin and hardener. Adding more than 6% will throw off the delicate balance required for the resin and hardener to cure, and you may end up with resin that doesn't harden.

3. Pour The Resin
Here's the fun part!
After your resin has had a chance to sit and thicken, you're ready to pour.
Start with the color you want in the center of your piece. Make sure you leave some gaps to fill in with white and clear resin.
Read how to pour & spread resin!

Build your piece out by pouring the second color around the first and again, leave some negative space to fill in with white and clear resin.
Finally, fill in the gaps with white and clear resin until the piece has even resin coverage throughout. If you wish, you can use a spreader to blend your colors or allow the blending to occur organically. 
4. Add embellishments:
Add any inclusions you wish to use to the center or perimeter of your piece including:
- metallic leaf
- glitter
- beads
- crystals
- dried leaves or flower petals
- any flat inclusion you wish ... you're limited only by your imagination!

5. Torch, Cover And Wait:
Lightly run the torch over your design to remove any large bubbles: leaving small bubbles replicates the look of glass so feel free to leave them in. Move your piece onto a flat, sturdy surface to dry, if necessary.
Read how to properly torch resin!
Cover your piece with a dust cover and allow your piece to cure for 2-3 hours until it's dry to the touch.


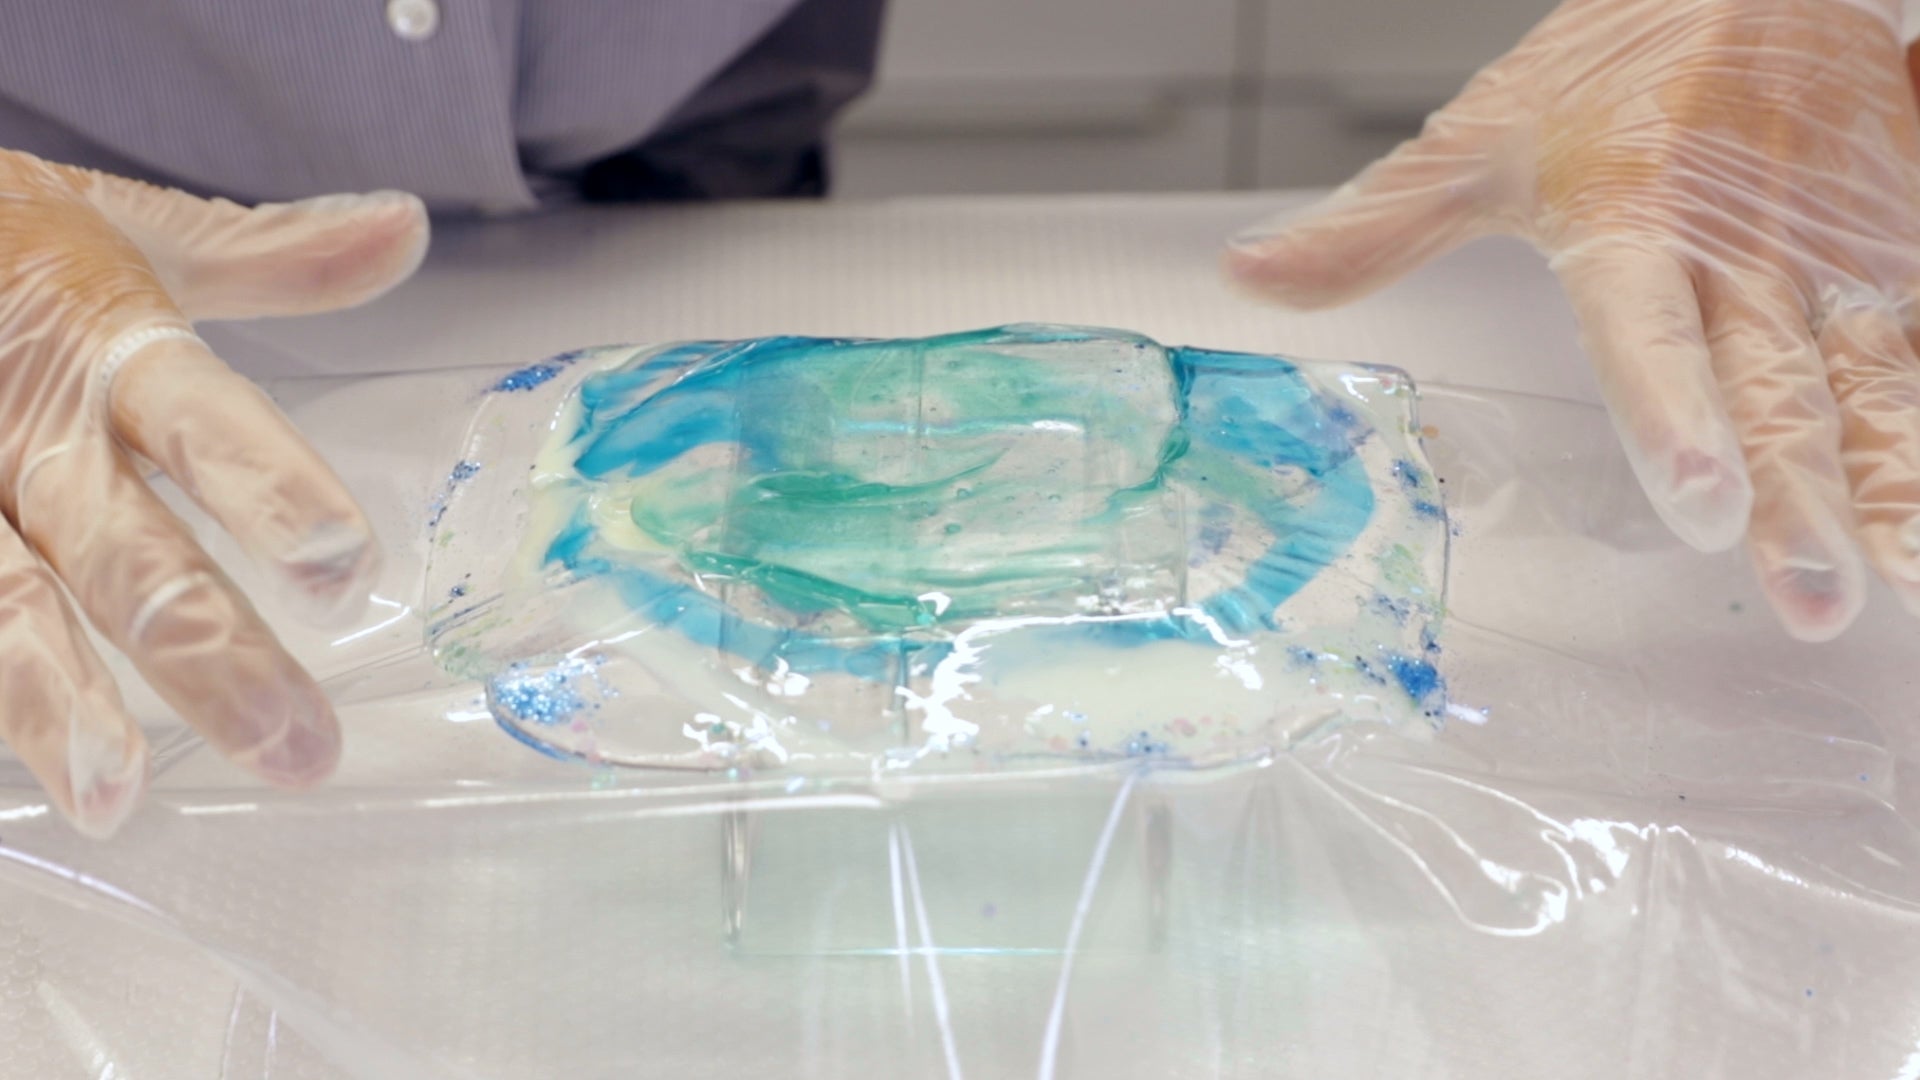
6. Shape & Mold Your Resin:
Once your piece has cured until it's fairly dry to the touch ( very lightly tacky is ok ) lift the entire piece of shower curtain and drape it over your vase. 
Pinch the edges to create fluted corners if you wish, and tuck the extra plastic underneath the vase, creating some tension to maintain the shape. If desired, apply a second square of plastic on top to help keep the resin in place.
Allow the resin 24 hours to finish curing.

7. Unmold Your Resin:
The next day, when the resin has finished its initial cure, you can unmold your piece. First, remove the top layer of plastic ( if used ) and then flip your mold over and carefully remove the plastic from the center of your piece: it should pull away quite easily.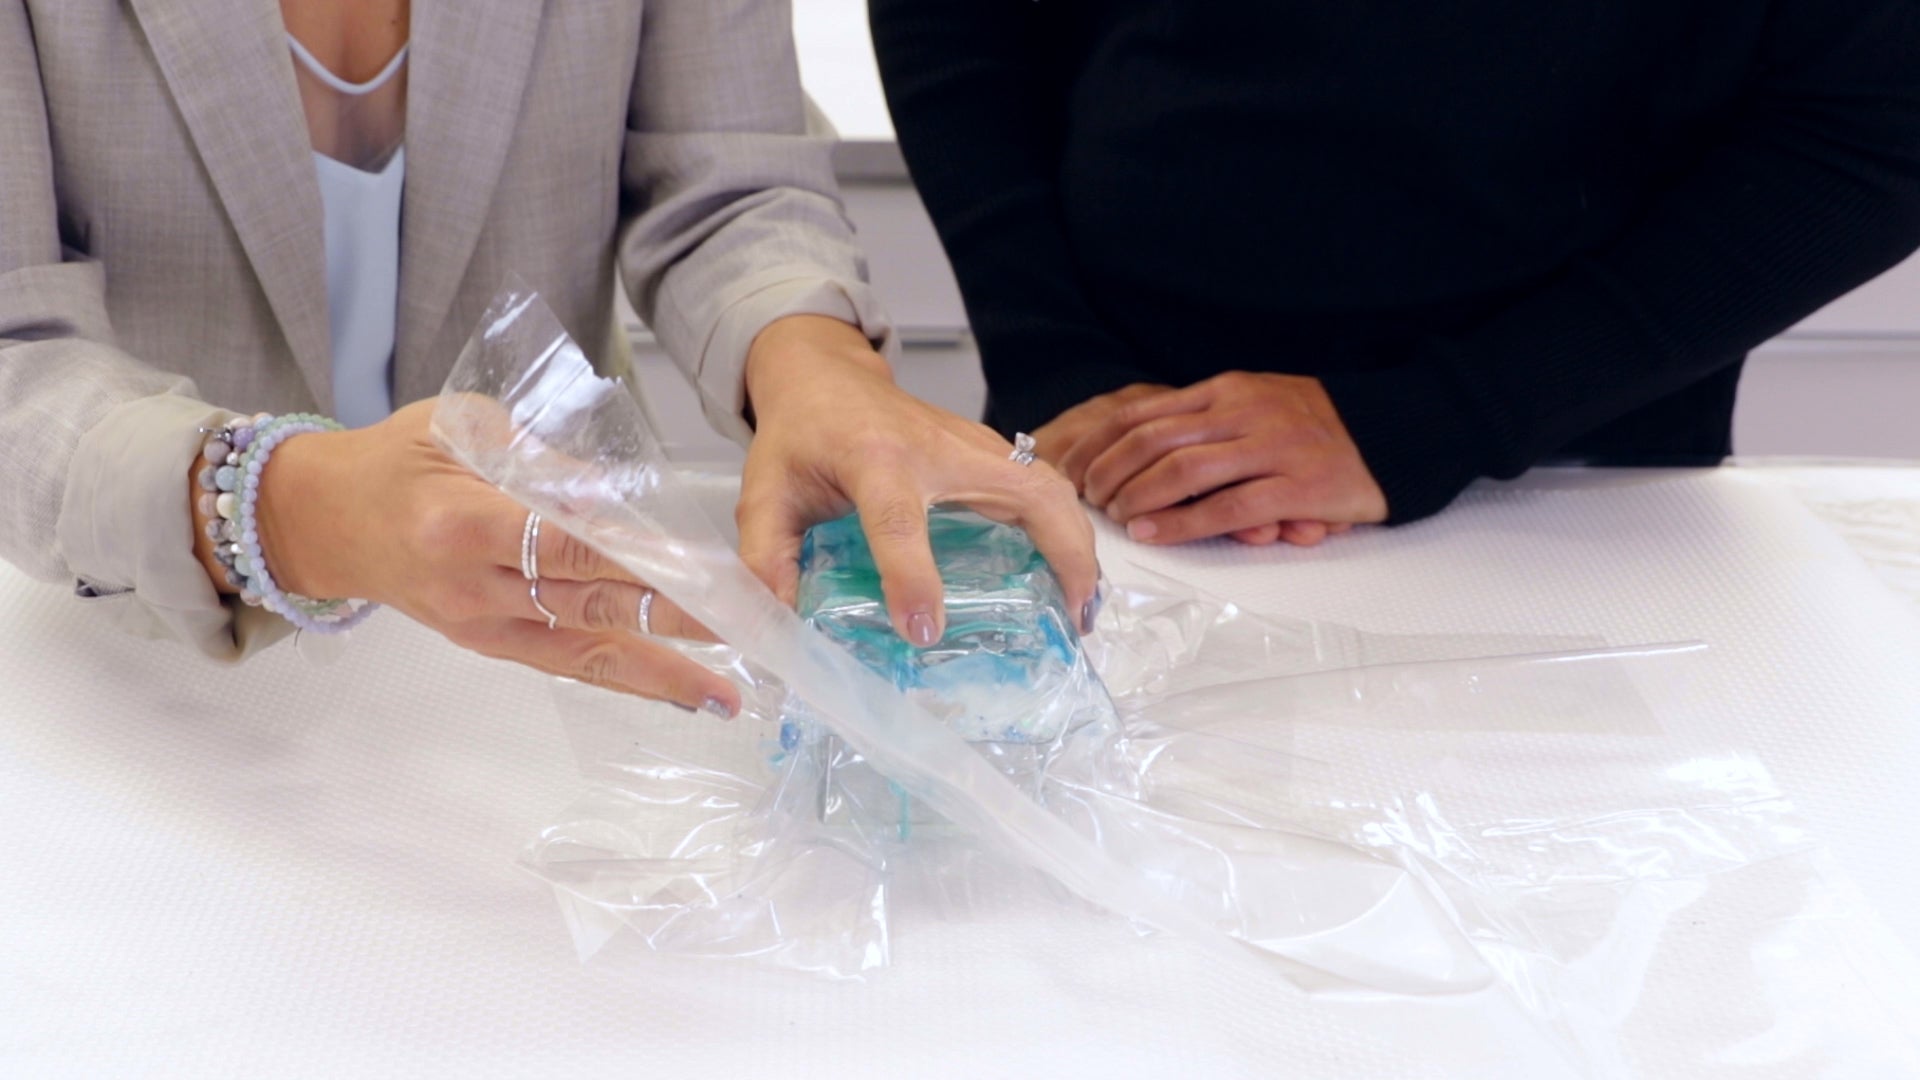

8. Finish The Edges:
Using scissors, trim away any drips or thin edges. If the edges of your piece are sharp, use a file or some sandpaper to dull them down. Using a fine brush, apply a coat of gold paint to the edges to complete your piece.

Here's the finished piece!
How To Create A Trinket Dish:

What You'll Need:
- ArtResin epoxy resin
- ResinTint liquid colorants
- glitter or metallic leaf for embellishing your piece
- a silicone mold
- 2 identical dishes, bowls, dinner plates or tin pie plates for shaping your piece
- a plastic lined work surface
- nitrile gloves
- plastic mixing cup
- small plastic cups and stir sticks, enough for each colour of tint used
- Maker's Studio Torch
- dust cover large enough to cover your piece
- scissors for trimming drips
1. Assemble Your Materials Before You Start:
Gather your tools so that everything is at hand before you start, including your dust cover.

2. Prepare Your ArtResin And Tints:
Measure equal amounts, by volume, of resin and hardener and mix thoroughly for at least 3 minutes, scraping the bottom and sides of the mixing container as you go. Divide the resin equally among small plastic cups, allowing one per color. Shake the ResinTint bottles well and use a few drops to tint each cup of resin, mixing well after each addition. Don't be afraid to mix and match to achieve the colours you wish to use.
We used:
- teal mixed with a few drops of white
- purple mixed with a few drops of white
- clear (no tint added)
ResinTint is a highly saturated pigment based colorant, so it's always best to start with less than you need, adding more as necessary. Check the transparency by using the mixing stick to pull some of the tinted resin up the side of your cup: if the tint is too translucent, add a little more until you're happy with what you see.
💡 TIP: No matter which colorant you choose to use, don't add more than 6% of the total combined volume of resin and hardener. Adding more than 6% will throw off the delicate balance required for the resin and hardener to cure, and you may end up with resin that doesn't harden.

3. Pour The Resin
Here's the fun part!
Start by pouring your color choices along the edges of your piece, allowing them to naturally blend together. Leave the middle of the mold for the clear resin pour.

Once you've poured your colors around the edges and are happy with the look, fill in the center with clear resin. 
4. Torch:
Lightly run the torch over your design to remove any large bubbles - if you wish to leave them, small bubbles replicate the look of glass. 
5. Add embellishments:
Add any inclusions you wish to use to the center of your piece including:
- metallic leaf
- glitter
- beads
- crystals
- dried leaves or flower petals
- any flat inclusion you prefer ... you're limited only by your imagination!

6. Touch up, cover and wait:
Using a spreader, ensure you have even coverage over the entire surface of the mold, including the edges. Torch again as necessary, cover and allow to cure 6-8 hours until the piece is fairly dry to the touch.
7. Unmold Your Resin:
Once the piece has cured enough to handle ( approximately 6-8 hours after pouring ) carefully remove it from the mold. It should be pliable enough to bend in half without breaking.


8. Shape & Mold Your Resin:
Place the resin onto the base plate. Ensure it's flat and centered. Run your hands over it to ensure there are no air pockets.

Place the top plate on top of the resin. Be aware that any markings or texture on the base of the top plate will imprint the resin, so choose carefully. 
Place a weight on top of the plates and allow to cure for 24 hours.
9. Unmold Your Resin:
After the 24 hour mark, remove the resin from the two plates. If the resin was fairly dry to the touch, you should have no problem removing it from the plates. You can see that the bottom of the silicone mold imparted a matte finish to the resin - conversely, a mold with a glossy finish would give a glossy finish.
10: Finish The Edges:
Using scissors, trim away any drips or thin edges. If the edges of your piece are sharp, use a file or some sandpaper to dull them down. Using a fine brush, apply a coat of gold paint to the edges to complete your piece.
We hope you enjoyed these fun and easy ways to make elevated resin decor from everyday objects you may already have around the house.
Looking for more free-form resin projects?
Check out Carmen's quick tips on how she makes resin geode coasters:
Have you created free-form resin decor?
We'd love to hear - let us know in the comments below!
To see more of Carmen's artwork, follow her on Instagram:
@carlidcollective.ca
Check out our blog on How To Make A Resin Window Painting.
ArtResin: Made For Artists, By Artists.
