Let's play a game.
A game where all of the pieces are designed by you!
Kind of a fun idea right? Well let's get to it.
Gather your objects like we did with our chess pieces. You could build a box for each piece but we think it's more efficient to build a box big enough to hold all of your pieces in one mold.

One box, one pour, one mold.
We spaced out the six different figures with approximately ½” between them, and measured the length and width of the box we needed, leaving about ¾” extra space on each side.
We used foam core for this mold’s frame, taping the sides together and also lining the inside of the box with clear packing tape. The tape helps the box to become waterproof and also allows for the finished mold to be easily pulled away.

Next, we super glued each chess piece to the bottom of the box so that they wouldn't move within the Mold Making Material.

Then it was time for the Mold Making Material. We mixed equal measurements of Part A and Part B until the color was consistent.

The 2 parts of the Mold Making Material kit are actually 2 different colors (white and dark blue) so you'll know when the mixture is thoroughly mixed when the color becomes one consistent medium blue hue.

Next, we poured the mixture into our container and over our chess pieces.

Then, we waited for the mold to cure. 3-4 hours at room temperature will do the trick.

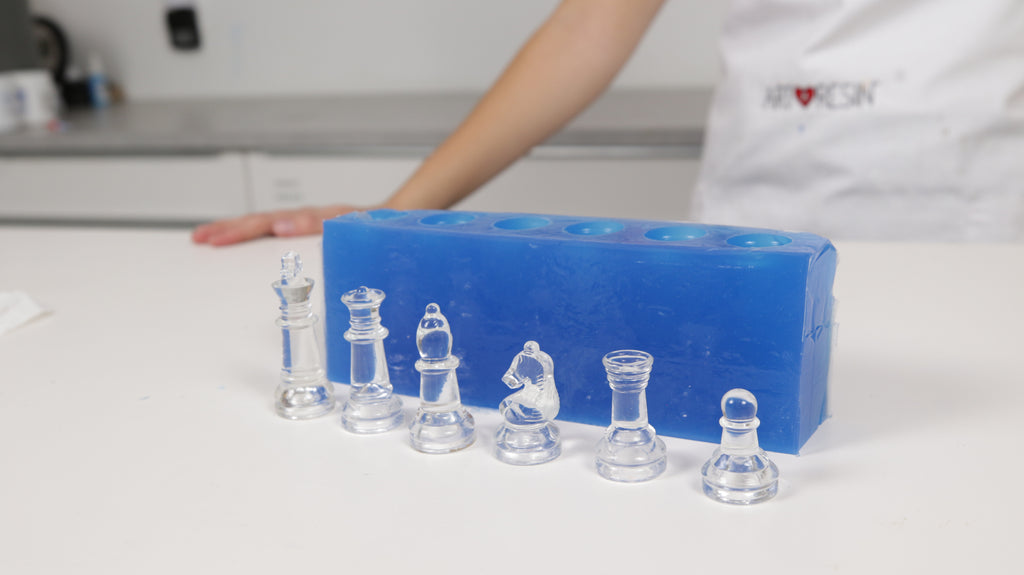
After poking the mold to ensure it was ready, we took apart our box and pulled each chess piece out of the mold.

Ta-daaaa! Our mold is complete and we can now make exact replicas of our chess pieces.
You can use many different substances to fill the mold, such as cement, plaster, polyurethane, soap, clay, polymer clay, play dough and wax, but we recommend ArtResin epoxy resin in combination with our line of ResinTints.
💡 TIP: You can also use Mold Making Material for food safe molds to create personalized shapes out of chocolate, candy, ice, butter and more! Just remember, molds made for use with food should ONLY be used for food. For more information, see our blog Make Your Own Food Safe Silicone Molds.

Just like Mold Making Material, ArtResin is a simple 1 to 1 ratio of resin and hardener. Measure out equal parts of both solutions and mix thoroughly for 3 minutes. You’ll have approximately 45 minutes of working time with the resin mixture before it will begin to set.

Grab any color of ResinTint and pour a few drops into the ArtResin. Then just mix 'er up. In this case we’ve selected black and metallic white to create our army of chess pieces.

Pour your tinted resin into the mold right to the top and let it sit for at least 24 hours. ArtResin is hard to the touch after 24 hours but a full, hardened cure will take 72.

Remove the pieces one at a time and voila! Your very own set of chess pieces to wow your opponents with.

Check... mate.
From there, have fun and create as many replicas as your heart desires.
...Do you copy? ;)