Tiered resin trays are a simple, elegant way to display desserts, cupcakes, appetizers or hors d'oeuvres. Whether you prefer the look of 2 tiers or 3, handcrafted resin stands are beautiful, easy to make and totally customizable to match the color theme of a baby shower, wedding or special event.
In this step-by-step tutorial, resin artist Carmen Darley drops by the ArtResin studio to demonstrate how to use DIY silicone resin molds and ready made molds to create 2 different tiered resin trays:
• a 2-tier resin stand using ResinTint for a faux marbled effect
• a 3 tier resin tray made with dried flowers, gold leaf and glitter.
Let's get started!
How To Create A Marble Resin Tray

What You'll Need:
- ArtResin epoxy resin
- ResinTint liquid colorants
- Silicone molds in 2 or 3 different sizes OR make your own with a tube of low odor silicone caulking, a caulking gun and parchment paper
- 3-Tier Tray Hardware
- Screwdriver
- Electric drill
- Drill bit the same size as the hardware and a smaller one to drill a sink hole
- Utility knife, sandpaper or a Dremel for smoothing the edges
- Nitrile gloves
- Plastic mixing cup
- Small plastic cups and stir sticks, enough for each colour of tint used
- A piece of plastic to line your work surface with
- Artist's Torch or a heat gun
- Dust cover large enough to cover your pieces
Discover our resin art tools & accessories.
1. Assemble Your Materials Before You Start:
Gather your tools before you start so that everything is on hand, including your dust cover.
2. Build Your Molds
You can buy pre-made molds or make your own custom ones. Making your own re-usable molds is easy, allowing you to create layers in any size or shape you wish. You can make custom molds using silicone caulking piped onto a piece of parchment paper or vinyl.
First, use a pen to sketch out your shapes - you can trace a perfect circle or square or draw a freehand, organic design in any size or shape you wish. If you're making a multi-tiered tray, make sure you leave a 2 cm difference between each layer.
Place the silicone tube in the caulking gun and cut the tip at the widest part to allow for a nice, thick line. Apply the silicone to the parchment paper, tracing your outlines. Ensure there are no gaps in the mold that the resin could leak out from.
Apply a second layer of silicone directly on top of the first. You can apply this right away or if you prefer, wait a few hours until the first layer of silicone has hardened up a bit. 
Once the second layer has been applied, let it dry for 24 hours.
3. Prepare Your ArtResin And Tints:
Measure equal amounts, by volume, of resin and hardener and mix thoroughly for at least 3 minutes, scraping the bottom and sides of the mixing container as you stir. 


Choose your color palette and divide the resin equally among small plastic cups, allowing one per color. Carmen wanted to replicate the look of marble so chose a white base accented with streaks of black and bronze.

Shake the ResinTint bottles well and add a few drops to each cup, mixing well after each addition. ResinTint is a highly saturated, pigment based colorant, so always start with less than you need. You can check the color by pulling some of the tinted resin up the side of your cup. If it's too translucent, add a little more tint.
💡TIP: No matter which colorant you use, don't add more than 6% of the total combined volume of resin and hardener. Too much colorant throws off the delicate balance required for the resin and hardener to cure, and you may end up with resin that doesn't harden.
Mix and match ResinTint to create your own custom colors. Add a drop of our metallics for a little shimmer or add a drop or two of white for an opaque look.
4. Pour The Resin
Here's the fun part!
Pour the white resin into the center of the mold, in a circular motion. It will self-level but a craft stick helps nudge it evenly to the edges.
Dip your craft stick into the black tinted resin and swirl it into the white resin to replicate the look of marble. 
Repeat with the bronze tinted resin.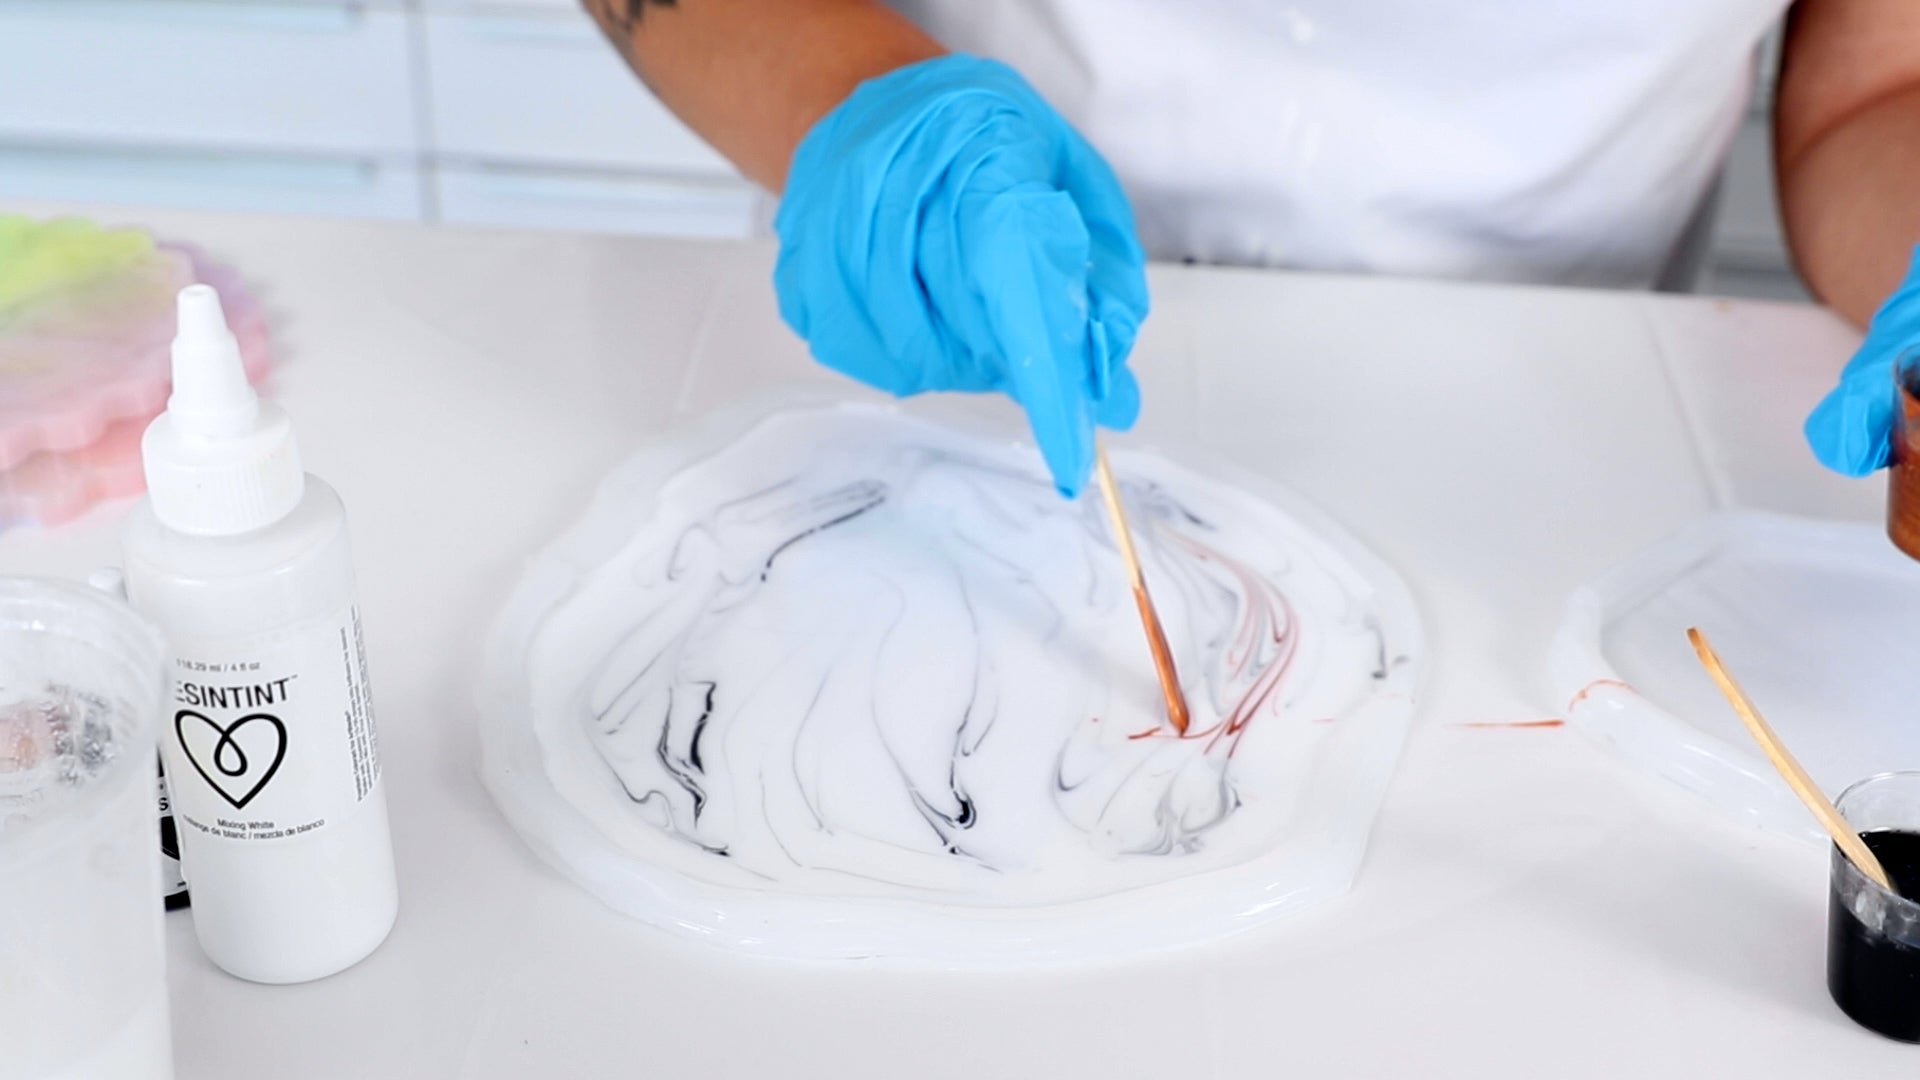
Add a little more black on top of the bronze. Repeat these steps for the other molds.
5. Torch, Cover And Wait:
Run the torch or heat gun very lightly over your design to remove any large bubbles, taking care to avoid the edges of the mold. This step has the added bonus of softening the blend lines so it really takes on a marble appearance!
Lay your molds on a flat, sturdy surface and cover with a clean cardboard box or plastic tote and allow it to cure.
6. Remove The Resin From The Molds
The trays will be dry to the touch at 24 hours, at which point you can gently remove them from the molds and place them somewhere flat to finish curing. Allow at least a week to fully cure before assembling the tray: if you assemble them too soon, gravity may pull the edges down and the layers will not sit flat.
7. Clean Up The Edges
If you've used a homemade silicone mold with caulking and parchment paper, you may find that the edges are rough and jagged. These can be addressed in two ways:
1) after unmolding at the 24 hr mark: the resin will be flexible enough that a utility knife can be used to carefully remove sharp edges.
2) if the layers have cured for 7 days or longer: smooth out the edges with sandpaper or a Dremel tool.
💡TIP: If you wish, use metallic paint or a metallic paint marker to finish off the edges of your tray.

8. Drill The Holes
Next, we need to drill holes in the middle of each layer to fit the hardware. Determine the size of the drill bit by matching it to the screw part of the hardware kit. The hole should be the same size or even slightly smaller so that the hardware screws in securely to the resin layer. You also need a smaller drill bit for the pilot hole - drilling a pilot hole first will prevent the resin from cracking.

Measure each layer to determine the center point and mark it with a pen. Starting with the smaller drill bit, slowly drill a pilot hole, then use the larger drill bit to complete the final hole.

Test your hardware and ensure you can thread the ends through the holes - if not, you can drill again to enlarge the holes as necessary.
9. Assemble The Tray
Once each layer has its drill hole complete, you're ready to assemble the tray. Thread the hardware through each layer, with the washers in between, and screw it tightly together. Use the screwdriver to tighten the screw at the bottom.


10. Use And Enjoy!
As the top tier has no backing, we recommend placing heavier items on the bottom tier of the tray.

How To Create A Floral Embellished Resin Tray

What You'll Need:
- ArtResin epoxy resin
- silicone molds in 3 different sizes
- tray hardware
- glitter, metallic leaf, dried flowers, glass or crystals for embellishing your piece
- nitrile gloves
- plastic mixing cup
- a piece of plastic to line your work surface with
- an Artist's Torch or heat gun
- dust cover large enough to cover your piece
1. Assemble Your Materials Before You Start:
Gather your tools before you start so that everything is on hand, including your dust cover.
2. Prepare Your Molds
You can make your own custom molds you can buy ready made silicone molds especially designed for tiered trays. They often come in sets of 2 or 3 assorted sizes and some even come with the hardware you'll need to build your tray. These molds have a nub in the center, eliminating the need to drill holes for the hardware.
3. Prepare Your ArtResin:
Measure equal amounts, by volume, of resin and hardener and mix thoroughly for at least 3 minutes, scraping the bottom and sides of the mixing container as you stir.
3. Pour The Resin
Here's the fun part!
Pour the resin into the center of the mold, in a circular motion. It will self-level but a craft stick helps nudge it evenly to the edges.
3. Add Your Embellishments
Using a pair of tweezers or a craft stick with a bit of resin on the tip, place your inclusions onto the resin surface. Once you're happy with the placement, use a craft stick to submerge the inclusion into the resin.
Here's where you can get creative! Use dried flowers, silk flowers, gold leaf, glitter, crystals, glass .... just ensure whatever you add is thoroughly dry.
💡TIP: Try not to move delicate items like dried flowers once you've placed them into the resin as they may break apart.


4. Torch, Cover And Wait:
Run the torch or heat gun very lightly over your design to remove any large bubbles, taking care to avoid the edges of the mold.
Lay your molds on a flat, sturdy surface and cover with a clean cardboard box or plastic tote and allow it to cure.
4. Remove The Resin From The Molds
The trays will be dry to the touch at 24 hours, at which point you can gently remove them from the molds and place them somewhere flat to finish curing. Allow at least a week to fully cure before assembling the tray: if you assemble them too soon, gravity may pull the edges down and the layers will not sit flat.

5. Assemble The Tray
Once each layer has thoroughly cured, you're ready to assemble the tray. Thread the hardware through each layer, with the washers in between, and screw it tightly together.
💡TIP: Because the silicone mold edges are smooth, you won't have to sand down the edges once you unmold the resin layers. You can, however, finish the edges with metallic paint or a metallic paint marker to add a little sparkle!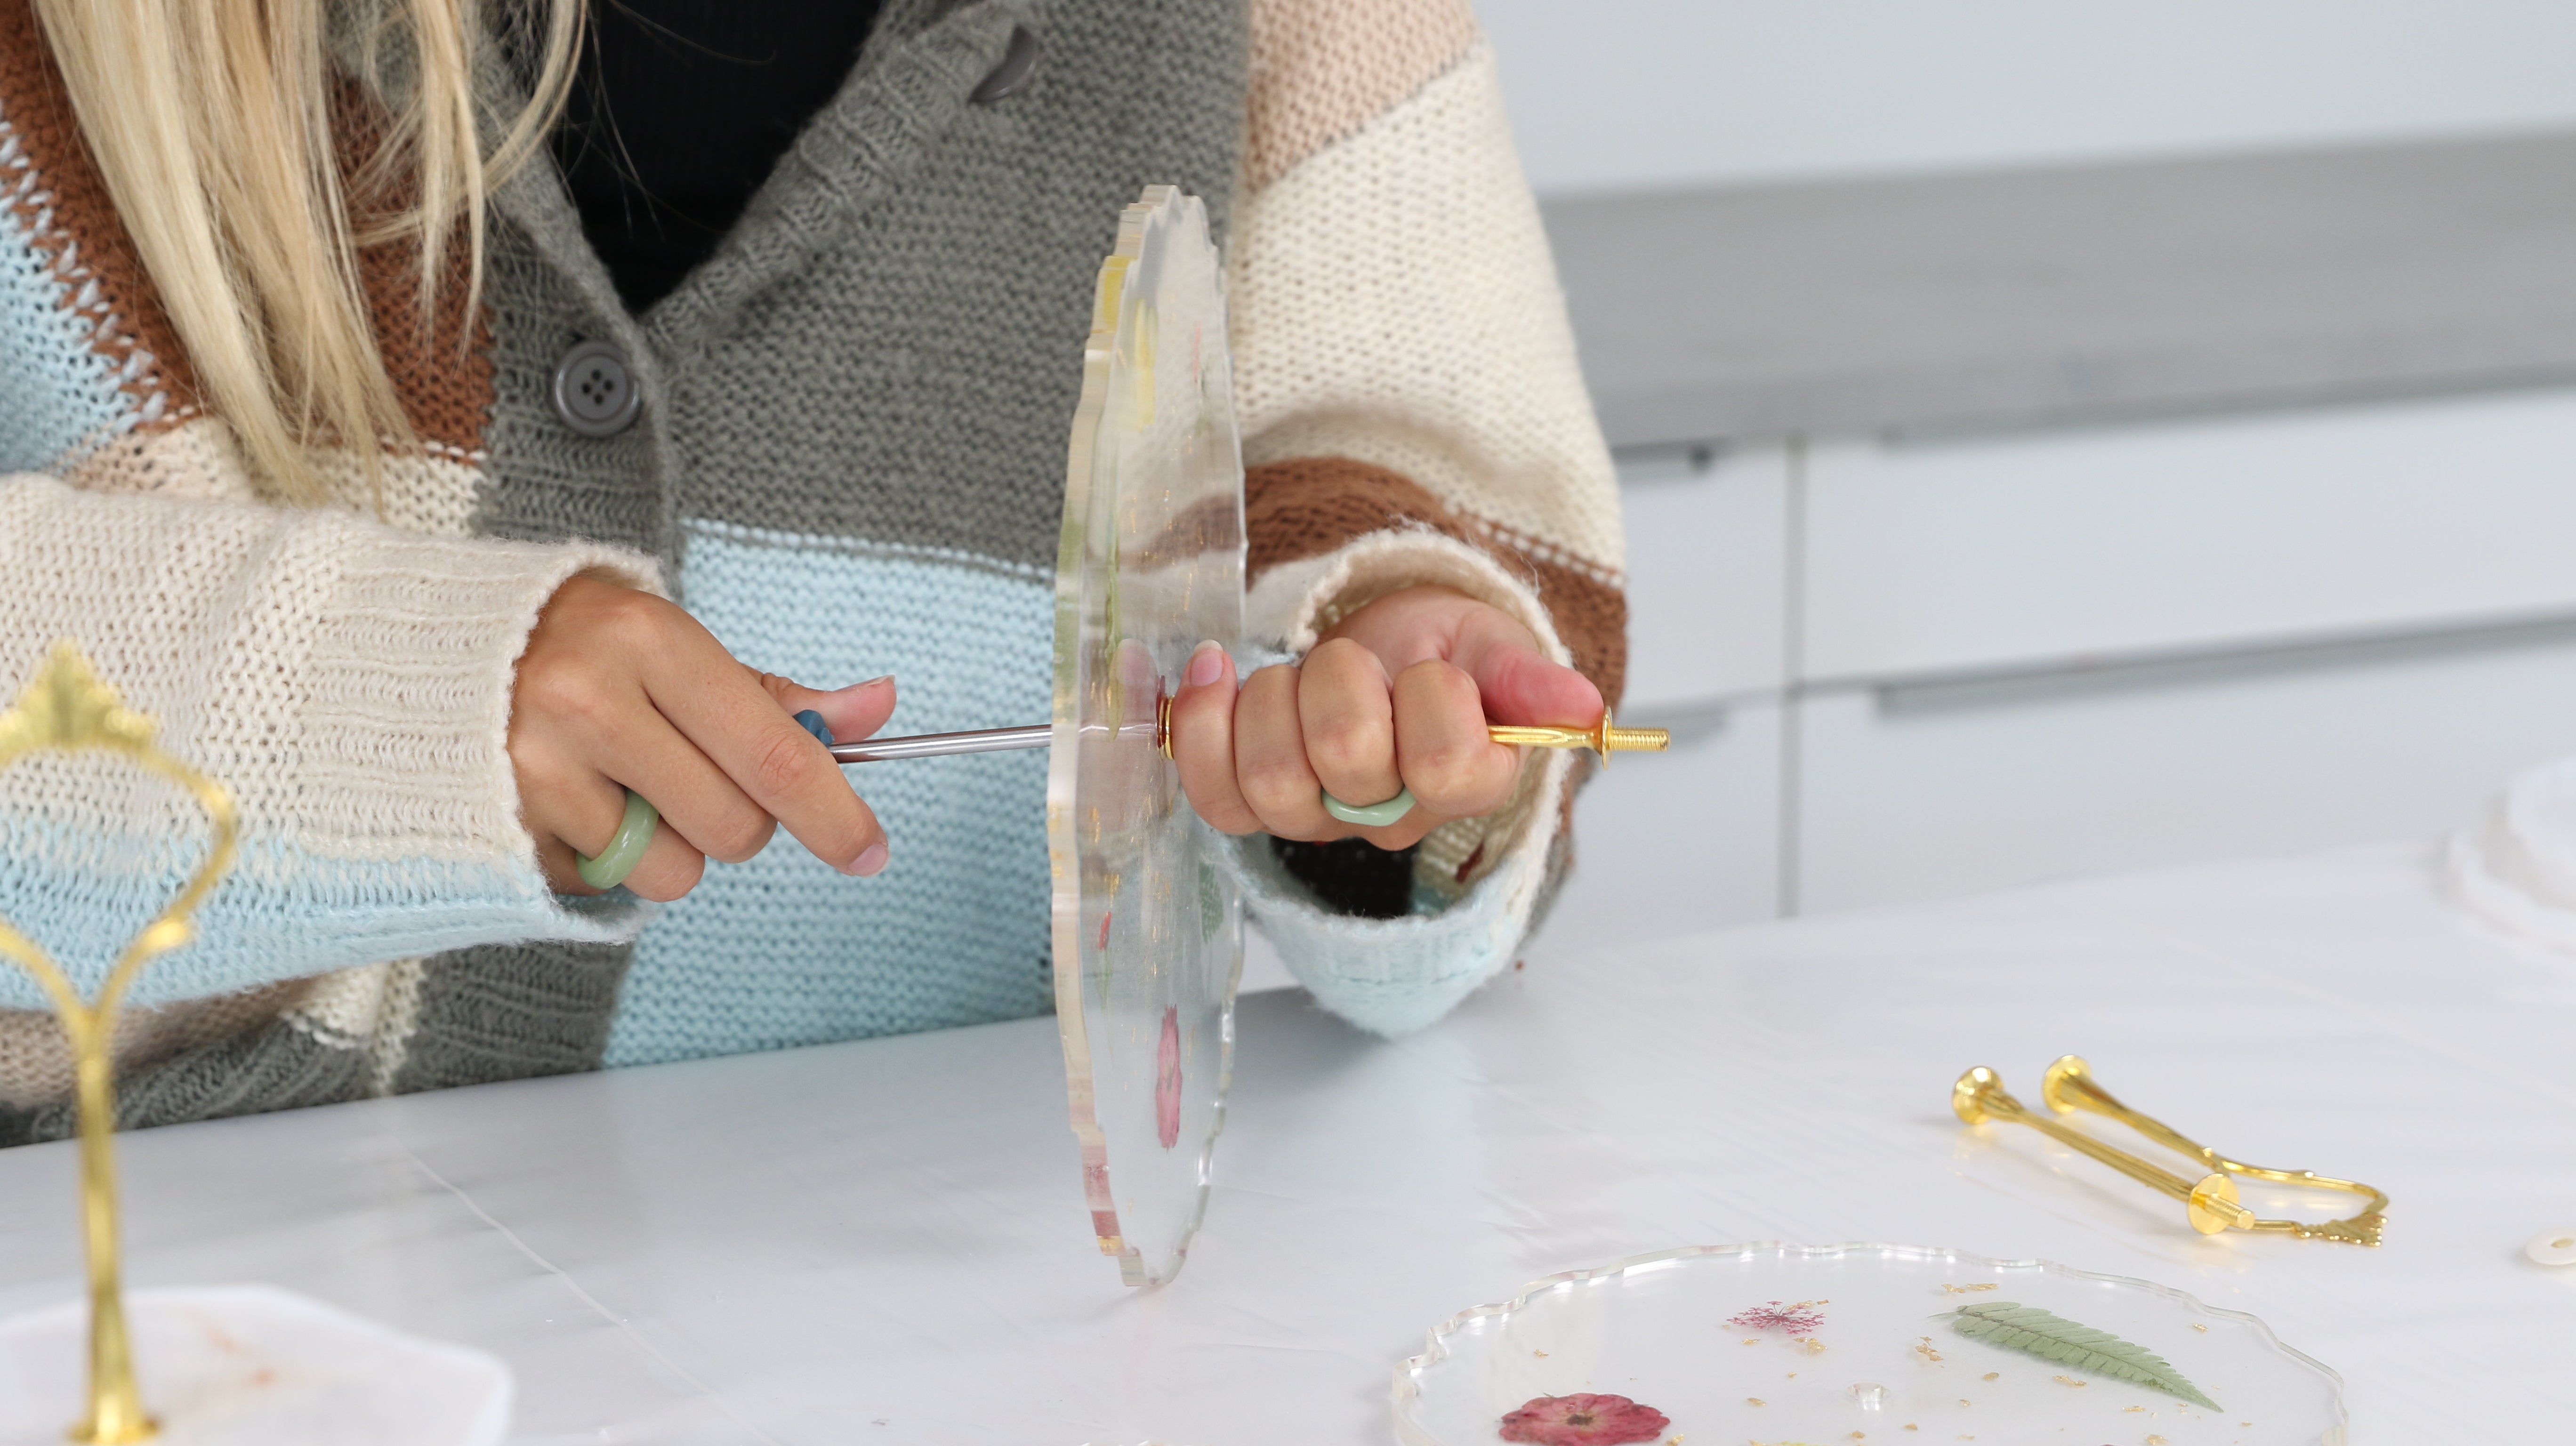
6. Use And Enjoy!
As the top tier has no backing, we recommend placing heavier items on the bottom tier of the tray.
Didn't these trays turn out beautifully? Which tray do you prefer?
We hope you enjoyed watching these two methods and you feel inspired to make your very own, custom made, tiered resin tray!
Check out our blog on How To Paint With Alcohol Ink On Yupo Paper.
Questions or comments?
Have you made your own tiered resin tray?
Let us know in the comments section below!
Do you want to learn more resin art projects? See below our how-to tutorials.
- Introduction to Resin Art
- How to Make an Epoxy Resin Tumbler
- How to Resin a Coaster
- How to Make a Pen Blank
- How to Create Resin Petri Dish Art
- How to Make a Charcuterie Board
- How to Make a Custom Resin Tray
- How to Make Resin Flower Coasters
- How to Resin a Puzzle
- How to Resin a Board Game Table
- How To Make Resin Flower Coasters
- 20 Best Resin Crafts To Make
