
Have you been wanting to try alcohol ink art but weren’t sure where to start?
You don't need painting experience to create alcohol ink flowers. This beginner-friendly project is easy to follow with beautiful results. You’ll create a soft, flowing petals by dropping ink and blowing it into shape - no complicated techniques, just letting the ink move naturally. Best of all, you can work with your favorite color palette for a piece that feels completely your own.
Ontario, Canada-based artist Susan King works with watercolor, acrylic, pastel, and alcohol ink. Her signature style features layered floral compositions, where alcohol ink blooms into soft, organic petals.
In this tutorial, Susan walks us through her process, using simple tools and techniques to build layers of alcohol ink into a beautiful floral bloom on a round canvas. She also shares how she enhances her work with pen details, and finishes each piece with a glossy resin coat for a smooth, glass-like surface.
Watch the full video tutorial:
What You'll Need:
• Small round canvas
• Tape to protect the back of the canvas
• Lazy Susan
• Rocket pump for blowing out the ink
• Paintbrush
• Black Acrylic paint
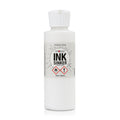
• Alcohol inks of your choice: Susan used Tim Holtz's Snowcap, Pearl Celestial, and Pearl Smolder and Piñata's Blanco Blanco (you could also use ArtResin's white Ink Sinker).
• Kamar Varnish to protect the ink
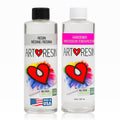
• ArtResin
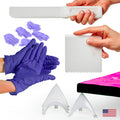
• Nitrile gloves, Mixing Stick, Spreader, Stands (available in our Accessory Kit)
• Measuring cup
• Respirator for alcohol ink work
• Fine-tipped white acrylic paint pen: Susan uses a Flysea .7 mm acrylic painter pen
• Black pigment liner pen: Susan uses a Staedtler .5 pigment liner
Step 1: Prepare the Canvas
Susan tapes the back of her round canvas to keep it clean and protected against resin drips.

Next, she applies a base layer of black soft body acrylic paint. The dark background helps the alcohol ink flowers stand out. Allow the paint to dry according to the label directions.
💡 SUSAN'S TIP: Place the canvas on a Lazy Susan so you can easily rotate it as you work.


Step 2: Create the First Layer of Petals
Using Snowcap (a translucent white) and Blanco Blanco (an opaque white), Susan begins forming petals at the outer edge of the canvas and works her way around in a full circle.
To form the petals, Susan first places 2-3 drops of Snowcap down on the canvas.

Next, she adds 1 drop of White.

Using the rocket pump, Susan blows the ink outward into a petal shape.

You may need 1-3 pumps depending on how the ink moves. Angle the pump to control direction, or rotate the canvas for different effects.

Susan works her way around the canvas, creating petals until the circle is complete. She then allows the layer to dry.


Step 3: Build the Second Layer
Next, Susan works between the first petals to create a second row using Snowcap and Celestial, a beautiful blue-grey pearl.
In the space between the first petals Susan places 3-5 drops of Snowcap.

Then she adds 1-2 drops of Celestial.

She blows the ink outward to form the next row of petals, making her way around the canvas. Once the circle is complete, she allows it to dry.


Step 4: Add the Third Layer
Next Susan adds 3 drops of Snowcap and 1 drop of white between each second-layer petal, blowing it outward to form a new layer.


💡 SUSAN'S TIP: If a drop lands where you didn't intend, simply blow it out and let it become a part of your design.


Step 5: Refine the Outer Edge
At this point, Susan steps back to take a look at her layers so far. She feels the outer edge is a bit too open. She places 2 drops of Snowcap between each of the outer petals to fill in the gaps and balance the composition.


Step 6: Continue Building Layers Toward the Center
Susan returns to her layers, working her way closer to the center of the canvas. She adds 1 drop of Celestial to create a soft blue layer of petals.

She follows this with 1 drop of Snowcap to create the next layer.

Susan continues layering to build out her last layer of Celestial, followed by Snowcap.
There are no strict rules here - if something doesn't feel right, you can always go over it again.


Step 7: Create the Center of the Flower
Susan adds one drop of Smolder, a dark, smoky gray metallic pearl, and gently blows it outward.


She adds small touches as needed for balance, then allows everything to dry completely.
She starts first with a layer of Celestial.

Next, another layer of Snowcap.

Followed by a final layer of white (Blanco Blanco).


Next, Susan uses a fine-tipped white acrylic paint pen to add stippled dots around the center for texture and detail.

💡 SUSAN'S TIP: Place a flat object under the canvas to keep the surface steady while dotting. Susan uses a glass container with a hard plastic lid.


Step 8: Optional Line Work
Using a black pigment liner pen, Susan selectively outlines a few petals to add contrast and depth. She only chooses a few areas that feel right rather than outlining everything.
She also adds in light stippling in the center for extra detail.


Step 9: Seal the Artwork
Susan allows the painting to dry for several days before applying a light spray of Kamar Varnish. This alcohol ink-friendly sealant protects the design without reactivating or causing the inks to bleed.
After spraying, let the piece sit for a few more days. Plan for about a week of total drying time before moving on to resin.

Once fully dry, Susan lightly sands the surface with 100 grit sandpaper to create a bit of tooth for the resin to adhere to. A quick wipe-down removes any dust, and the piece is ready for its glossy topcoat.

Step 10: Apply Resin
Wearing gloves, prepare the ArtResin according to directions. To determine exactly how much resin you need, use ArtResin's Resin Calculator
Simply enter the diameter of your piece and the calculator will let you know how much resin and hardener to mix together.

Place the canvas on stands and pour the resin into the center. Use a spreader to guide it evenly across the surface.

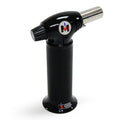
Since the back is taped, Susan allows the resin to flow over the edges. Next, she uses a torch to remove the bubbles, then covers the piece and leaves it undisturbed for 24 hours to cure.


Final Results:
The finished pieces reveal soft, layered alcohol ink florals sealed under a shiny resin finish that enhances the color, depth, and shimmer.


We hope you enjoyed this tutorial with Susan and feel inspired to try your own alcohol ink floral art! A special thank you to Susan for sharing her process with us!
To see more of Susan's work:
Visit her website: kingsdrawingroom.weebly.com
Follow her on Instagram: @susan_king_artist
Watch her YouTube videos: @PaintingisPoetrySK
ArtResin: The Original Epoxy for Resin Art
