Resin geode art is made by placing crushed glass and crystals alongside tinted resin to recreate the look of natural rock formations. Using pigments and mica powder, you can create resin geodes in any color palette you wish, adding decorative elements like glitter and metallic paint for a luxurious finish.
Artist Shilpi Patel walks us through her step-by-step process for creating a custom piece of resin geode art. If color and sparkle are your thing, you're going to love learning how to create resin geodes! Once you learn the basics, there's no limit to what resin geode art designs you can create for coasters, wall art, sculptures, table tops and more.
Let's get started!
Supplies You Will Need

- 18" x 18" wood panel painted white
- Clear fireglass in 1/4" pieces or smaller. You can find these online or in store where they supplies for outdoor fire tables are told.
- Crushed glass in gold and silver (available at craft stores).
- ResinTint and/or Mica powder in several shades of white, plus 1-2 accent colors
- Gold glitter (fine)
- Krylon gold metallic paint marker
- Posca white acrylic paint pen
- A 2" wide paint brush to move the crystals into place
- ArtResin epoxy resin
- Several pairs of nitrile gloves
- A mixing cup with easy to read measurement lines
- Stir stick
- Craft sticks and small plastic cups (enough for each color)
- a small plastic zip lock bag
- Plastic stands
- Painter's tape
- A level
- A handheld torch like our Artist's Torch
- A clean, empty plastic tote to protect your piece while it dries

Steps For Making a Resin Geode
The following step-by-step instructions will explain how to create your own resin art geodes:
Step 1: Paint the Wood Panel
Paint the wood panel white. Once dry, tape off the back with painter's tape. The tape will catch the resin drips and provide a nice clean finish to the underside of your panel.
Place the panel on stands up and off of the work surface. Using a level, ensure the panels are perfectly horizontal. This is an important step: if the panels are not level, the resin will run off one side as it cures and ruin the geode pattern you’ve created. 
Step 2: Create a Design
Create a design using the crystals. Wearing gloves to protect your hands, start with your largest crystals and place them on the panel. You'll be building the majority of your geode design using these, so feel free to use a lot of them. Take your time laying out the crystal pattern. Play around with the shape until you’re happy with what you have in front of you.
💡 TIP: Start by choosing a symmetrical or an abstract pattern. If you're not sure what you like, use reference photos of natural geode formations to help you choose both pattern and color palette.
Next, use the gold toned fire glass to outline the shape you’ve made with the clear crystals.
💡 TIP: You can use just one type of crystal, but a mixture of sizes and tones gives texture and dimension to your piece.
Use the paintbrush to create shapes, curves or to make slight adjustments, pushing the rocks in or away, and adding more crystals as necessary. Remember that crystals come in all shapes and sizes: if there are some big pieces you don’t like, feel free to move them or replace them.
💡 Shilpi's Tip: "The beauty of geode art is that each piece is different. You’ll never find a geode [in nature] that’s the same as another geode. In artwork, that takes the pressure off because it doesn’t need to be perfect. It can be whatever you want it to be."

Step 3: Mix A Small Batch Of Resin
Mix a small batch of resin to adhere the crystals to the panel. You'll be drizzling the resin over the crystal pattern so you only need to prepare a small amount - 50 ml total should do.

Starting in one corner, drizzle a small amount of resin over the crystal pattern, so that every crystal has exposure to a tiny bit of resin. Try to pour in one fluid, constant motion from one corner to the other without stopping and starting and being careful not to flood the crystals. You can pour slightly more near the perimeter of your design: this will create a barrier to prevent tinted resin from seeping underneath the crystals and changing their look.
💡 TIP: If you're using real crystals or a large quartz piece, don't pour the resin on top. Instead, place a small amount of resin underneath the crystal(s) to adhere them to the panel. 

If the drizzled resin starts to seep out from under the glass crystals, you can use a gloved finger to remove the excess. This is an important step to prevent excess resin from spreading out and diluting the first layer of tinted resin.
Step 4: Prepare your Tinted Resin
Prepare your tinted resin. If you have leftover resin from drizzling, you can use it for your first layer, to be applied closest to the glass crystals. This first shade is a transition between the crystals and the rest of the piece and should follow the tone of the crystals it's poured next to. For example, use a gold tinted resin next to gold glass, a white resin next to clear glass, or a silver resin next to silver glass. 
Work slowly and precisely, pour a thin line of tinted resin against the top edges of the crystals and the panel. This first layer has the added bonus of covering up any edges of the crystal pattern that aren't perfect. 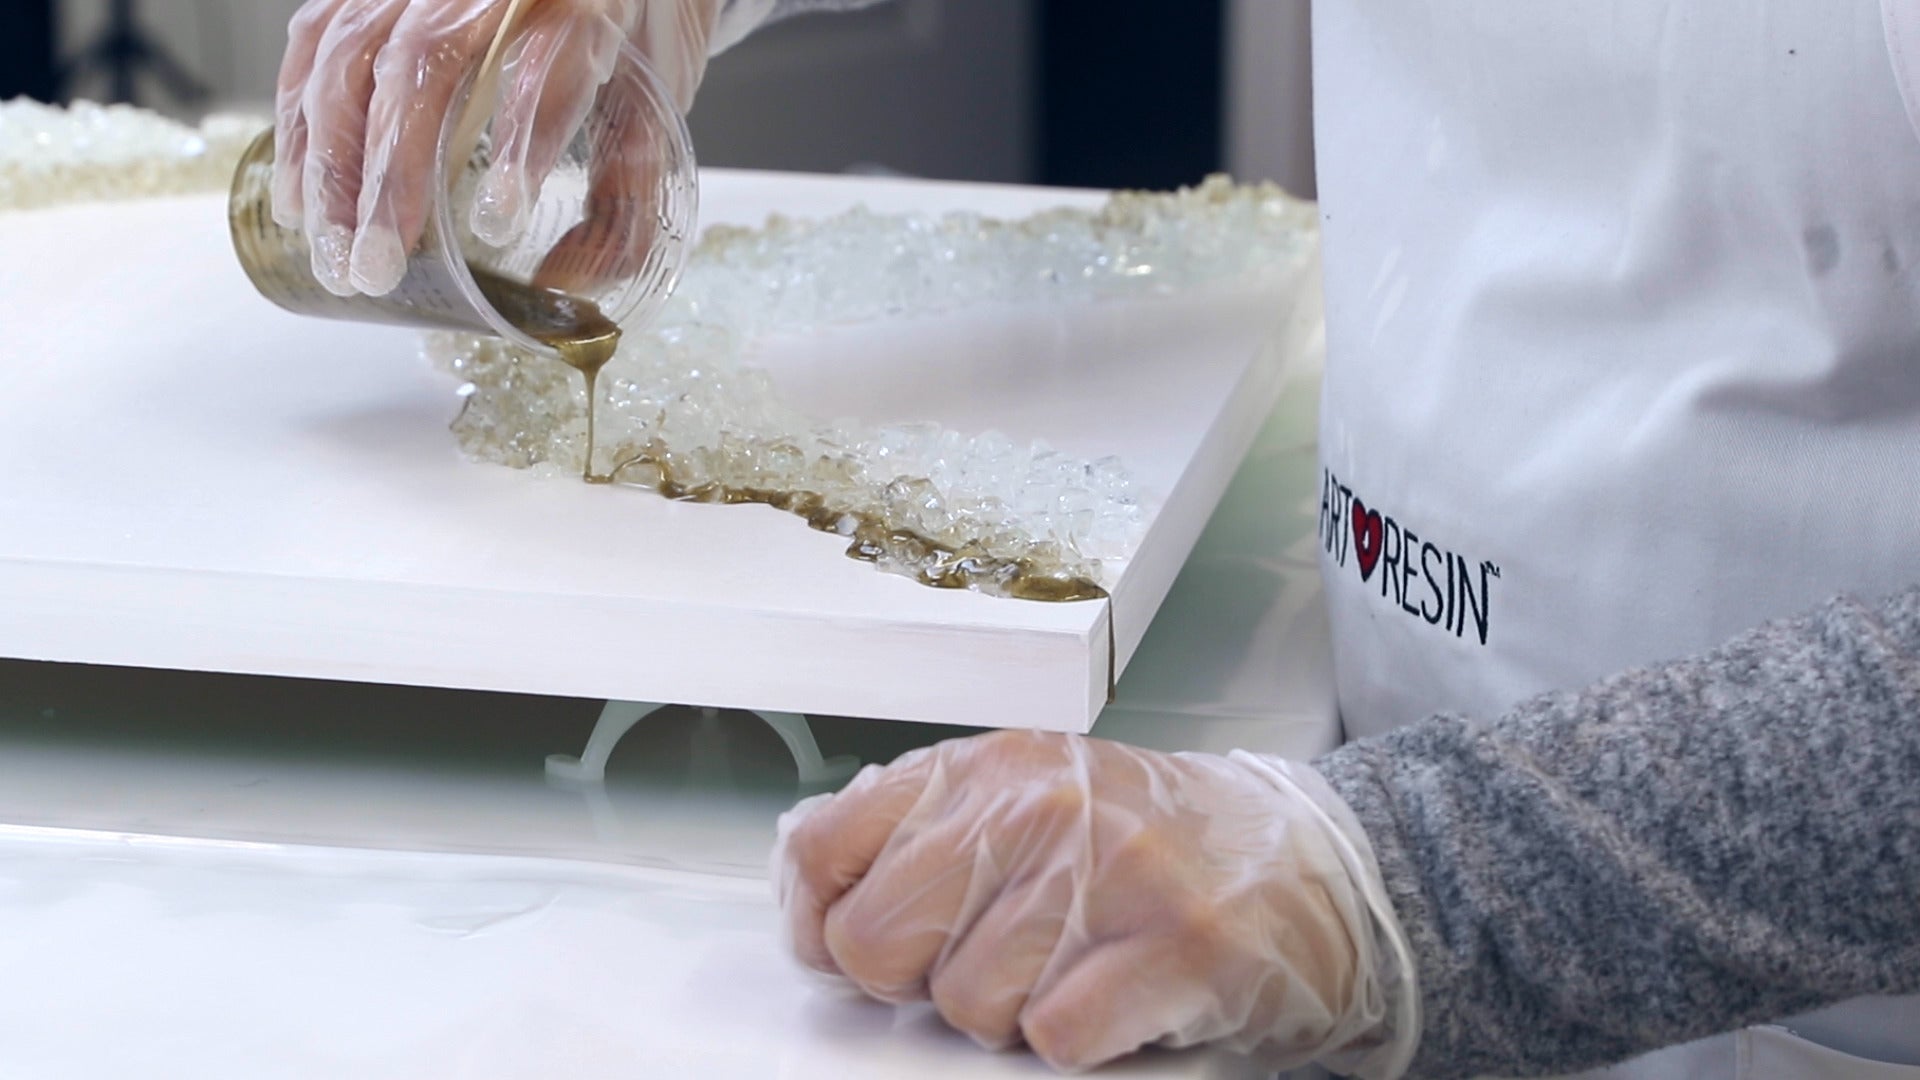
Carry the design over the sides of the panel to give the piece a complete look. You can use leftover resin from your cup to drizzle down the sides or you can use a craft stick to pick up the excess resin that has pooled underneath. Of course, if you prefer a clean look, you can tape off the sides of your piece before you start.

Step 5: Mix the Resin For The Main Body
Now you’re ready to mix the resin for the main body of the geode piece. Shilpi advises choosing 2-3 shades of white and 1-2 pops of color that will complement the first layer of resin you've already applied.
Shilpi's chose to use:
- gold
- sparkly white
- shimmery white
- opaque white
- navy blue
- iridescent turquoise green


Step 6: Pour Resin Mix
Once the resin tints have been mixed, you're ready to pour! If you prefer a more symmetrical look to your geode piece, you can pour each resin color right next to eachother. If you prefer a more modern spin, you can create an abstract look with your lines, breaking them off in a few branches.
💡 TIP: Before you start, you may need to touch up the first line you laid down if the resin has spread or become diluted, or if the initial color was too transparent.
Starting with the white shimmered resin first, pour a thin line right up against the gold. Take your time, pouring slowly in one continuous pour. Going too fast will cause the gold and white to blend. This will create cells and gold lines in the white. 
Next, pour the white sparkly resin in a thin, continuous line around the interior edges of the crystals, hitting both the crystals and the panel. Repeat if you've find you missed any areas or left gaps. 

With the same sparkly white, pour a thin layer along the outline of the shimmery white in one continuous pour. Don’t worry if you’ve left a little space in between the 2 layers; as the resin self-levels, it will fill in the gap or you can use a popsicle stick to fill it in. 

Next, move on to the opaque white, pouring in a thin, continuous line against the sparkly white areas.
While you're pouring, be aware of the ratio between the white and the gold: if you find the white is diluting the gold, use a craft stick to drizzle a little more gold for definition. 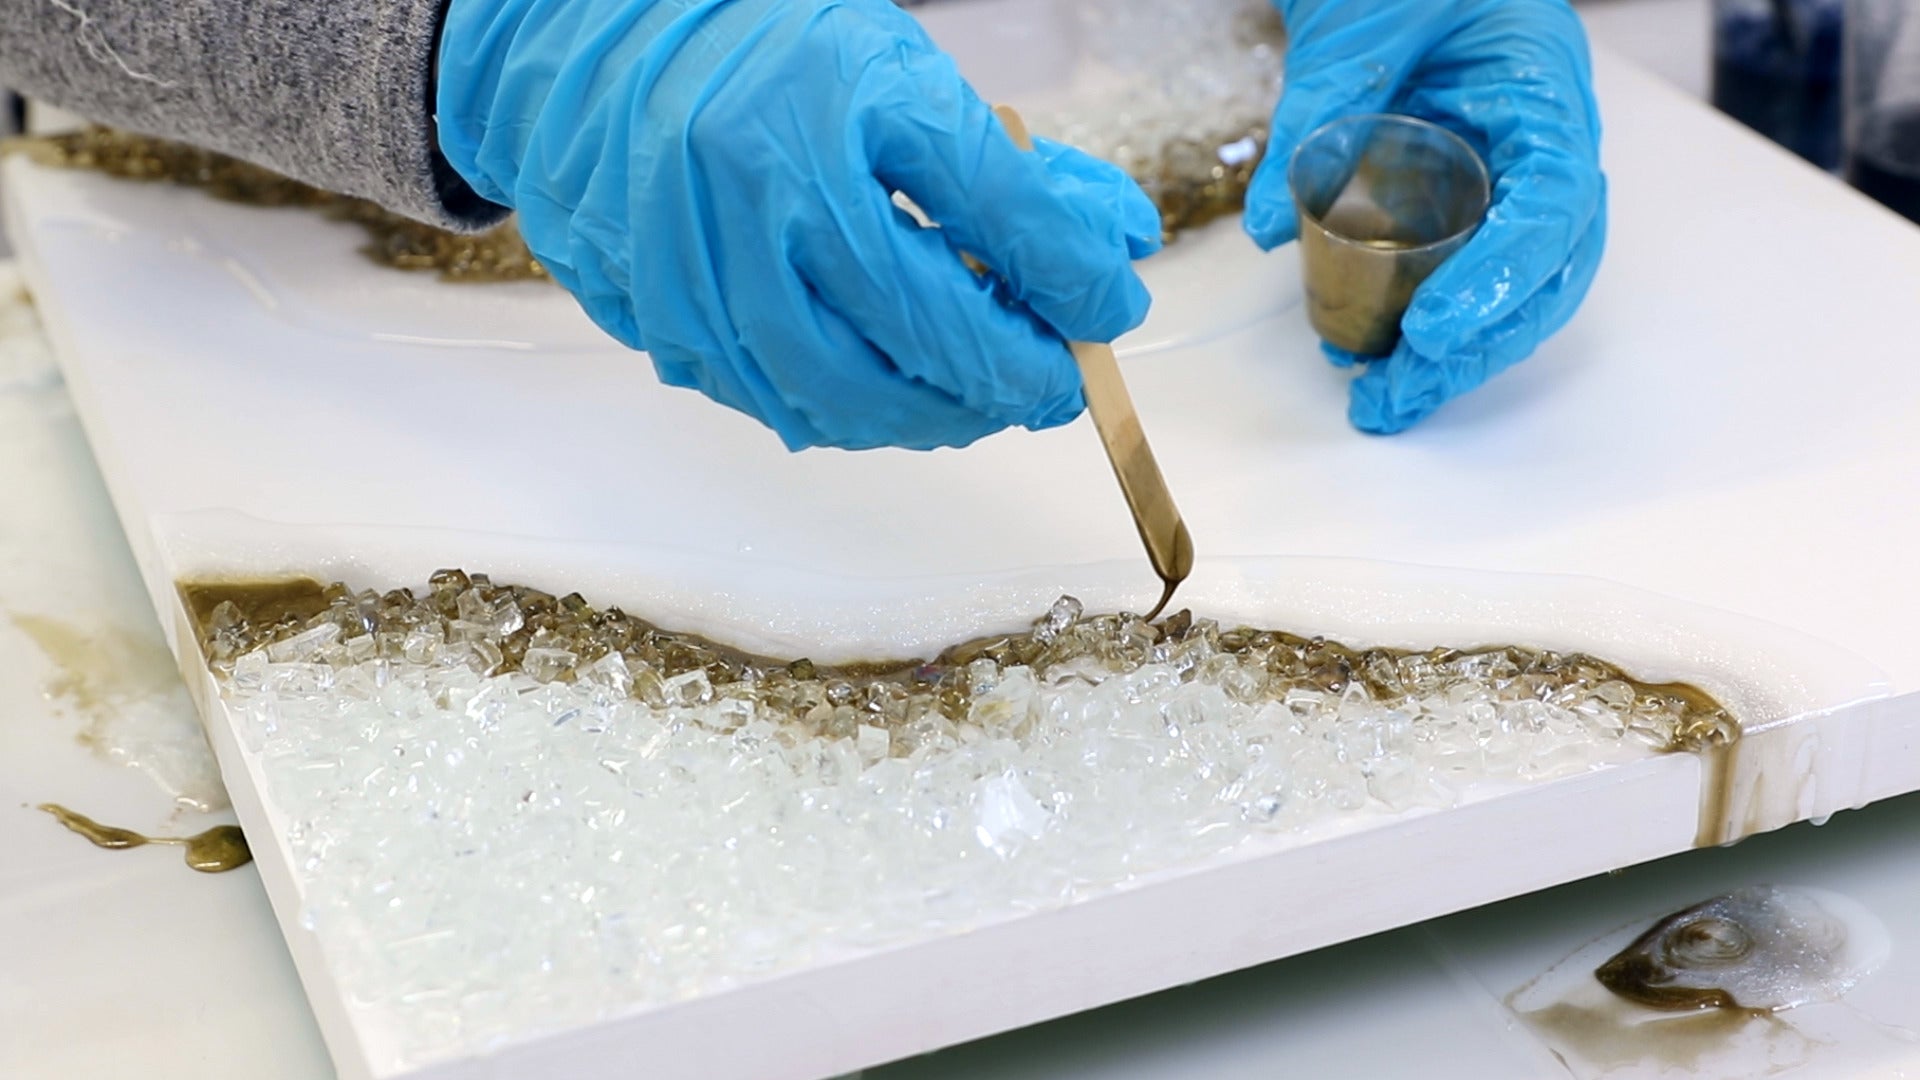
Once you've assessed your piece and decided where you'd like to see some pops of color, you can go in with the navy resin. Leave a little gap as you pour (1/2 cm) or the navy will overpower the white. The two colors will fill in and sit side by side, preventing cells from forming or the colors from blending.

Next, pour the turquoise green against the blue, again leaving a small gap.
If you find you like the look of space between the navy and turquoise, you can fill it in with white; or, simply allow the two colors to fill it in as they level out. 

At this point, fill in any spaces that need it. Try to use up the color that you have the most of left in your cups.
💡Shilpi's Tip: Resin geode art is a layering process: the first layer is the base to establish the color palette. At any point, you can adjust your piece by adding more crystals or introducing another color. If you're not happy with what you've poured, use the side of a craft stick to scrape the resin off and re-pour. When we move onto the 2nd day, we'll be adding glitter, fine lines and more crystals, so you'll have ample opportunity to change areas you may not be fond of.

Step 7: Torch Out Any Bubbles
Torch out any bubbles and check for dust with a toothpick. Place a dust cover on top and allow the resin to cure overnight.
Step 8: Remove Any Loose Stones
24 hours later, once the resin has dried, turn the piece over to remove any loose stones that did not adhere the day before. If you have a large patch of crystals that did not adhere, you can add them back in and drizzle on more resin at this point.

Step 9: Add Your Embellishments
Next, add your embellishments, including paint marker lines, glitter and fine crushed glass additions. If you love the piece the way it is, feel free to leave it, but adding some details will embellish what you’ve already created or cover up areas you think can be improved. 
Start first by drawing in acrylic paint marker lines; it's a very subtle detail but adds a great deal of dimension. Shilpi suggests starting with the color that you have the majority of in your piece: in this case, she will be starting with white. 
Use a white paint pen to draw in white lines along the white shimmer portions of resin where you think it needs a little bit of interest or a touch up. Go slowly, trying not to stop to avoid a disjointed line. Remember to carry the line through down the edges as well.

If you have areas where the resin has created cells, you can draw a circle around them to turn them into features. Or, if you don’t like them, you can cover them in crushed glass or glitter, or pour more resin to cover them up.

Step 10: Create a Guideline
Next, we're going to create a guideline for our glitter embellishment using the gold paint pen. This is a good opportunity to embellish an area you'd like to highlight or cover up an area you don't like. The line doesn't need to be straight or perfect since it will be covered up with glitter. Start with less and add more as needed. 

Step 11: Add Glitter
Add a generous amount of glitter to a small batch of resin (approximately 2 oz) to make a thick glitter paste. It helps to let the resin sit for approximately 20 minutes to thicken up: this will give you far more control and help prevent the resin from spreading when you're applying the glitter resin to the piece.
Scrape the resin into a ziploc bag placed into a plastic cup, similar to how you would fill a cake decorating bag. 
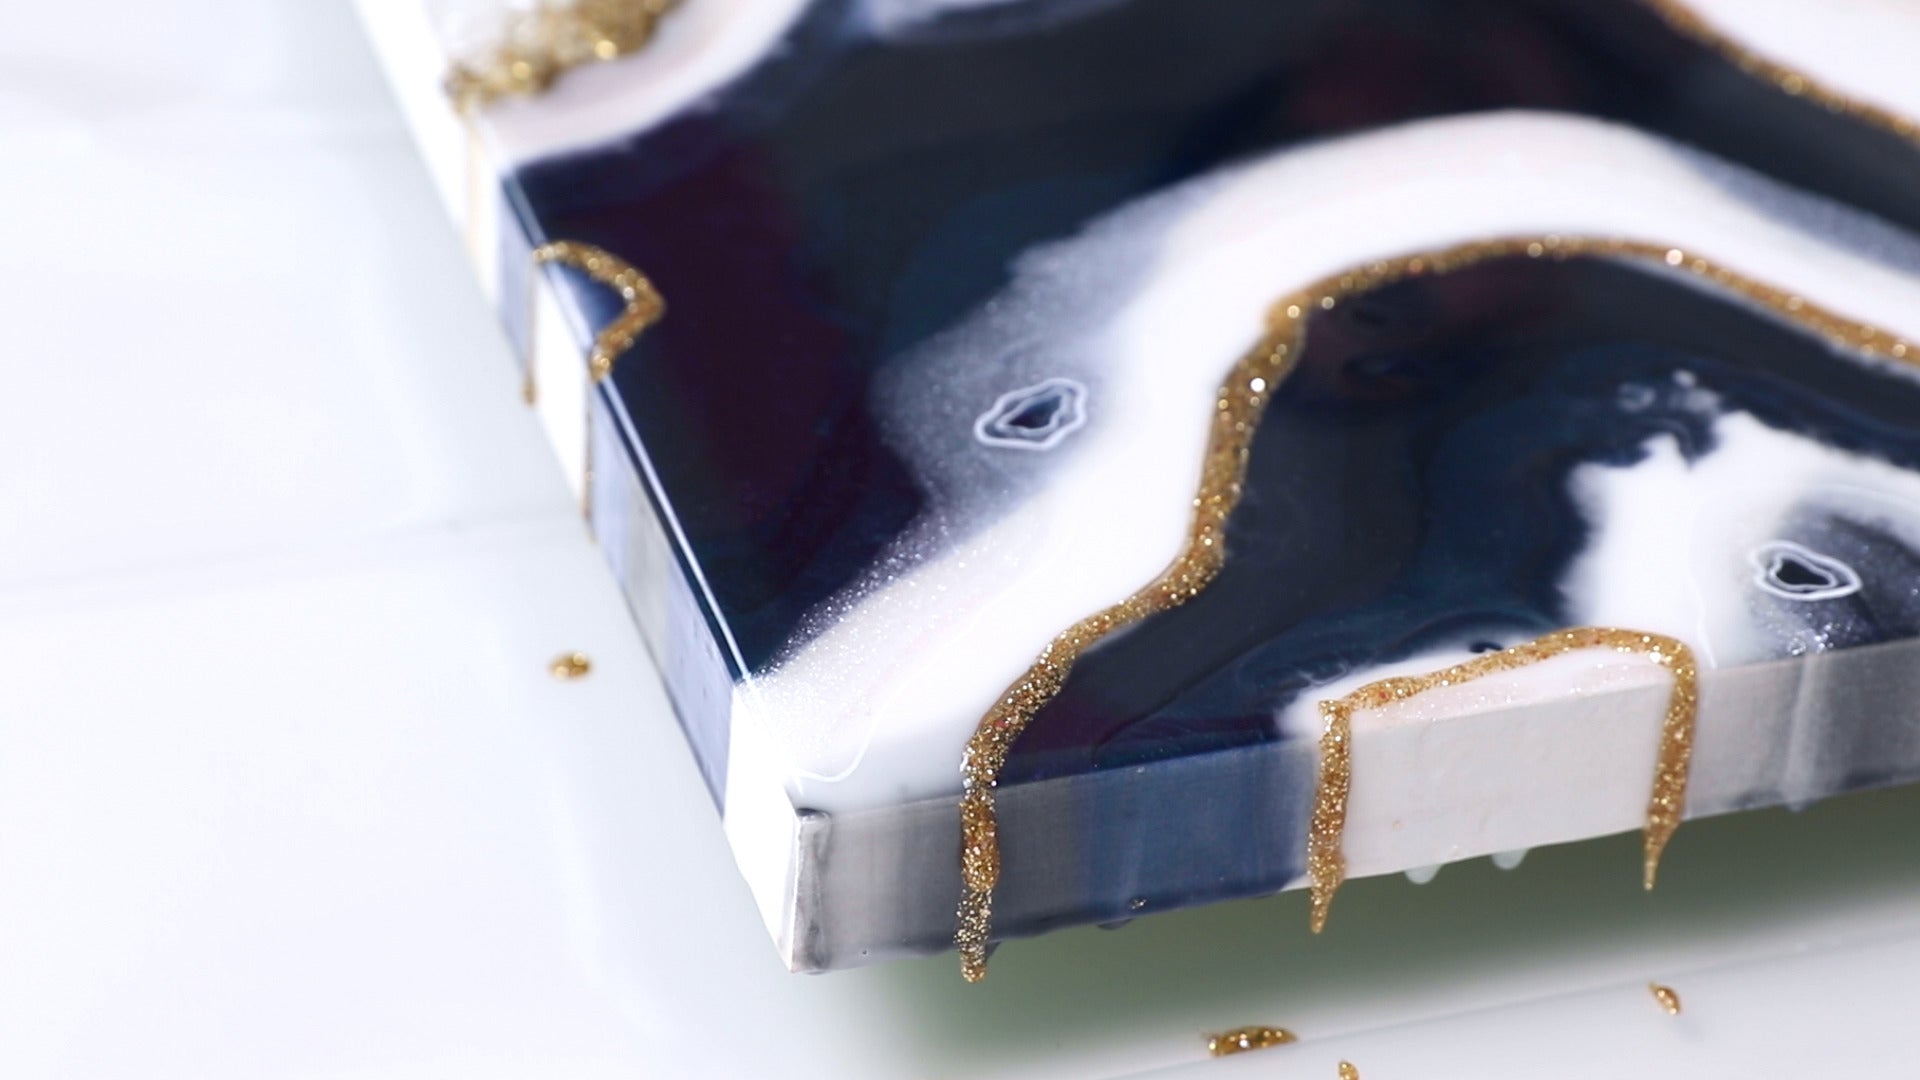
Snip a very small hole in the corner of the ziploc bag so that the resin line is thin and follow the gold guidelines you made earlier with the gold pen. Remember to allow the glitter resin carry down the side.
💡 TIP: Keep in mind that it's best to start with a thin line: the resin will spread out as it self-levels and your glitter line will get a little thicker. 

Step 12: Look at your Piece
Once you've applied your glitter resin, look at your piece from a different perspective: look at it from a bird's eye view or rotate the orientation to see if there are any areas that need a little highlight. Once you're happy with how it looks, torch any resined areas if need be, cover with a dust cover and allow the piece to cure for 24 hours.
Step 13: Enjoy your Resin Geode Art
Admire your completed work!
There you have it!
We hope you learned something new today and that you're inspired to create a unique resin geode piece of your own!
To see more of Shilpi's geode work, follow her on Instagram: @shilpiscanvas
If you have any questions about resin geode painting, please leave them in the comments below.
Do you want to learn more about using resin on accessories? See below our how-to tutorials:
- Introduction to Resin Art
- How to Make Resin Jewelry
- How to Resin Pencil Crayon
- How to Resin Paint Marker
- How to Resin a Bracelet
- How to Use Resin Over Cricut Decals
- How to Make Resin Keychains
- How to Make a Resin Geode Phone Grip
- How To Resin Marker
ArtResin: Made For Artists, By Artists.
