Have you always wanted to create galaxy-inspired resin art? This stunning nebula tabletop makes it feel like you're gazing into the cosmos — in your own home!
In this beginner-friendly tutorial, resin artist Sandra of @wildheartresinart transforms an ordinary tabletop into a dazzling nebula-inspired piece using ArtResin, glitter, iridescent flakes, mica powders and pigment paste.
Sandra will show you how to create swirling clouds of color, shimmering stars, and sparkling cosmic details — and creating these effects is easier than you might think.
And, if your first attempt doesn't turn out exactly as planned, no worries. One of the best things about working with resin is that you can always pour another layer and try again. In fact, that's exactly how this nebula tabletop came to life.
Watch the video tutorial:
Materials
• Tabletop with a raised lip. Sandra used a tabletop approximately 18" in diameter
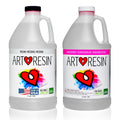
• ArtResin epoxy resin. Sandra used approximately 32 oz to create the nebula, plus another 10 oz for the final top coat.
• Pigment paste in white and black
• Mica powder in neon orange, neon pink, neon green, neon blue
• 3D flakes in opal and holographic silver
• Iridescent flakes (large)
• Fine glitter in white and blue
• Spray paint in blue glitter
• Mixing cup
• Stir stick
• Small mixing cups & craft sticks, one for each color
• Heat gun
• Painter's tape
Step 1: Protect the Tabletop
Like many resin artists, Sandra had a project that didn't turn out quite the way she hoped. Rather than starting over from scratch, she decided to give the table a fresh start as a nebula.
Fortunately, one of the great things about resin is that, as long as the original layer has cured properly, you can pour another layer over top and create an entirely new design.
Because she's working on a tabletop with a raised edge, Sandra applies painter's tape around the perimeter.
This helps protect the edges and catches any resin drips during the pour.


Step 2: Prepare the Resin
Wearing gloves, Sandra measures 8 oz resin and 8 oz hardener into separate cups.
She pours both in a larger mixing cup and stirs thoroughly for 3-5 minutes, scraping the sides and bottom as she mixes. The resin is ready when it appears completely clear and free of streaks.


Step 3: Create a Black Galaxy Base
Sandra pours a portion of the mixed resin into a separate cup and adds black pigment paste. She mixes thoroughly until the resin is completely opaque.


She then pours the black resin mixture onto the tabletop and spreads it evenly across the entire surface, including the edges.
The goal is to create a thin, even coat - just enough to cover the previous galaxy design underneath.


She gently tilts the tabletop to help the resin flow and self-level. Once the resin is evenly spread, use a torch to remove any bubbles.

Step 4: Add Sparkle
While the resin is still wet, Sandra sprays blue glitter spray directly on the surface.

To recreate the look of a colorful nebula, she layers different textures and sparkles throughout the piece.
She starts with the opal flakes to create the base of her nebula.


She follows this with a few sprinkles of the 3D holographic flakes on either side.


Next, she adds an assortment of glitter flakes. You can have a lot of fun with this, adding in different colors and sizes of glitter.

Finally, she adds fine white and blue glitter to create the appearance of distant stars.

She allows the background layer to cure completely before moving onto the next stage.
Step 5: Pour a Clear Base Layer
The next day, Sandra prepares another batch of ArtResin (8 oz each of resin and hardener mixed together for 3-5 minutes).
She portions out half of the resin among 5 small cups, and pours the remainder of the resin over the cured surface, spreading it evenly across.
This layer provides a way for the colors to move and blend.


Step 6: Mix the Nebula Colors
She tints the resin in the cups using white pigment paste and mica powder in neon orange, pink green and blue. Each color is mixed until smooth and fully dispersed.

Step 7: Create the Nebula
Sandra begins by pouring lines of white resin across the tabletop.

She follows with sections of colored resin, layering the various shades over and alongside the white.

She continues alternating between white and tinted, gradually building up what will become the swirling nebula effect.
There's no exact formula here - that's the fun part! Sandra adds more color wherever she feels the design needs it.


Step 8: Use a Heat Gun to Blend
Using a heat gun, Sandra gently blows the resin across the surface. The moving air stretches and blends the colors, creating soft wisps and flowing shapes that resemble a real nebula.
💡TIP: A little heat goes a long way. Keep the heat gun moving to avoid overheating the resin.


She continues adding color and adjusting, using the heat gun to blow out the color until she's happy with the composition.


The Finished Piece
Once the nebula layer has cured, Sandra pours one final clear layer of ArtResin (approximately 5 oz each of resin and hardener) over the entire tabletop. This protective top coat enhances the depth of the design while leaving the surface glossy, smooth and durable.
Once cured, Sandra attaches the legs and the piece is done!
💡 TIP: Wait 72 hours until the resin has fully cured before putting it into use.


With layers of shimmering flakes, glittering stars and colorful resin clouds, Sandra's tabletop captures the beauty and mystery of deep space.
The best part is that if you're not happy with the first resin pour, you don't have to start over from scratch. As Sandra discovered, sometimes the perfect piece is just one more layer away.
A big thank you to Sandra for sharing her techniques!
To see more of her work:
Follow Sandra on Instagram: @wildheartresinart
Watch her YouTube tutorials: @SummerGirlDesigns
ArtResin: The Original Epoxy for Resin Art.