How To Resin Colored Pencil
- Create a colored pencil design on the paper of your choice, sized to fit the wood panel (or other sturdy substrate) you plan to use.
- Apply a sealant over top of your drawing and allow it to dry according to the label directions.
💡 TIP: Choose a brush-on or spray sealant that dries clear, offers UV protection and is safe to use on pencil drawings. Be aware that a brush-on sealant may cause the drawing to smear, so always test on a scrap piece first. - Following the label instructions, apply glue stick or spray adhesive to the back of the drawing.
-
Carefully place the drawing onto the panel. Start by lining up the side closest to you and slowly lay the rest of the print down.
-
Place a piece of glassine paper or parchment paper, cut to size, on top of the artwork.
- Roll a brayer tool to gently burnish the entire surface, removing air bubbles trapped under the paper and ensuring a good, secure bond to the panel.
- Wearing gloves, measure and mix the ArtResin according to instructions. 💡 TIP: If you're not sure how much ArtResin you need, enter the dimensions of your piece into our Resin Calculator.
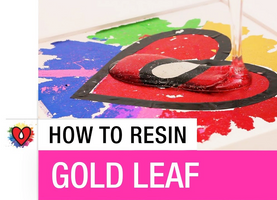
- Pour the resin in the center of your artwork and use a flat-edged spreading tool to guide the resin over the entire surface.
- Use an Artist’s Torch to remove bubbles.
- Cover and all the resin to cure. After 24 hours, the resin will be dry to the touch and will be fully cured after 72 hours.
Read our blog How To Resin Pencil Crayon for full, step-by-step instructions!
ArtResin: Made For Artists, By Artists.