There will always be some waste when creating resin art, but there are also some effective ways to minimize it. In my own resin studio, I've found that a few simple changes, like using fewer disposable materials, has made a huge difference in reducing waste.
Today, I'm sharing the tips I've learned over the past 8 years working with ArtResin. My hope is to provide you, my fellow resin artists, with some ideas on how to produce less waste (and save you some money too!)
Here are 10 small changes that can make a big impact on reducing epoxy resin waste.
1. Determine How Much Resin You Need
The easiest way to minimize waste is to only mix up the amount of resin you'll actually use. Here are a couple of ways to do this:
Use ArtResin's Resin Calculator or Circle Calculator:
Enter the length & width or the diameter of your project. The calculator will calculate the amount of resin and hardener required.
💡 TIP: Remember, these calculations are based on a single layer approximately 1/8" or 3 mm thickness. If you intend to pour a thicker coat, for example 1/4" or 6 mm, you would need to double the recommended amount.

Pouring into a Mold
If you're using silicone molds, there's a handy method to determine how much resin you'll need: Fill the mold with either water or dry, uncooked rice, which you then pour into a graduated measuring cup to gauge the total volume. Since ArtResin requires equal amount of resin and hardener, just divide amount by 2 to figure out how much of each you'll need.
💡 TIP: Make sure to let the mold dry completely, which may take a day or two, especially if there are deep crevices. You may find it's faster to fill the mold with rice instead. Either way works.


2. Follow Label Directions
Another simple way to reduce waste is to follow the label directions, which provide important details essential for proper resin curing, including measuring, mixing, work time, and ideal temperature.
Following the label directions ensures that your resin batch cures properly, saving you from having to re-pour, or even from throwing it out and starting over.
These are some of the most common issues I've seen over the years:
Inaccurate Measuring:
This could be weighing the resin when it should be measured by volume. It might also be adding extra hardener, thinking it will result in a harder cure (spoiler alert: it won't — it just throws off the resin-hardener ratio and the resin won't cure correctly.)

Insufficient Mixing:
This can be either not mixing long enough or not scraping the sides and bottom as you mix. Either way, under mixing means the resin and hardener aren't properly blended and can't cure properly.

Working Environment
Resin performs best in warm (not hot), dry, and stable environments. Cold temperatures can result in sticky resin or surface imperfections, while a hot and humid environment can lead to flash curing or a greasy film on the cured resin (also known as amine blush).

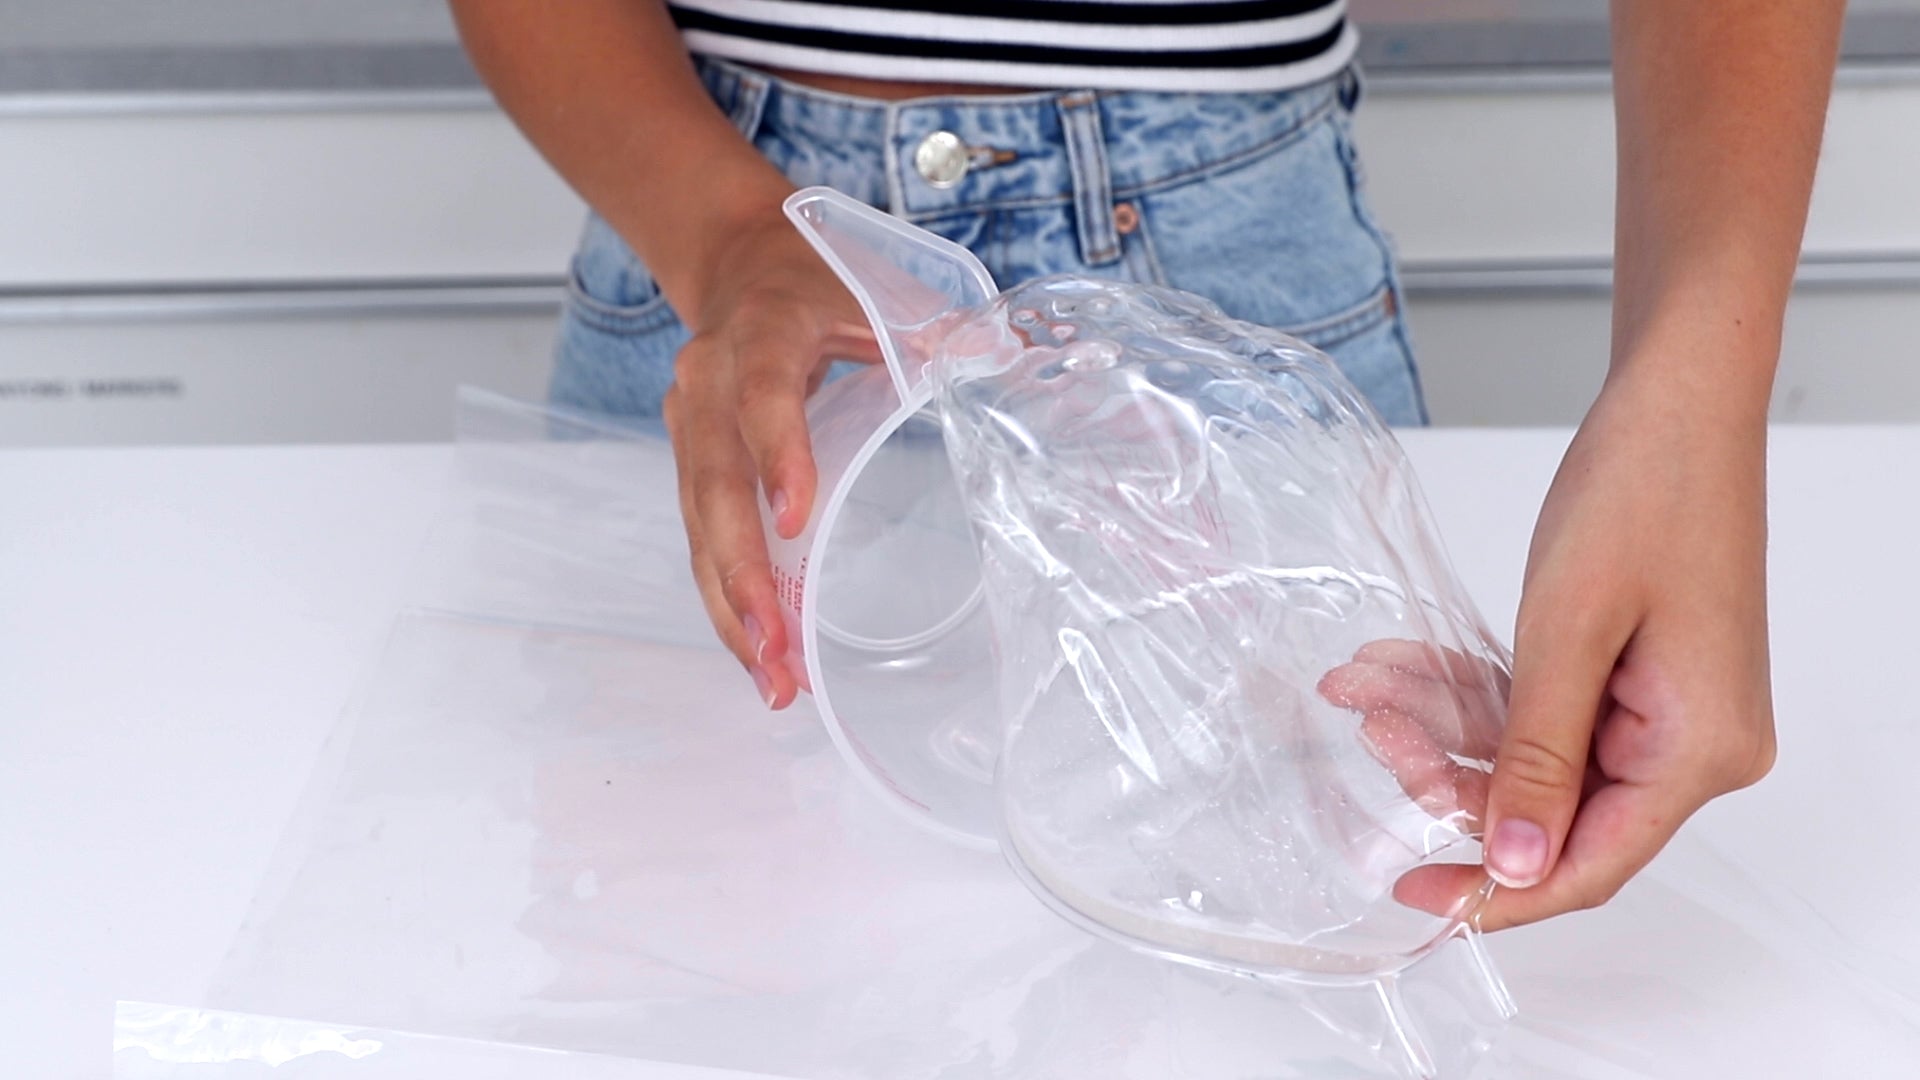
3. Use Plastic Tools
Using plastic, re-usable tools such as stir sticks, spreaders, stands, and mixing cups instead of disposable tools is the number one way to reduce waste. You've likely heard this tip before, but since it's the most important one on the list, it's worth repeating :).
You can either wipe off wet tools with isopropyl alcohol and wipes, or lay them on your work surface, peeling off the resin once cured.

Here's a lesser-known tip (which took me years to figure out): The type of plastic you use for your mixing cups makes a huge difference when it comes to releasing cured resin easily.
The best mixing cups for resin are made of polypropylene plastic—that's the frosted, flexible type of plastic. Most polypropylene items will have a number 5 recycling icon on the bottom.

Polypropylene is the secret to resin releasing in one clean, satisfying pull with no stuck-on bits left behind. No paper towel necessary!
💡 BONUS TIP: Leave the resin in the mixing cup for 48 hours before you try to remove it. Even the thinnest layer of resin will release so much easier this way!
I could never understand why the cured resin would sometimes release so easily from the mixing container and other times it was such a struggle. I finally realized that I only had difficulty when I used acrylic plastic (plexiglass) or (sorry to say it) silicone.
This may be an unpopular opinion, but I prefer not to use silicone when it comes to resin mixing cups. I find that silicone grabs onto everything including dust, lint, hair, and especially small bits of cured resin. Because the resin doesn't release as easily from silicone, I find cleaning this type of mixing cup way more difficult than it needs to be.

4. Work On Thick Plastic
This is my most recent change and the one I'm most excited about. For years I've used vinyl shower curtains or plastic liners, and struggled with lines and bumps from the folded plastic that makes it challenging for artwork to sit level. The vinyl also melts whenever I use a heat gun and needs to be replaced often.
Instead, I got a small, off-cut piece of 1/2" thick, smooth, HDPE plastic to fit my work table from a local plastics supply company. You could also use UMHW plastic. These are the same types of plastic that cutting boards are made of.
💡 TIP: The key to a piece of HDPE or UMHW is that it's smooth and thick: smooth so the resin won't adhere and ideally 1/2" thick or more so the plastic lays flat and won't warp.


This has quickly become my new favorite resin tool. The plastic lays perfectly flat, no lines or bumps that can throw the level off, and it can withstand a few seconds of a heat gun without melting. It's easy to keep clean, and cured resin peels off effortlessly.

And if there are any stubborn areas where the resin is too thin to peel, a plastic scraper or plastic razor blade does the trick without causing any damage.
💡 TIP: Avoid metal scrapers or razor blades on UMHW or HDPE or it will scratch.


If you're not able to source a thick piece of UMHW or HDPE plastic, these smooth, flexible cutting mats from the dollar store make an easy and inexpensive alternative!

5. Upgrade Your Gloves
Good quality gloves protect your hands from sticky resin, but it's easy to go through multiple pairs during a single resin session. I recently upgraded from standard nitrile gloves to heavy-gauge nitrile gloves from a local restaurant supply store—the same heavy duty black gloves you often see BBQ chefs or tattoo artists wearing. I wish I knew about these sooner!

These gloves are so strong and chemical resistant. You can wipe them down with isopropyl alcohol while still wearing them to remove all the resin, remove carefully, hang to dry, and then re-use them over and over again.


A single pair typically lasts me over a dozen resin sessions. (To be honest, they only tear when I use them for tasks like sanding.)
Any effort we can make to reduce our use of disposable products adds up to make a big impact!
6. Ditch Paper Towels
I had heard about resin artists using baby wipes to clean up for awhile - I don't know why I waited so long to try this myself... Turns out baby wipes are a game changer: they're sturdy, strong, and can be reused multiple times.

I took it a step further and also added blue shop towels to my supplies. They're bigger, stronger, and more absorbent than regular paper towels and can be used over and over.

Here's how I make the most out of baby wipes and shop towels:
I only use fresh wipes and shop towels when absolutely necessary, like for a final wipe of my tools, gloves, or work surface. After, I hang them to dry and toss them into a bin for later use.

For messy tasks, like cleaning up spills or wiping down wet stir sticks and spreaders, I use isopropyl alcohol sprayed onto a cloth from my bin instead of grabbing a fresh wipe.


I get so much use out of them this way - hanging them to dry after each use and reusing them as many times as I can.
I can't believe how many regular, disposable paper towels I used to go through. I haven't used any for months and I don't miss them one bit.
7. Replace Toothpicks
This tip came out of necessity when I couldn't find my toothpicks to fish out some dust in my resin pour. I had just purchased a pack of clay tools, including one with a needle point. It worked so well that I haven't used a toothpick since.

I also found a 2 pack of scoring tools from the craft section of the dollar store that work just as well.
8. Repurpose Extra Resin
I always make sure to have a small mold, like a tealight holder, on hand when I'm resining. This way, if I end up with any leftover resin, I can easily tint it and pour it into my mold.

You can end up getting some fun, random, striped effects this way! These little creations can be kept for yourself, given as gifts, or even used as bonus items for customers if you have a resin business.

9. Use Up Leftover Resin
Occasionally, you may find yourself with a bit of leftover resin or hardener in your bottle. Here are a couple of ways to make use of these small amounts:
Transfer the excess product into newer bottles:
Resin doesn't yellow with age so you can pour older resin into a newer bottle without issue. However, hardener will yellow over time. To make the most of it, I keep a bottle of yellowed hardener specifically for projects where clarity isn't an issue, such as over wood, tinted resin, or painting the back of a stretched canvas.
💡 TIP: To learn more, see our blog What Can You Do With Yellowed Hardener?


Make your own resin paste:
It's easy to make your own resin paste with leftover resin or hardener and the mica powder or powdered pigment of your choice.
Resin paste is used for tinting resin, and white pigment paste, in particular, is popular for making waves in resin ocean art. Resin paste is made using pigments so it's highly concentrated, has great opacity, and a little goes a long way. It has excellent lightfastness, a thick consistency, and because it's not water based, it will not react with resin like acrylic paint can.
💡 TIP: Remember, as with all colorants, don't add more than 6% of the total combined volume of resin and hardener so that the 1:1 balance is not thrown off.


10. Upcycle Resin Scraps
Keep a basket of cured resin scraps for use in future projects. You can cut them up for a terrazzo effect, use small pieces as filler in molds to minimize the amount of resin required, or you can even create brand new pieces of art.
In fact, we have a whole video and blog highlighting ways to use leftover resin: it's called Stop Wasting Your Resin! Check it out for more inspiration!

I hope this gives you some ideas on how to reduce waste in your own resin practice. Don't feel you have to implement them all - even 1 or 2 of these changes can make a significant impact over time.
Do you have any tips of your own to reduce waste? I'd love to hear them in the comments below :)
ArtResin: Made For Artists, By Artists.
