How to Resin Paper Collage
- If you're creating a paper collage directly onto a wood panel, tear or cut paper as desired and mount them one-by-one, using a glue stick. If the collage is pre-made, ensure it's cut to fit the panel and mount the artwork using your chosen adhesive - whether it's a spray adhesive, a glue stick, or a brush-on adhesive.
- 💡 TIP: For optimal results, smooth out any wrinkles or air pockets by either using your hands or gently rolling a brayer over the top. This ensures the paper is securely and evenly attached to the panel, with no air pockets.
- Seal your work with either a spray or brush-on sealant, allowing it to dry completely according to the label directions. Choose a sealant that dries clear, offers UV protection, and is designated safe for use with paper.
- Wearing gloves, measure and mix the ArtResin according to instructions.
-
💡 TIP: If you're not sure how much ArtResin you need, enter the dimensions of your piece into our Resin Calculator.
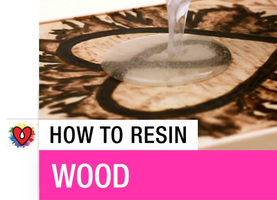
- Pour the resin in the center of your artwork and use a flat-edged spreading tool to guide the resin over the entire surface.
- Use an Artist’s Torch to remove bubbles.
- Cover and all the resin to cure. After 24 hours, the resin will be dry to the touch and will be fully cured after 72 hours.
Read our blog How To Resin Paper Collage for full, step-by-step instructions!
ArtResin: Made For Artists, By Artists.